
The Mandalorian IB-94 Blaster Pistol
Hello. It’s been a bit since my last post. Before we get into this project, I figured I would give a short explanation regarding my absence. I use my cellphone to take most of the pictures you see on this site. Towards the end of 2021 I ended up having a failure of the MicroSD card used in my phone, and I lost all the pictures I had taken over the past few years including all the pictures for this project. (Remember to back up your data kids.) The only pictures I still have are ones that I sent friend via Discord, Google Chat, or text messages. So, this post is going to be a little sparse. To make a long story short, it really put a damper on my motivation to share projects via this site.
Update:
My friend Kevin was able to go back through our text messages and send me some of the pictures that I was missing. It is not everything I have planned to share for this project, but I am grateful nonetheless. Thanks for the save, Kevin.
In my down time I started to get back into miniature painting with Warhammer 40k and had a whole color scheme tutorial planned. I unfortunately lost a bunch of those pictures as well. What’s done is done. I will do my best to share what I was able to recover and keep moving forward from there. With that being said, here is the Mandalorian’s IB-94 Blaster Pistol.
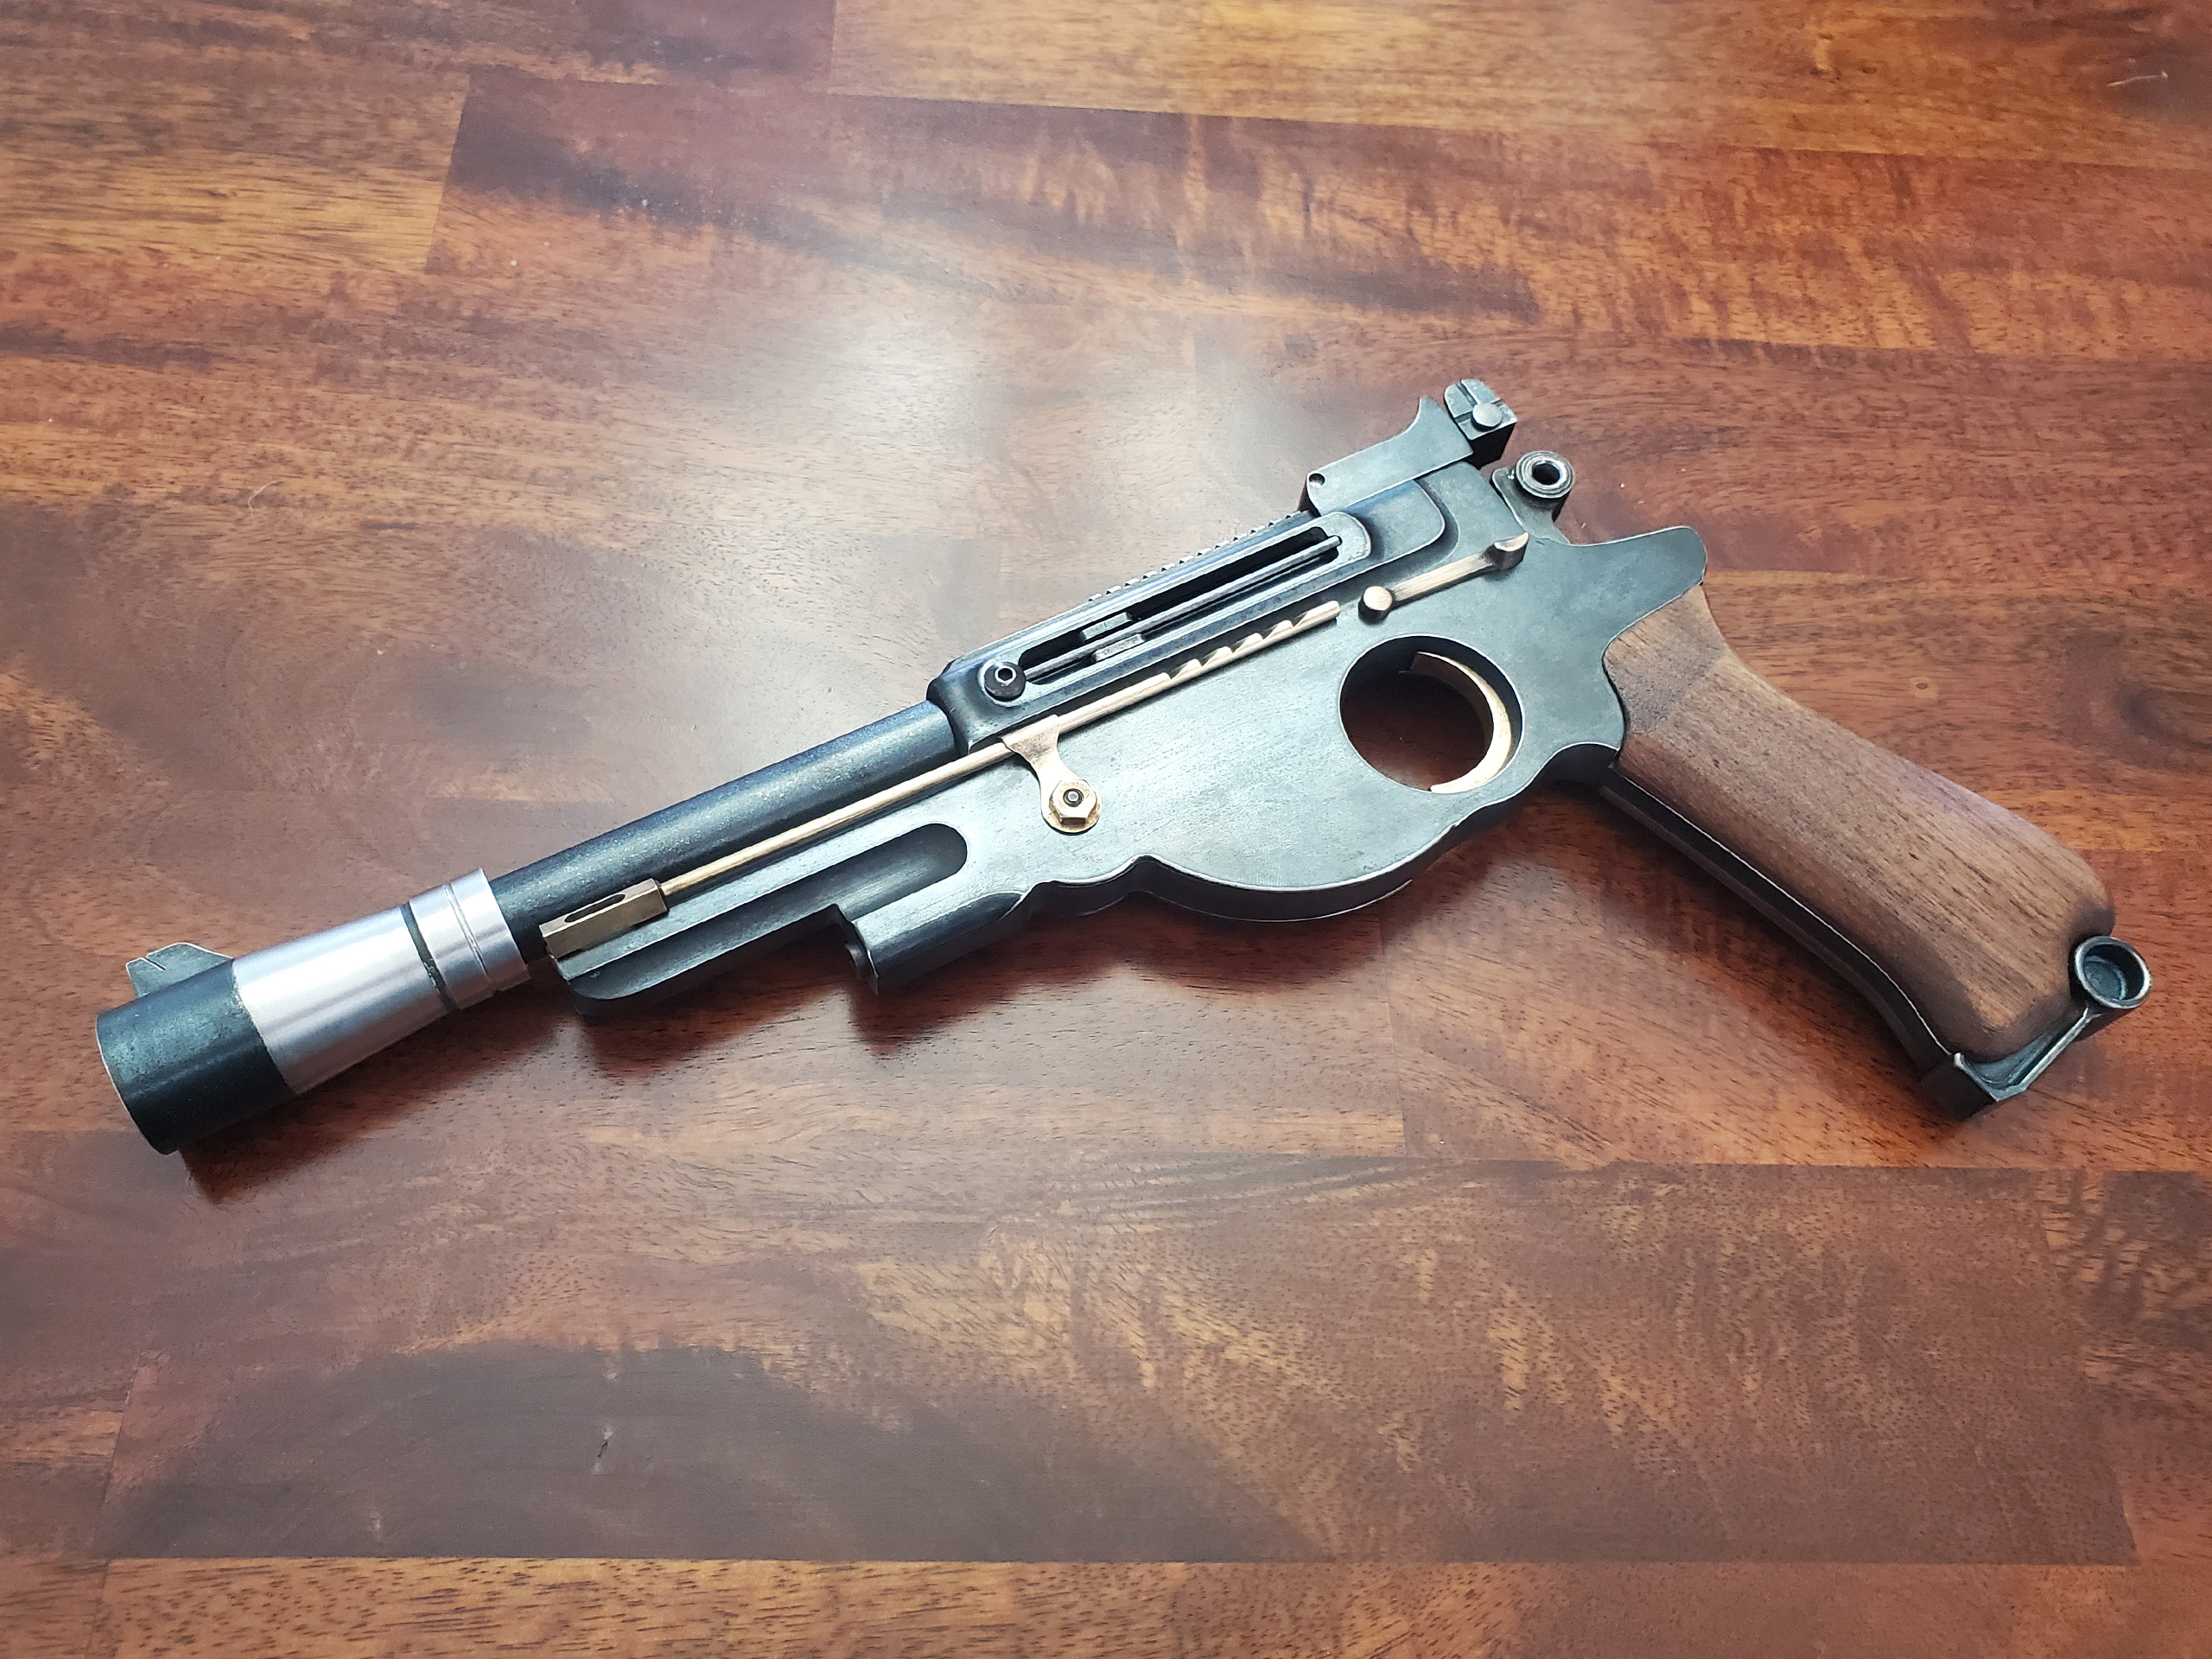
This is a replica of the IB-94 Blaster pistol used by the title character in The Mandalorian. This specific kit is the “FIELDMARSHAL Aluminum Bergmann Mandalorian Blaster” from https://blasterfactory.com/, formerly known as War Machine Paintball. The kit is all machined aluminum with some brass accents, steel hardware, and walnut wooden grips.
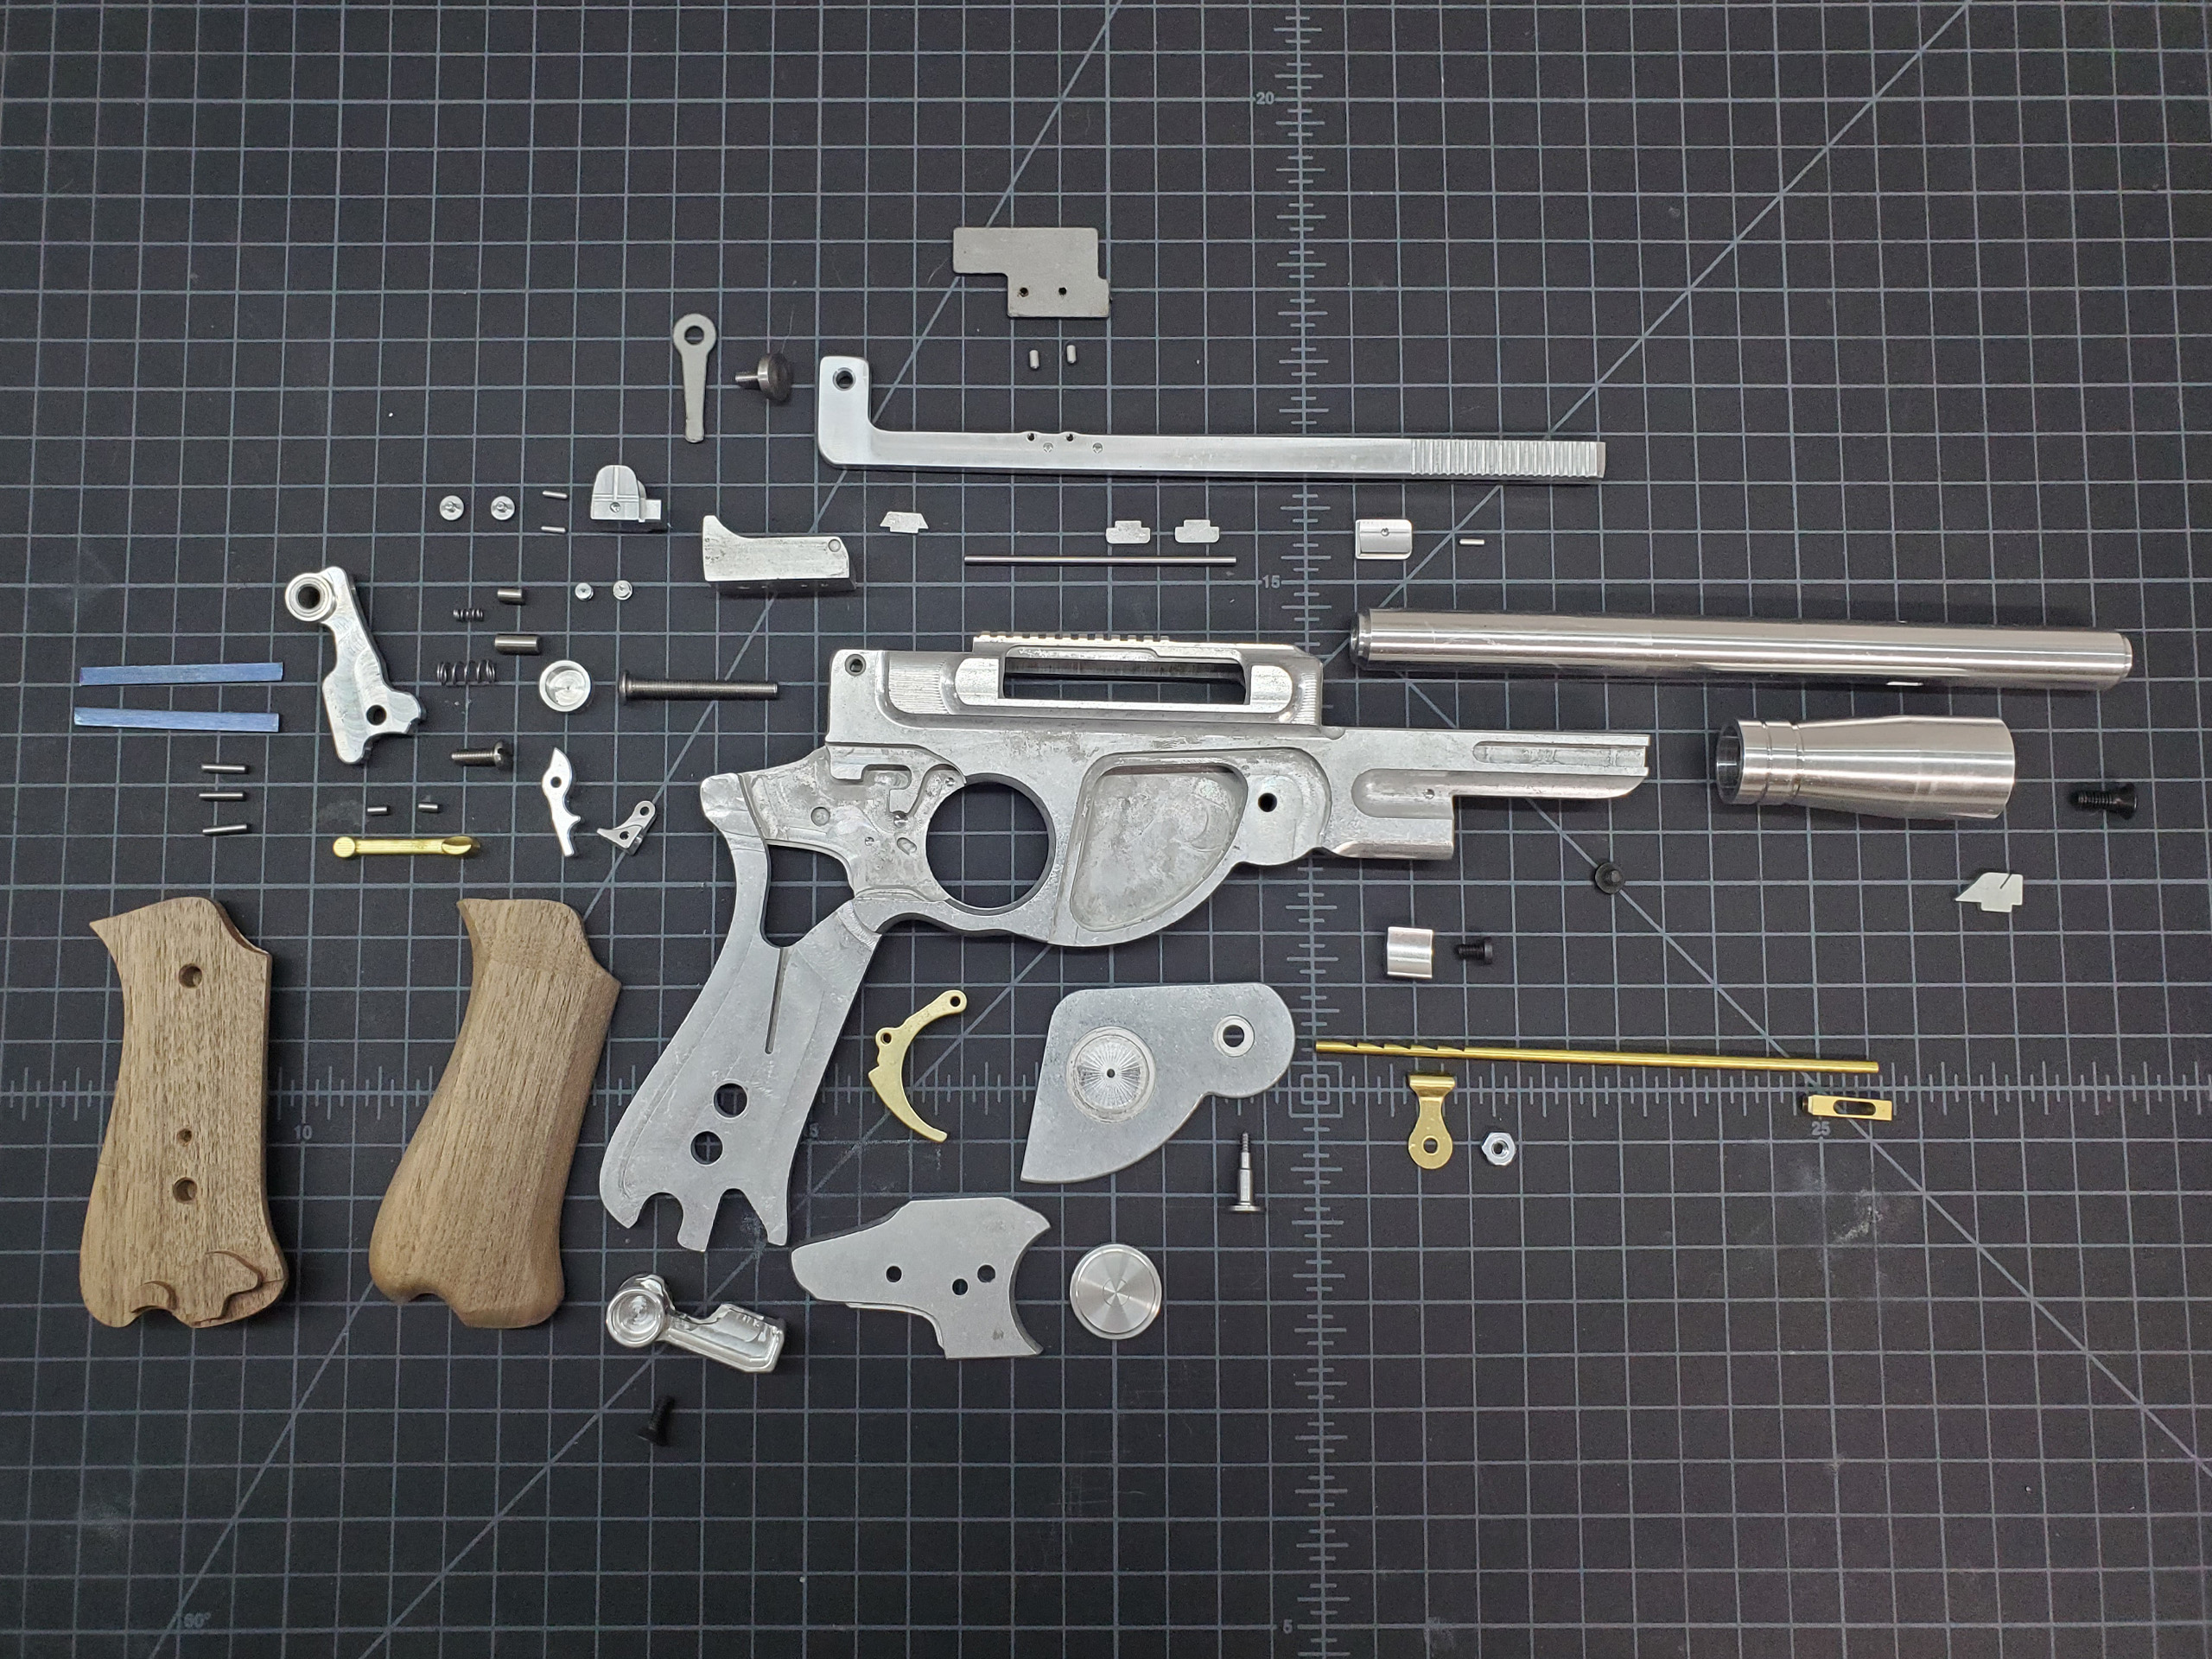
These are all the parts that the kit comes with. As you can see it is very detailed and as far as I can tell, screen accurate. The original prop is based on a real firearm, the Bergmann 1894 No. 1 with some small modifications to make it more “StarWarsy”. The finished prop also has a working single action trigger.
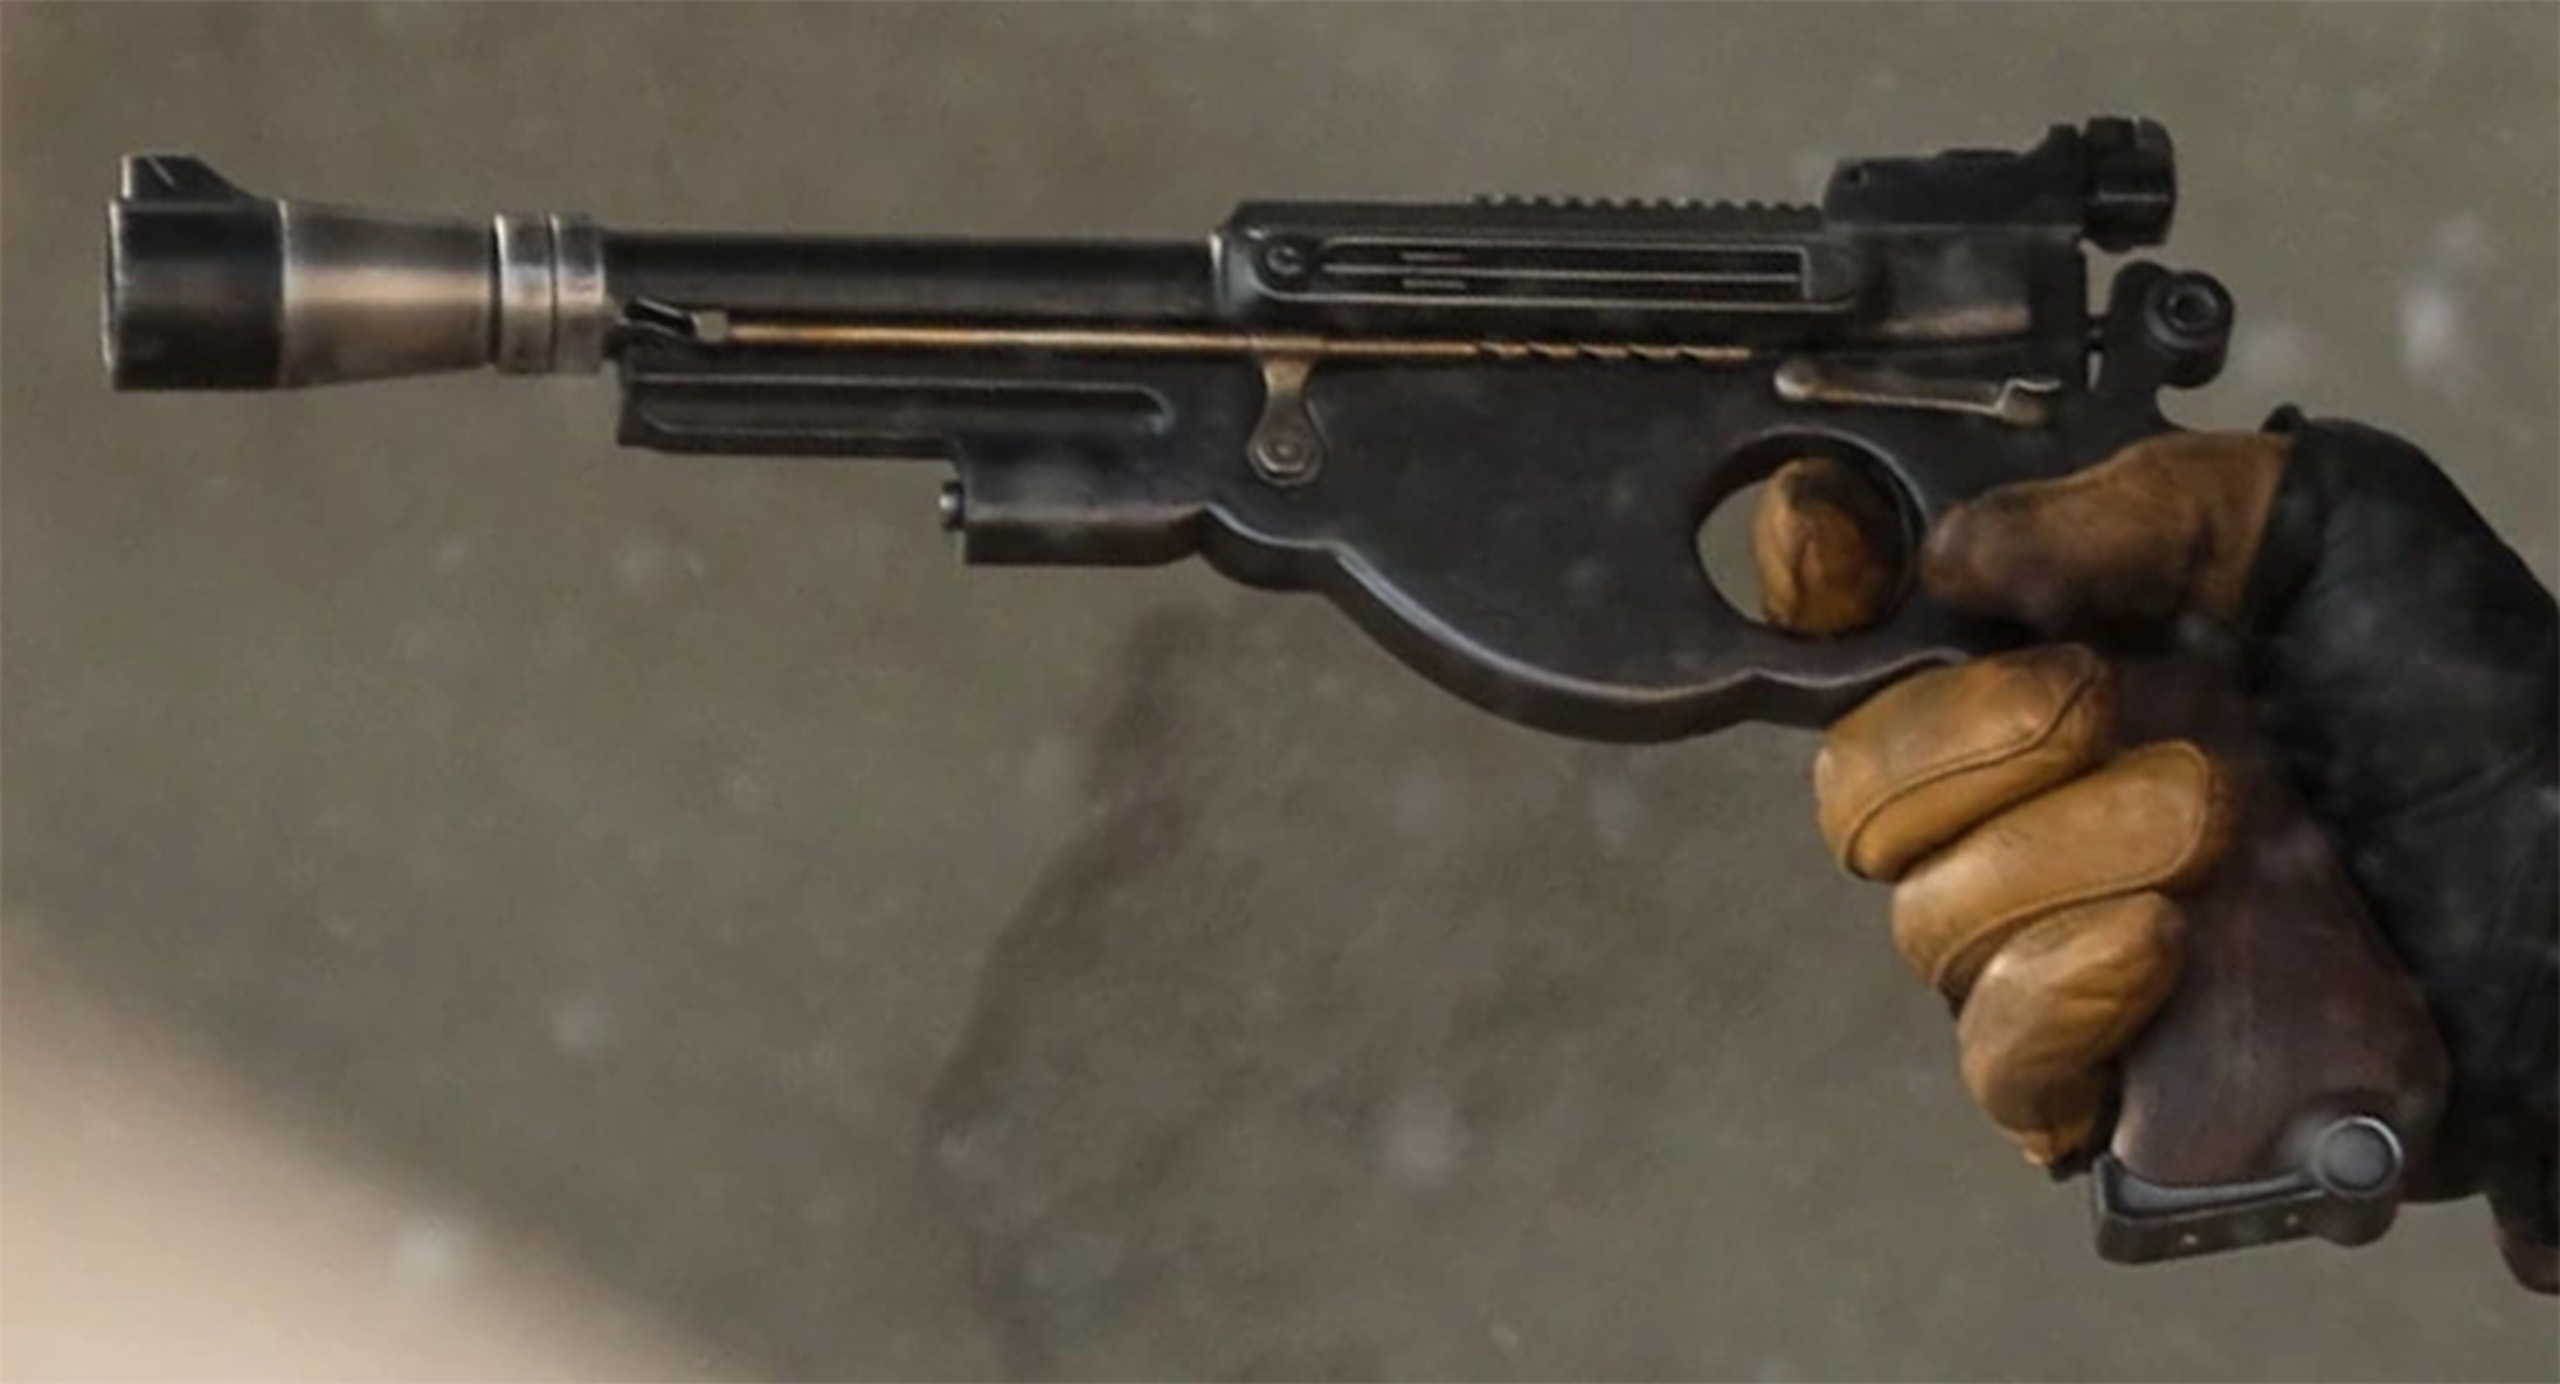
The prop in the show is actually a sort of cool gunmetal gray. In my opinion it doesn’t really look painted, it looks more like blackened metal or anodized aluminum. So I wanted to try and replicate this.

My first attempt was to use Birchwood Casey Aluminum Black, which I expected to be… well, black. It ended up coming out a bit more blue than I expected. You can see it here on a scrap piece of aluminum I had.
Update:
Here you can see the Intended color. The top part being bare aluminum, and the bottom being a dark neutral grey. The end result however, ended up being a little more towards the blue hue.

I ended up trying the finish on a few of the smaller pieces of the kit just to see if the different grades of aluminum made any difference. The more I looked at it, the more I ended up liking it. So, I figured I would just roll with it and see how the finished prop looked. Here you can see the left side of the blaster.
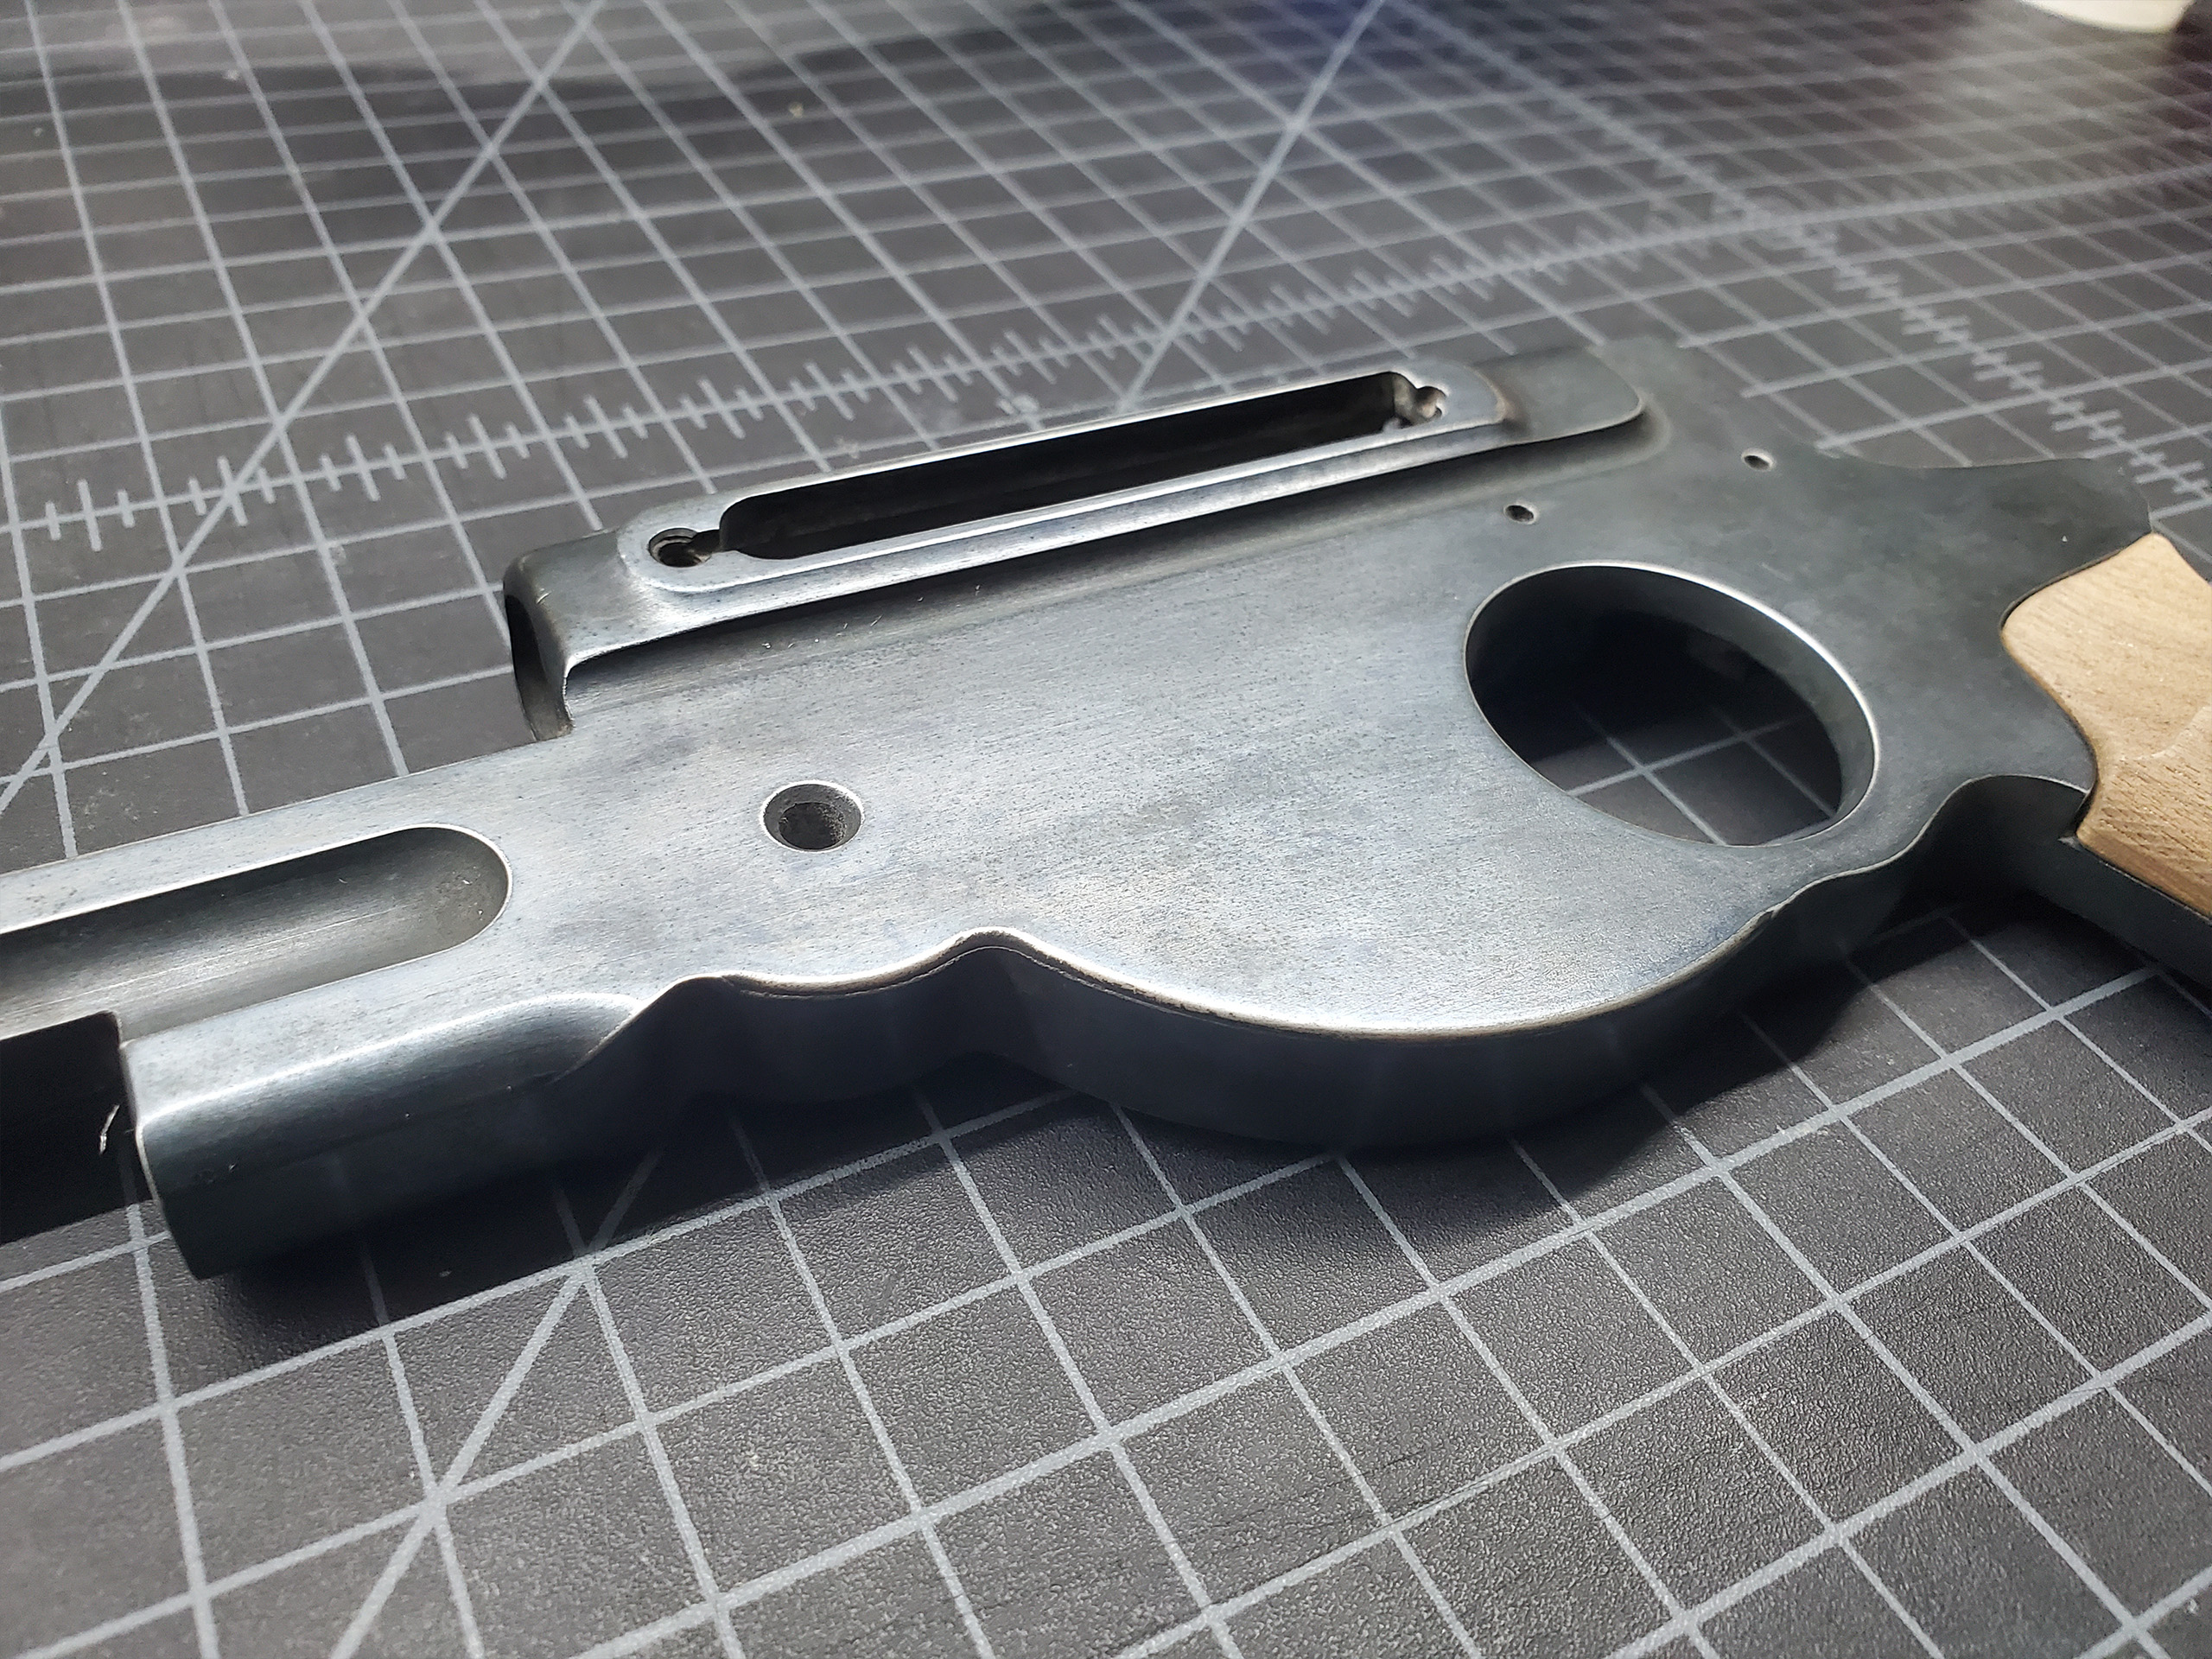
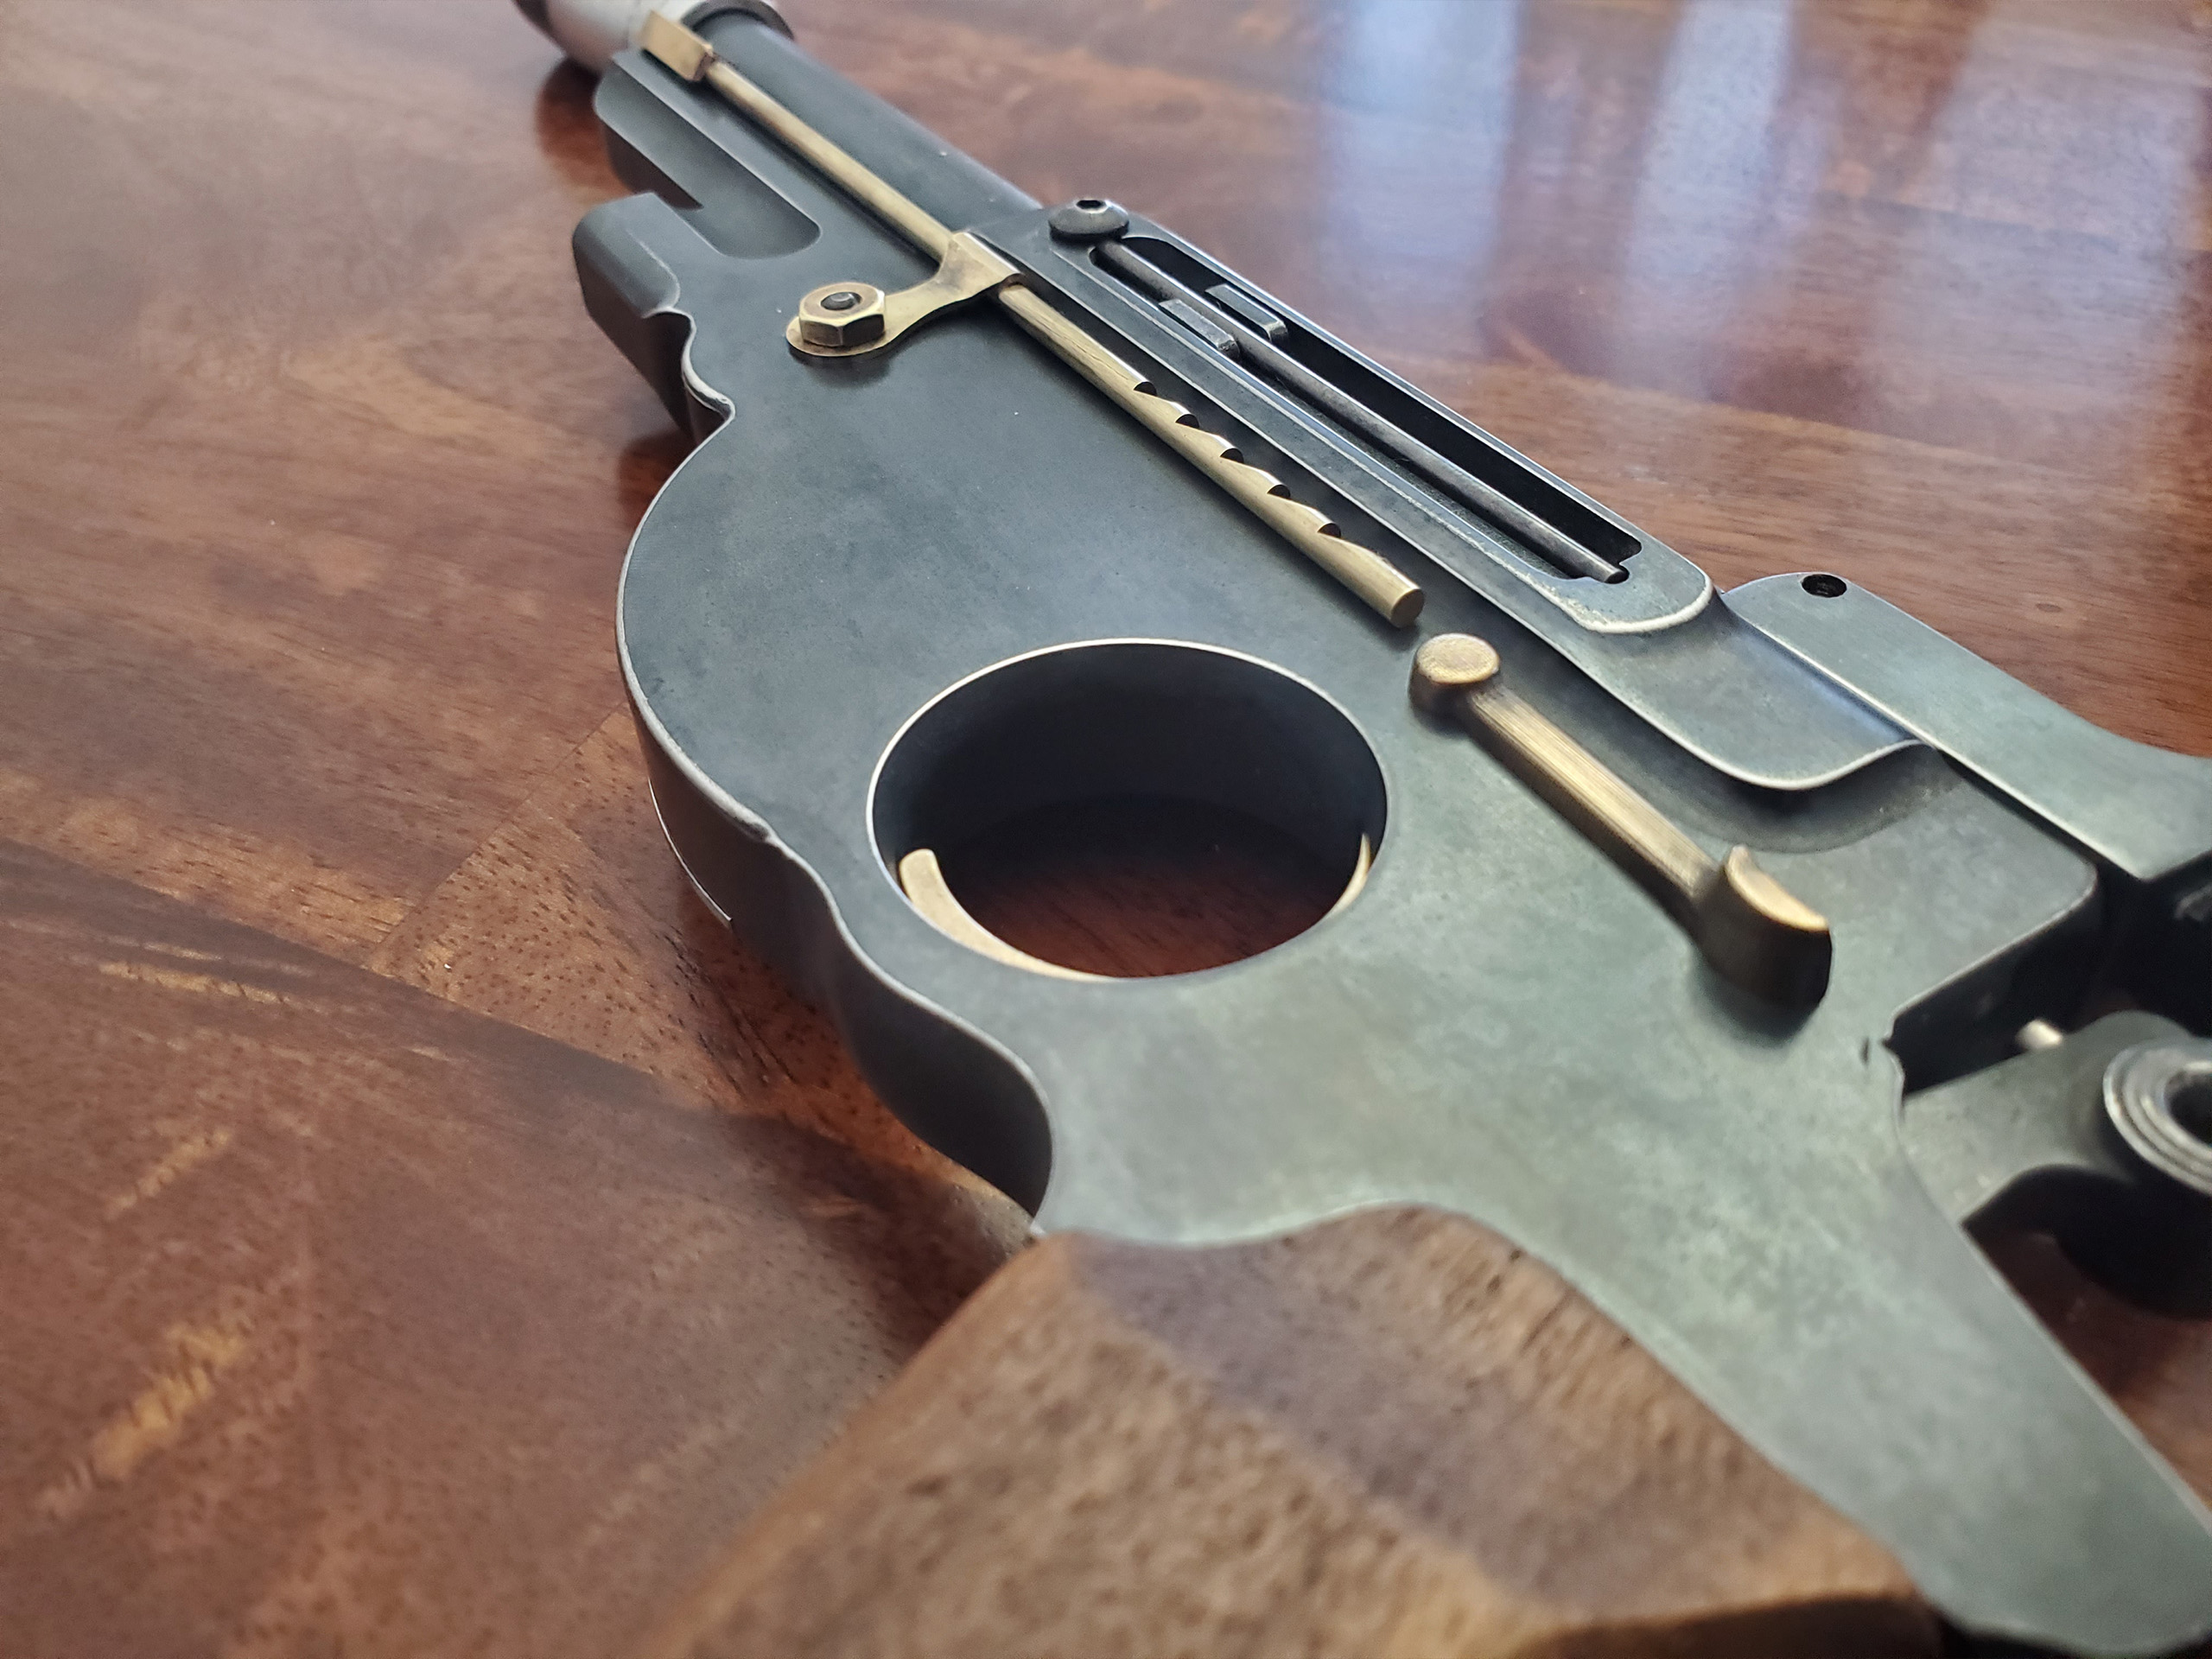
Here is a slightly closer view. The Aluminum black actually pitted the surface a little. This stuff is very nasty to work with. I ended up doing several applications with some 0000 steel wool in between to get a nice even finish.
Update:
This is the left side of the completed blaster before I oiled the grips.
Update:
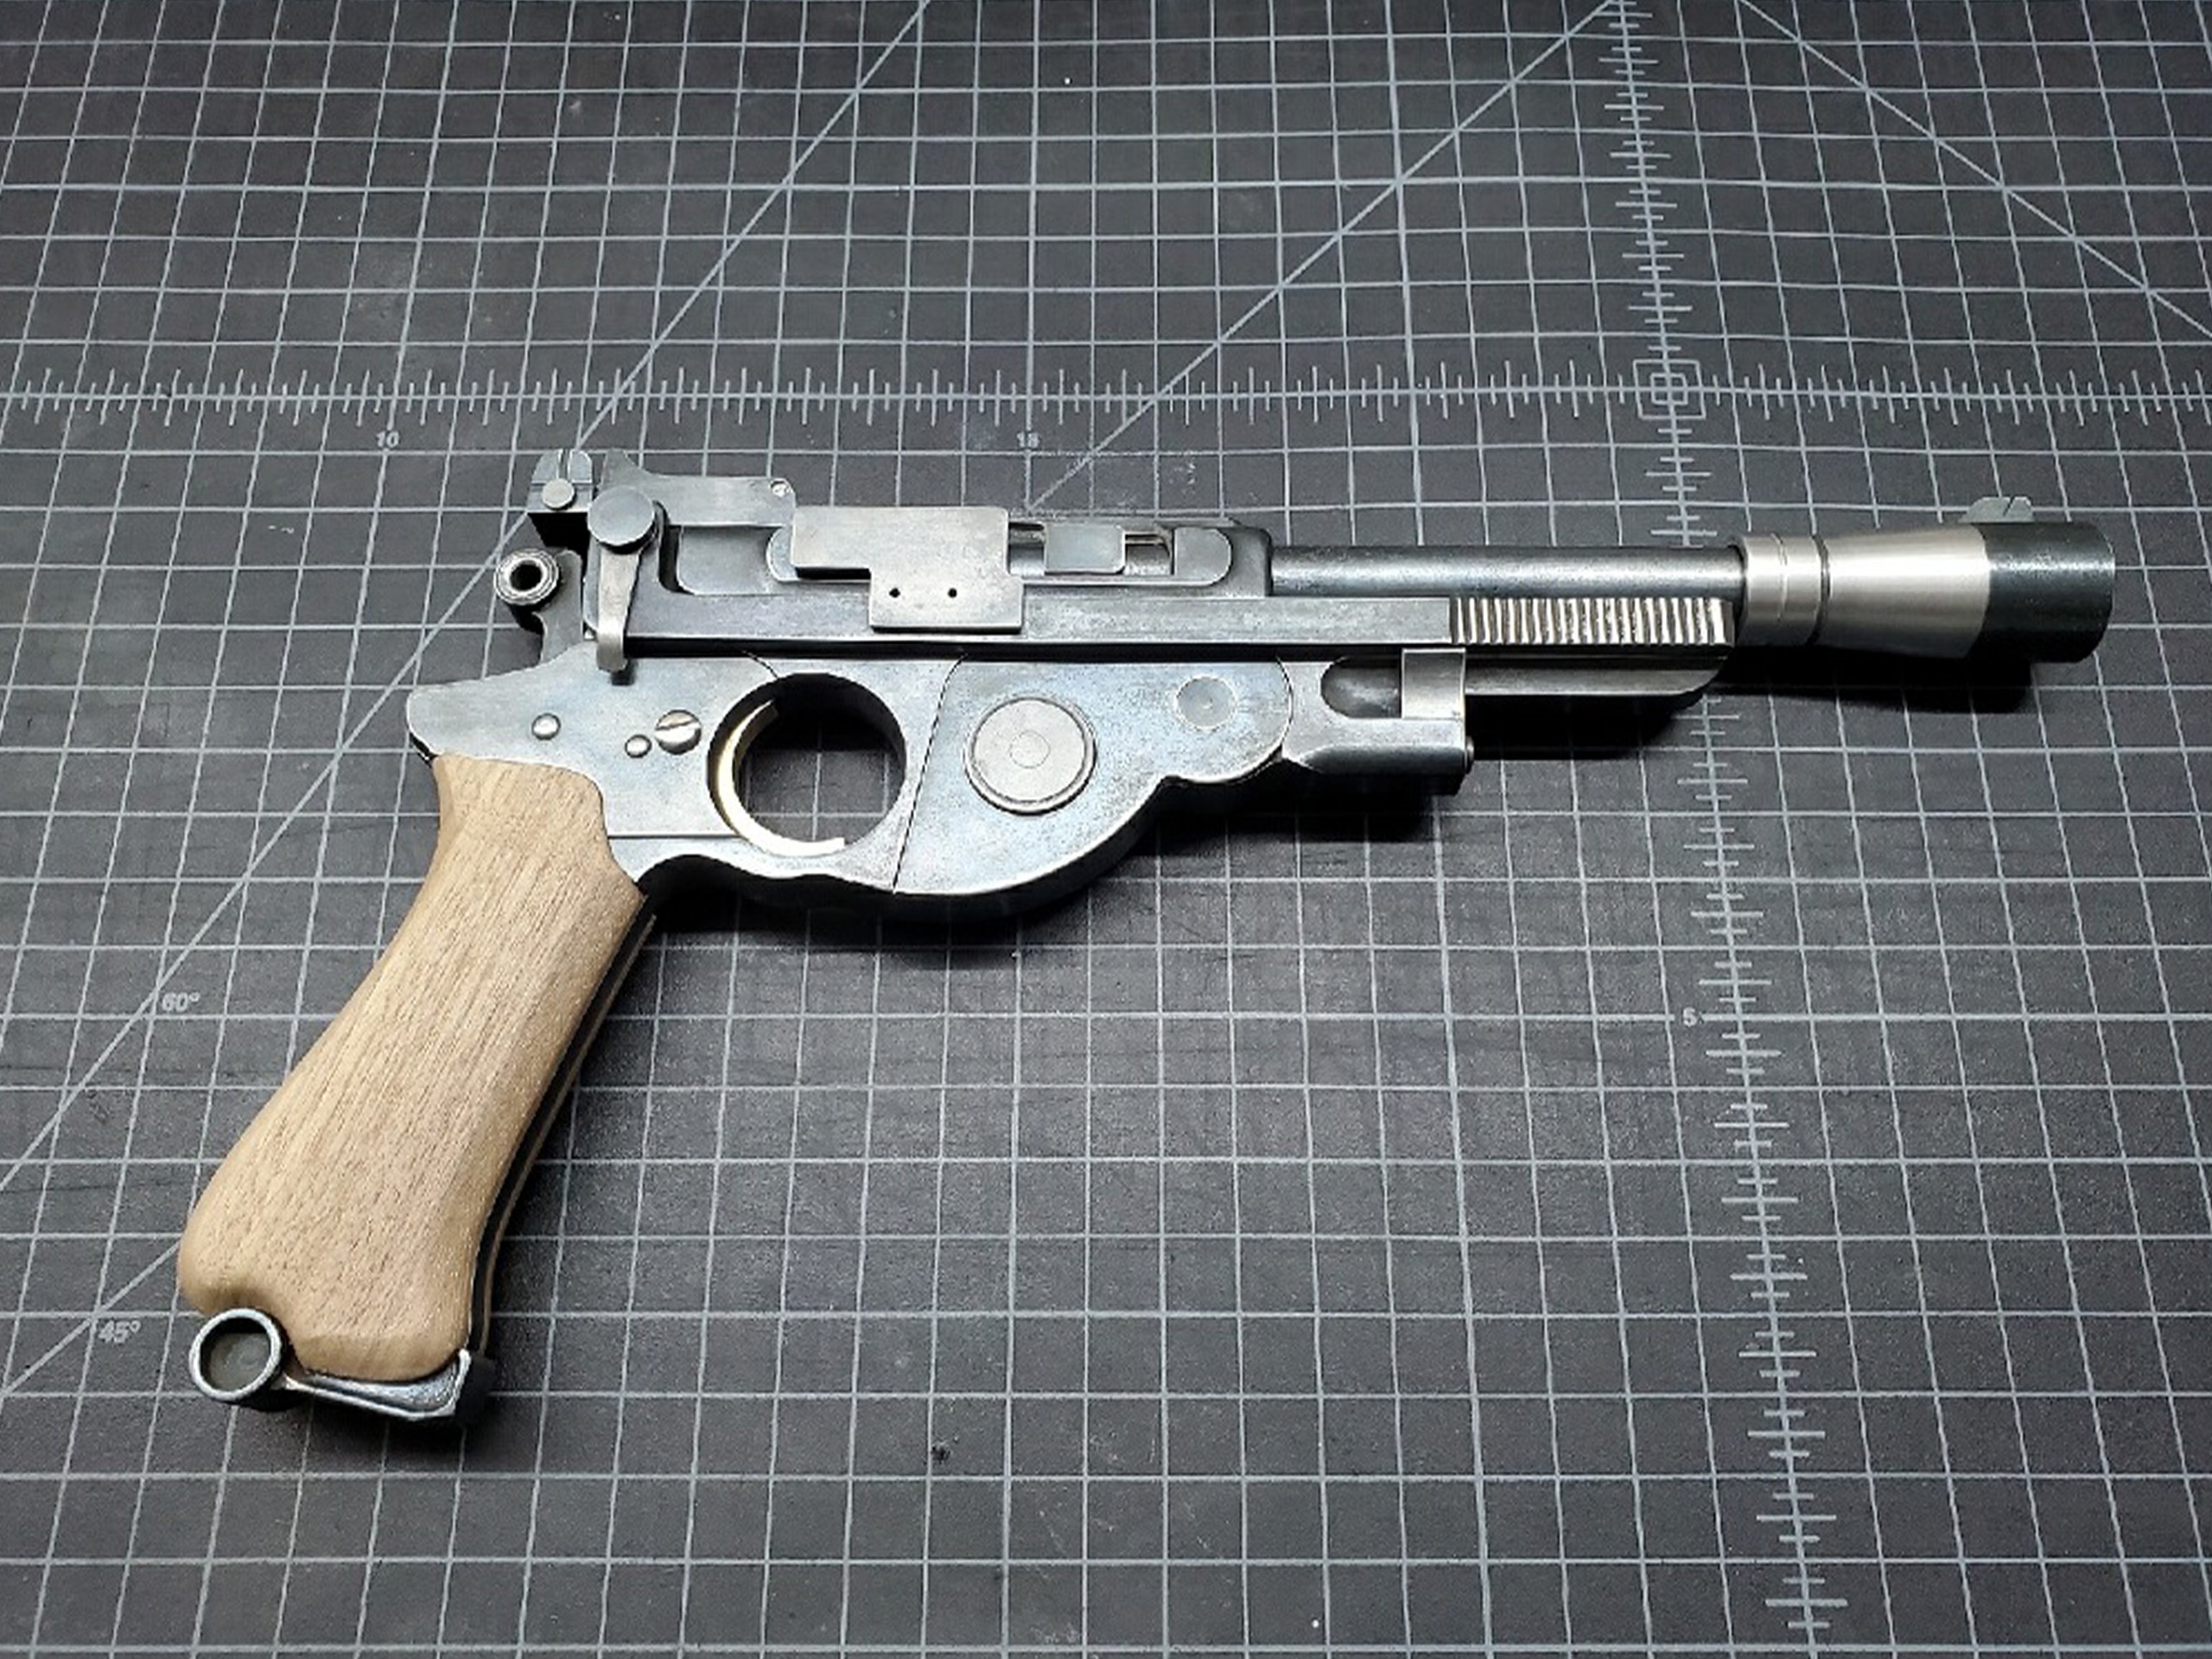
This is the right side of the blaster.
Update:
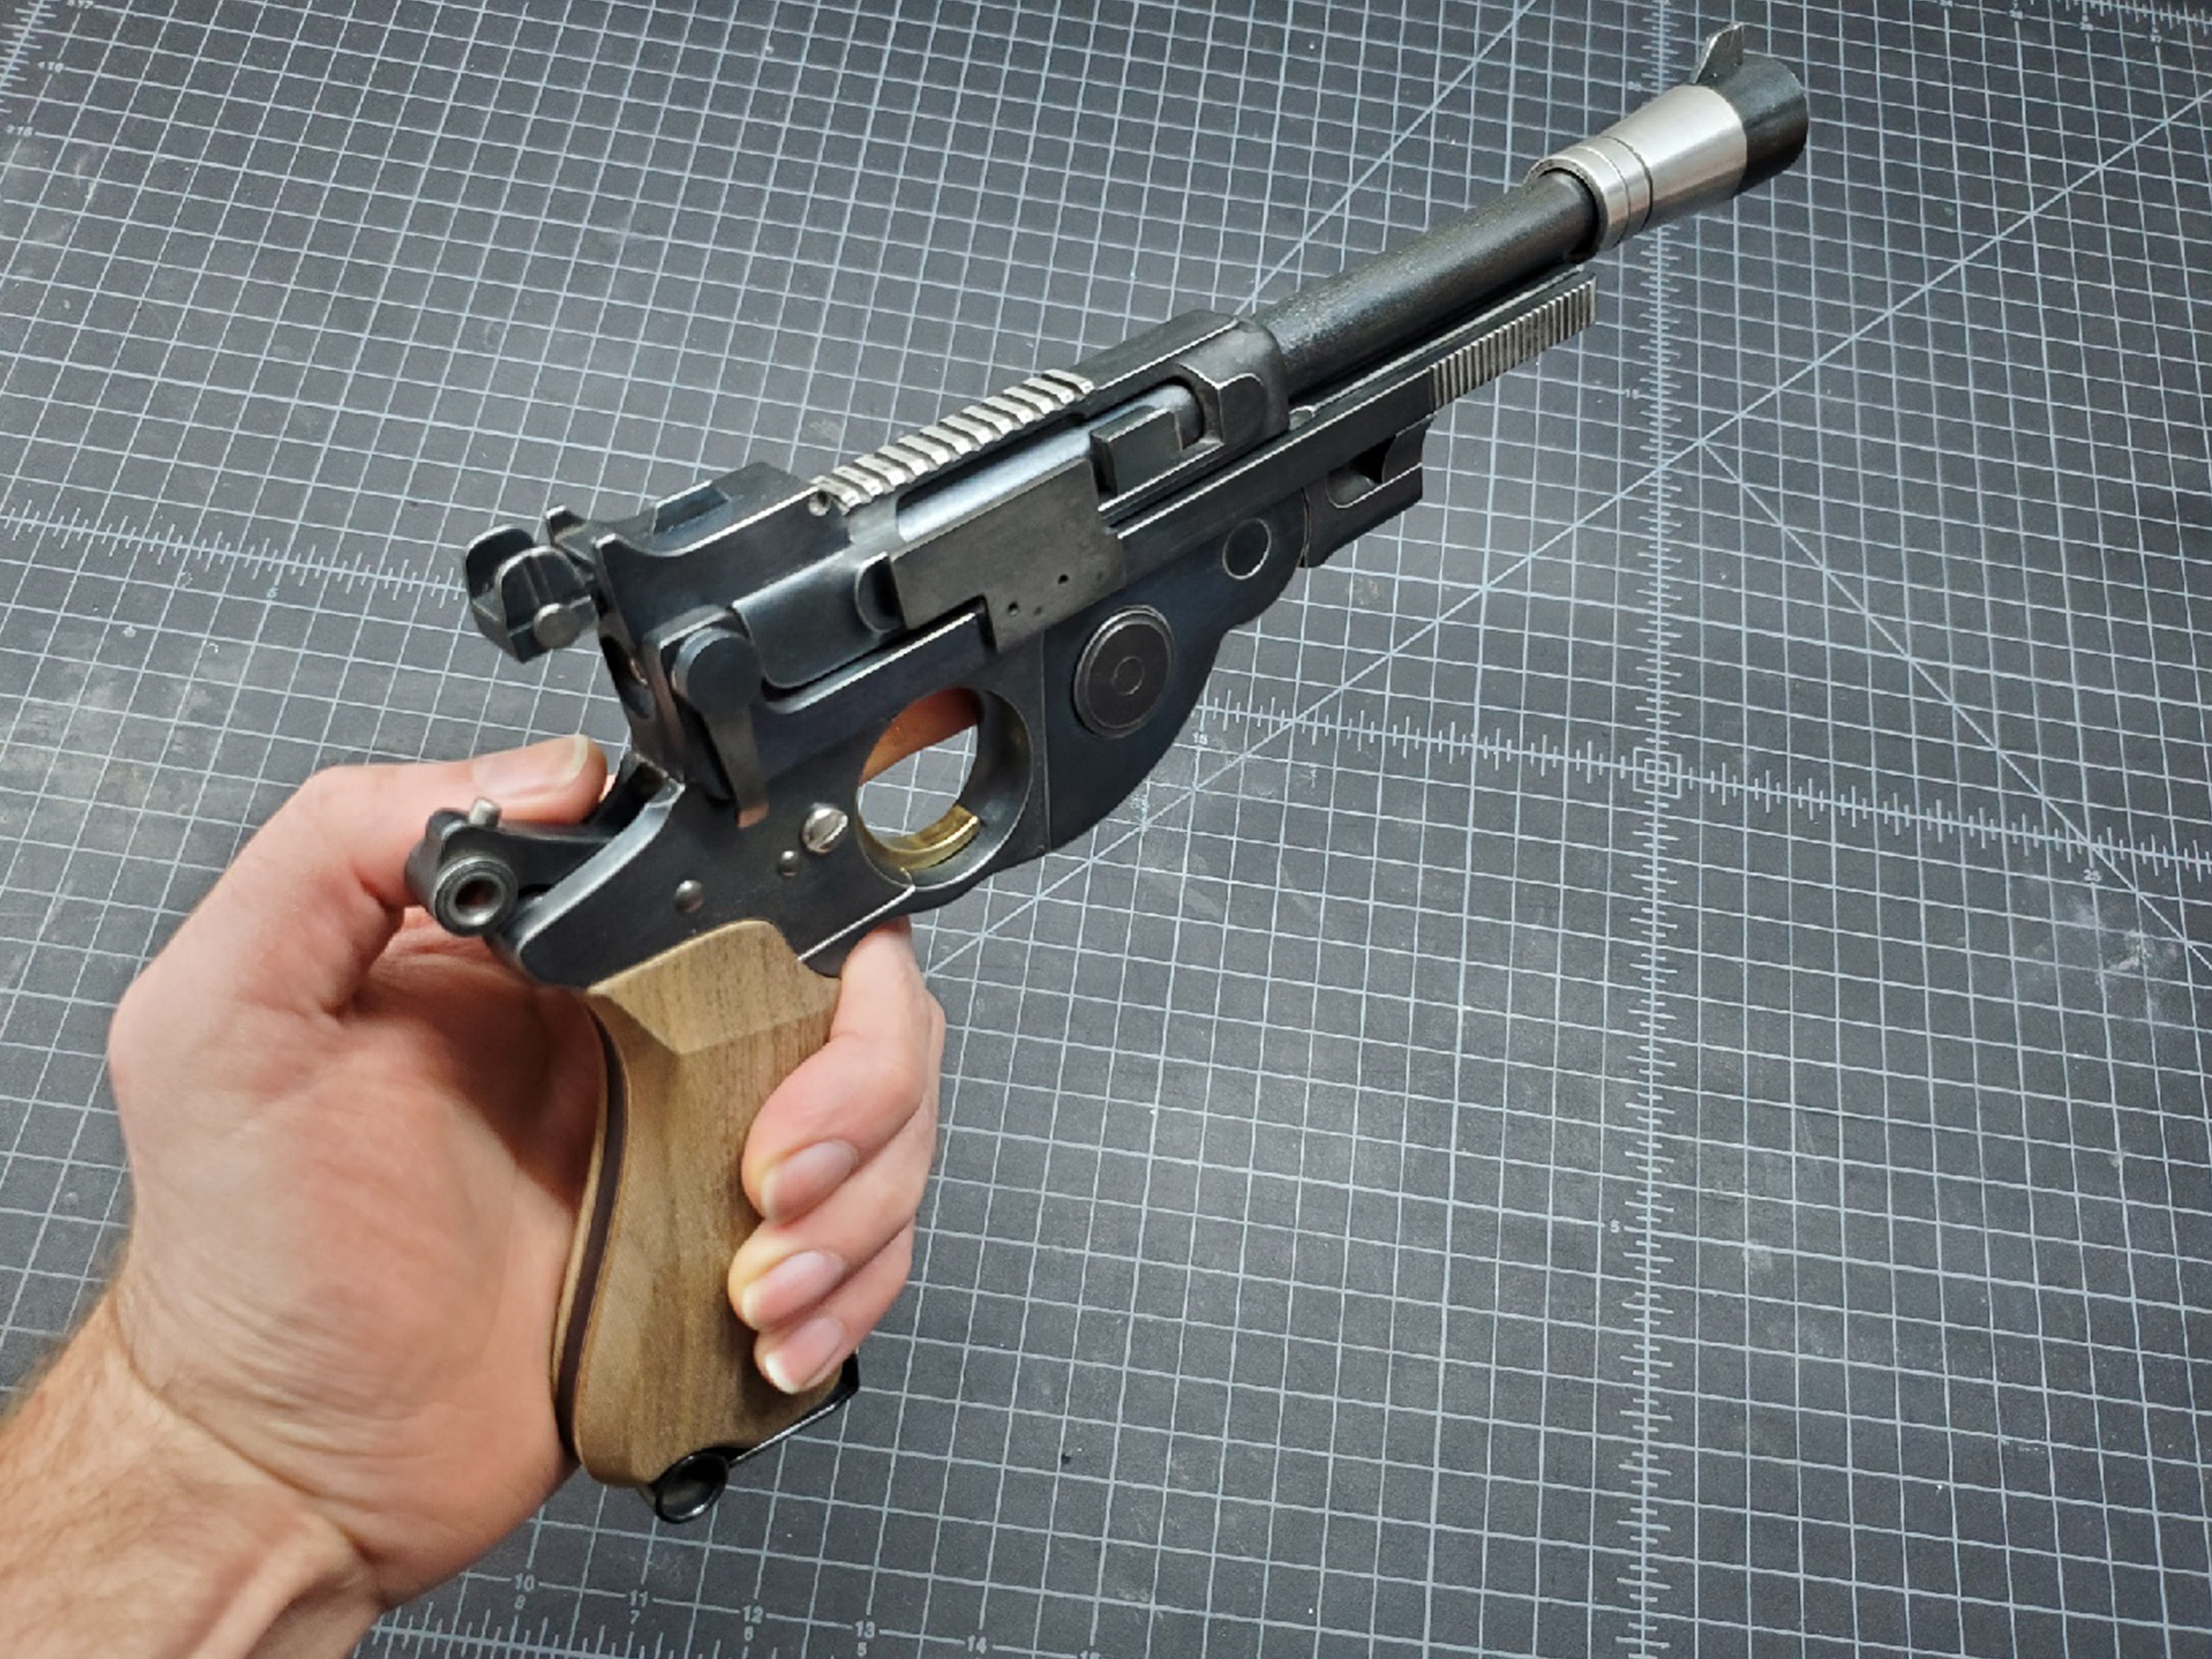
To give a sense of scale, here I am holding the blaster.
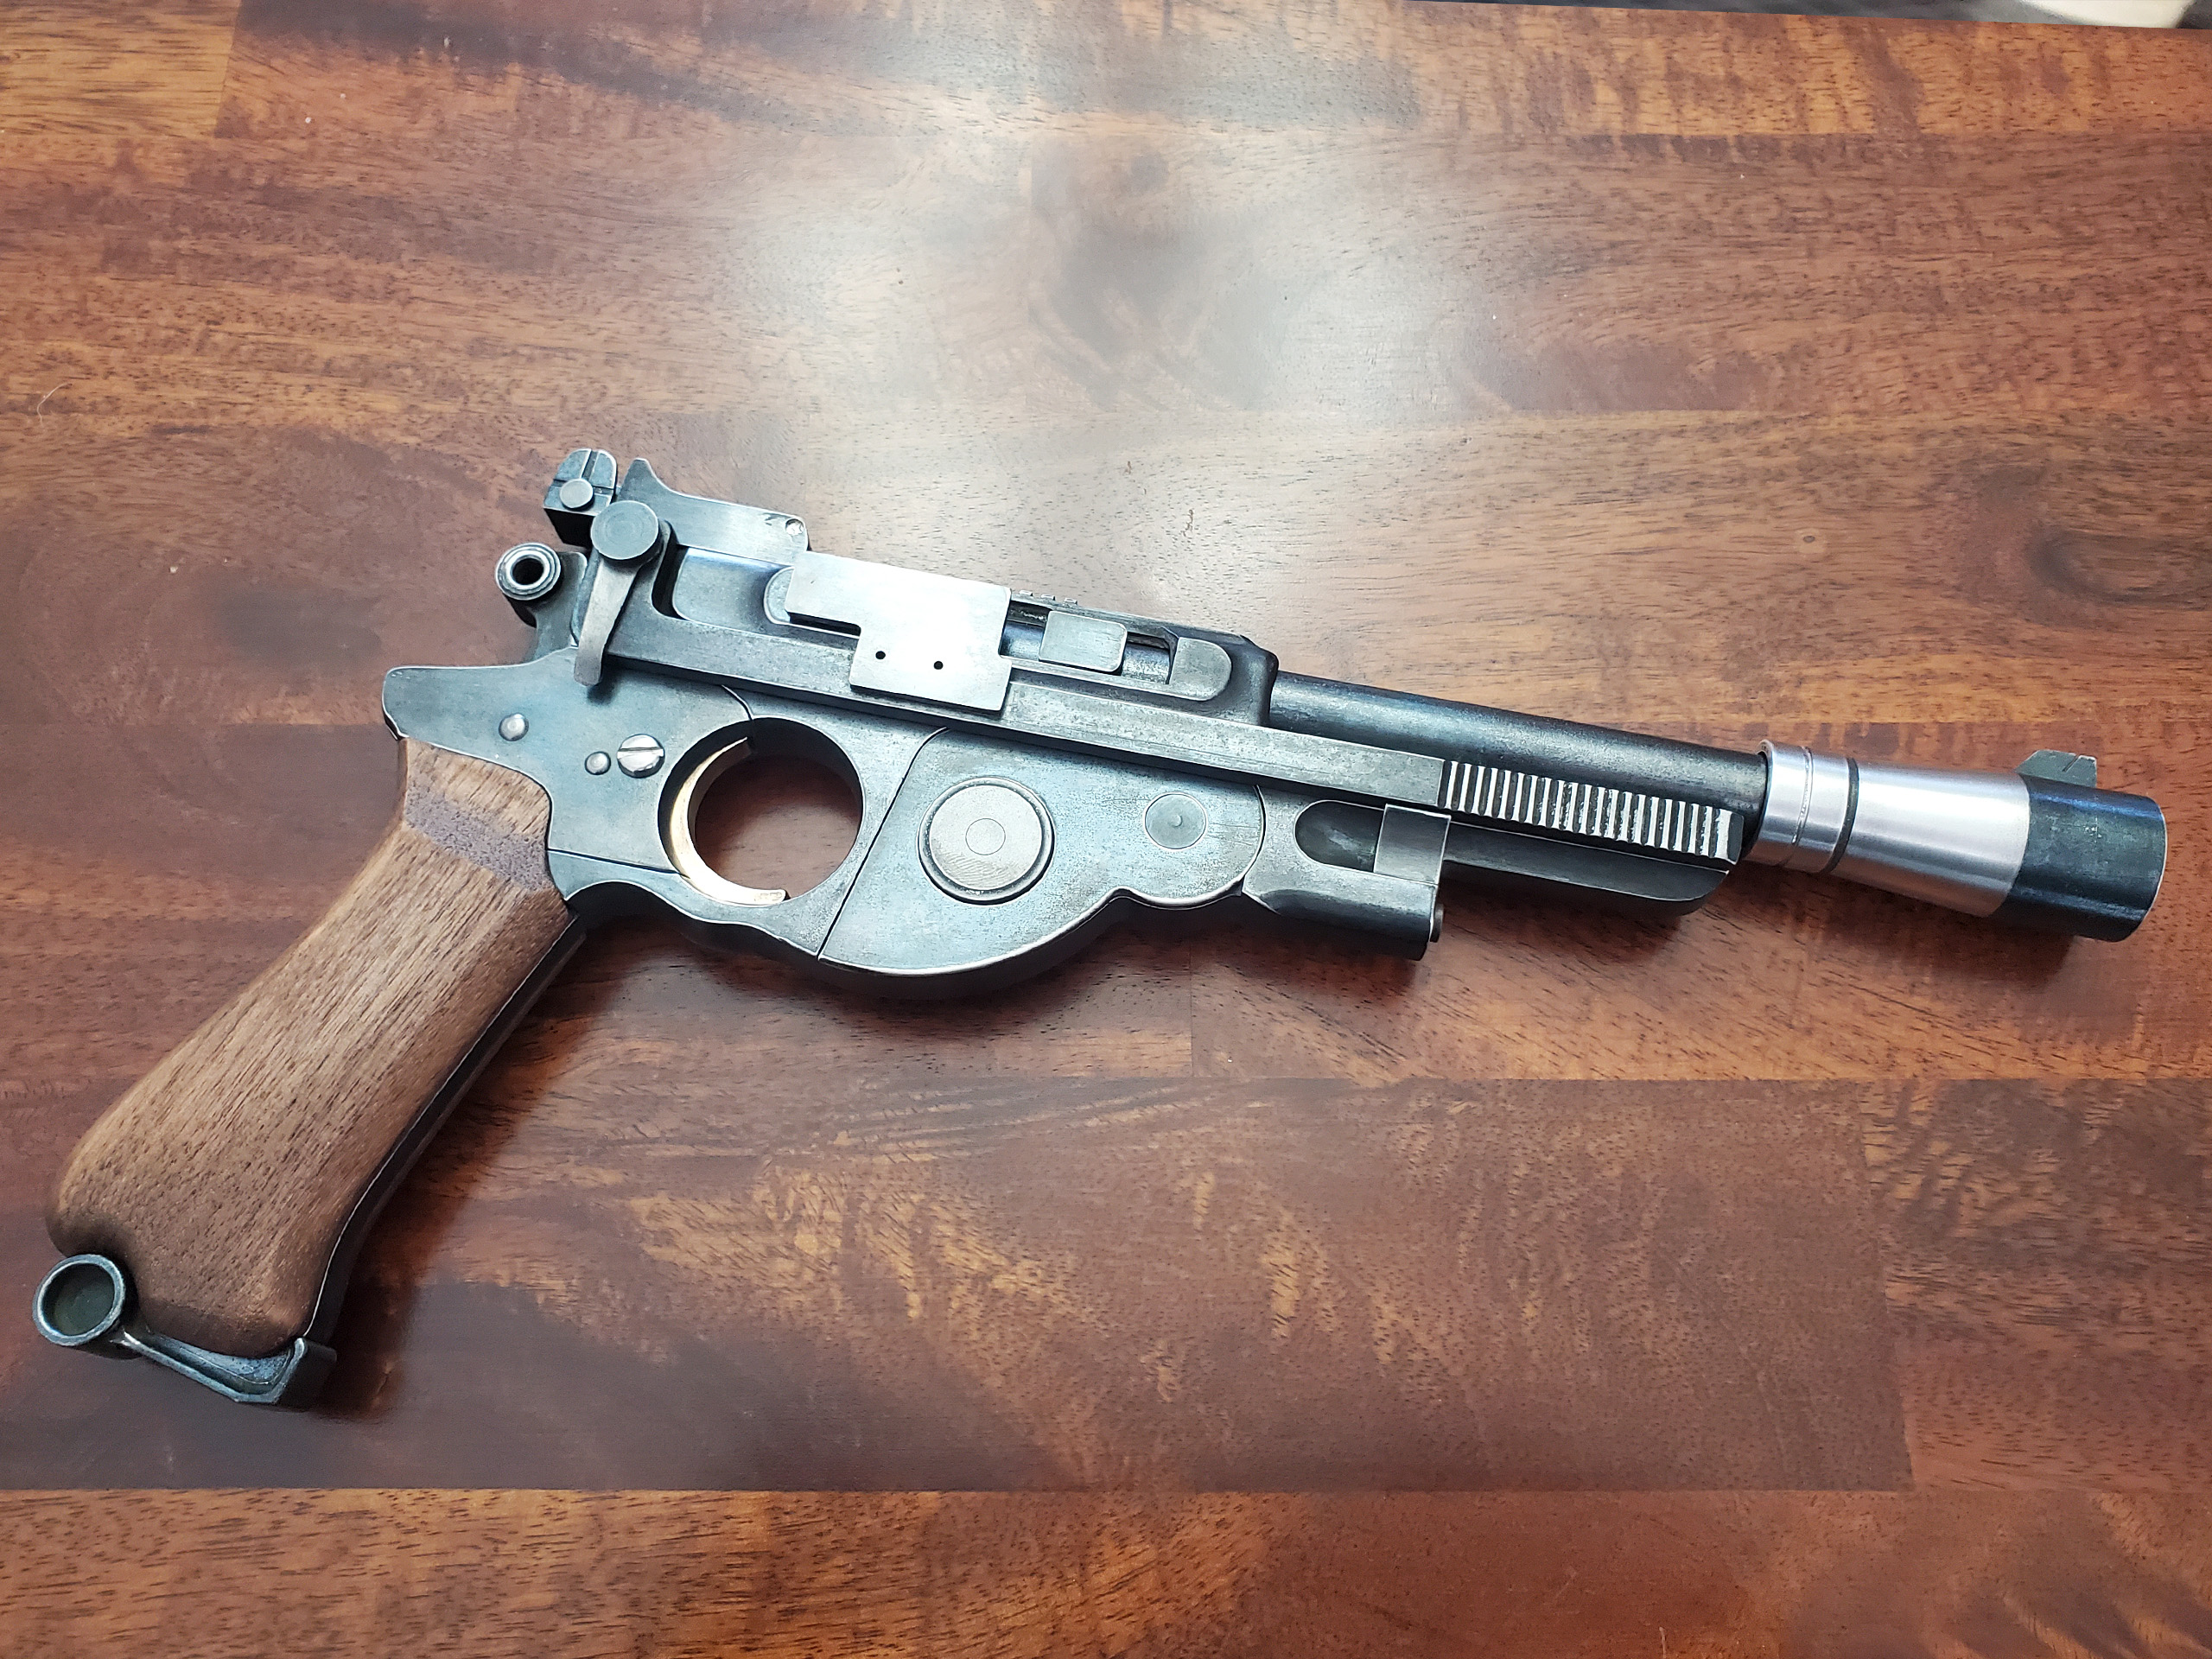
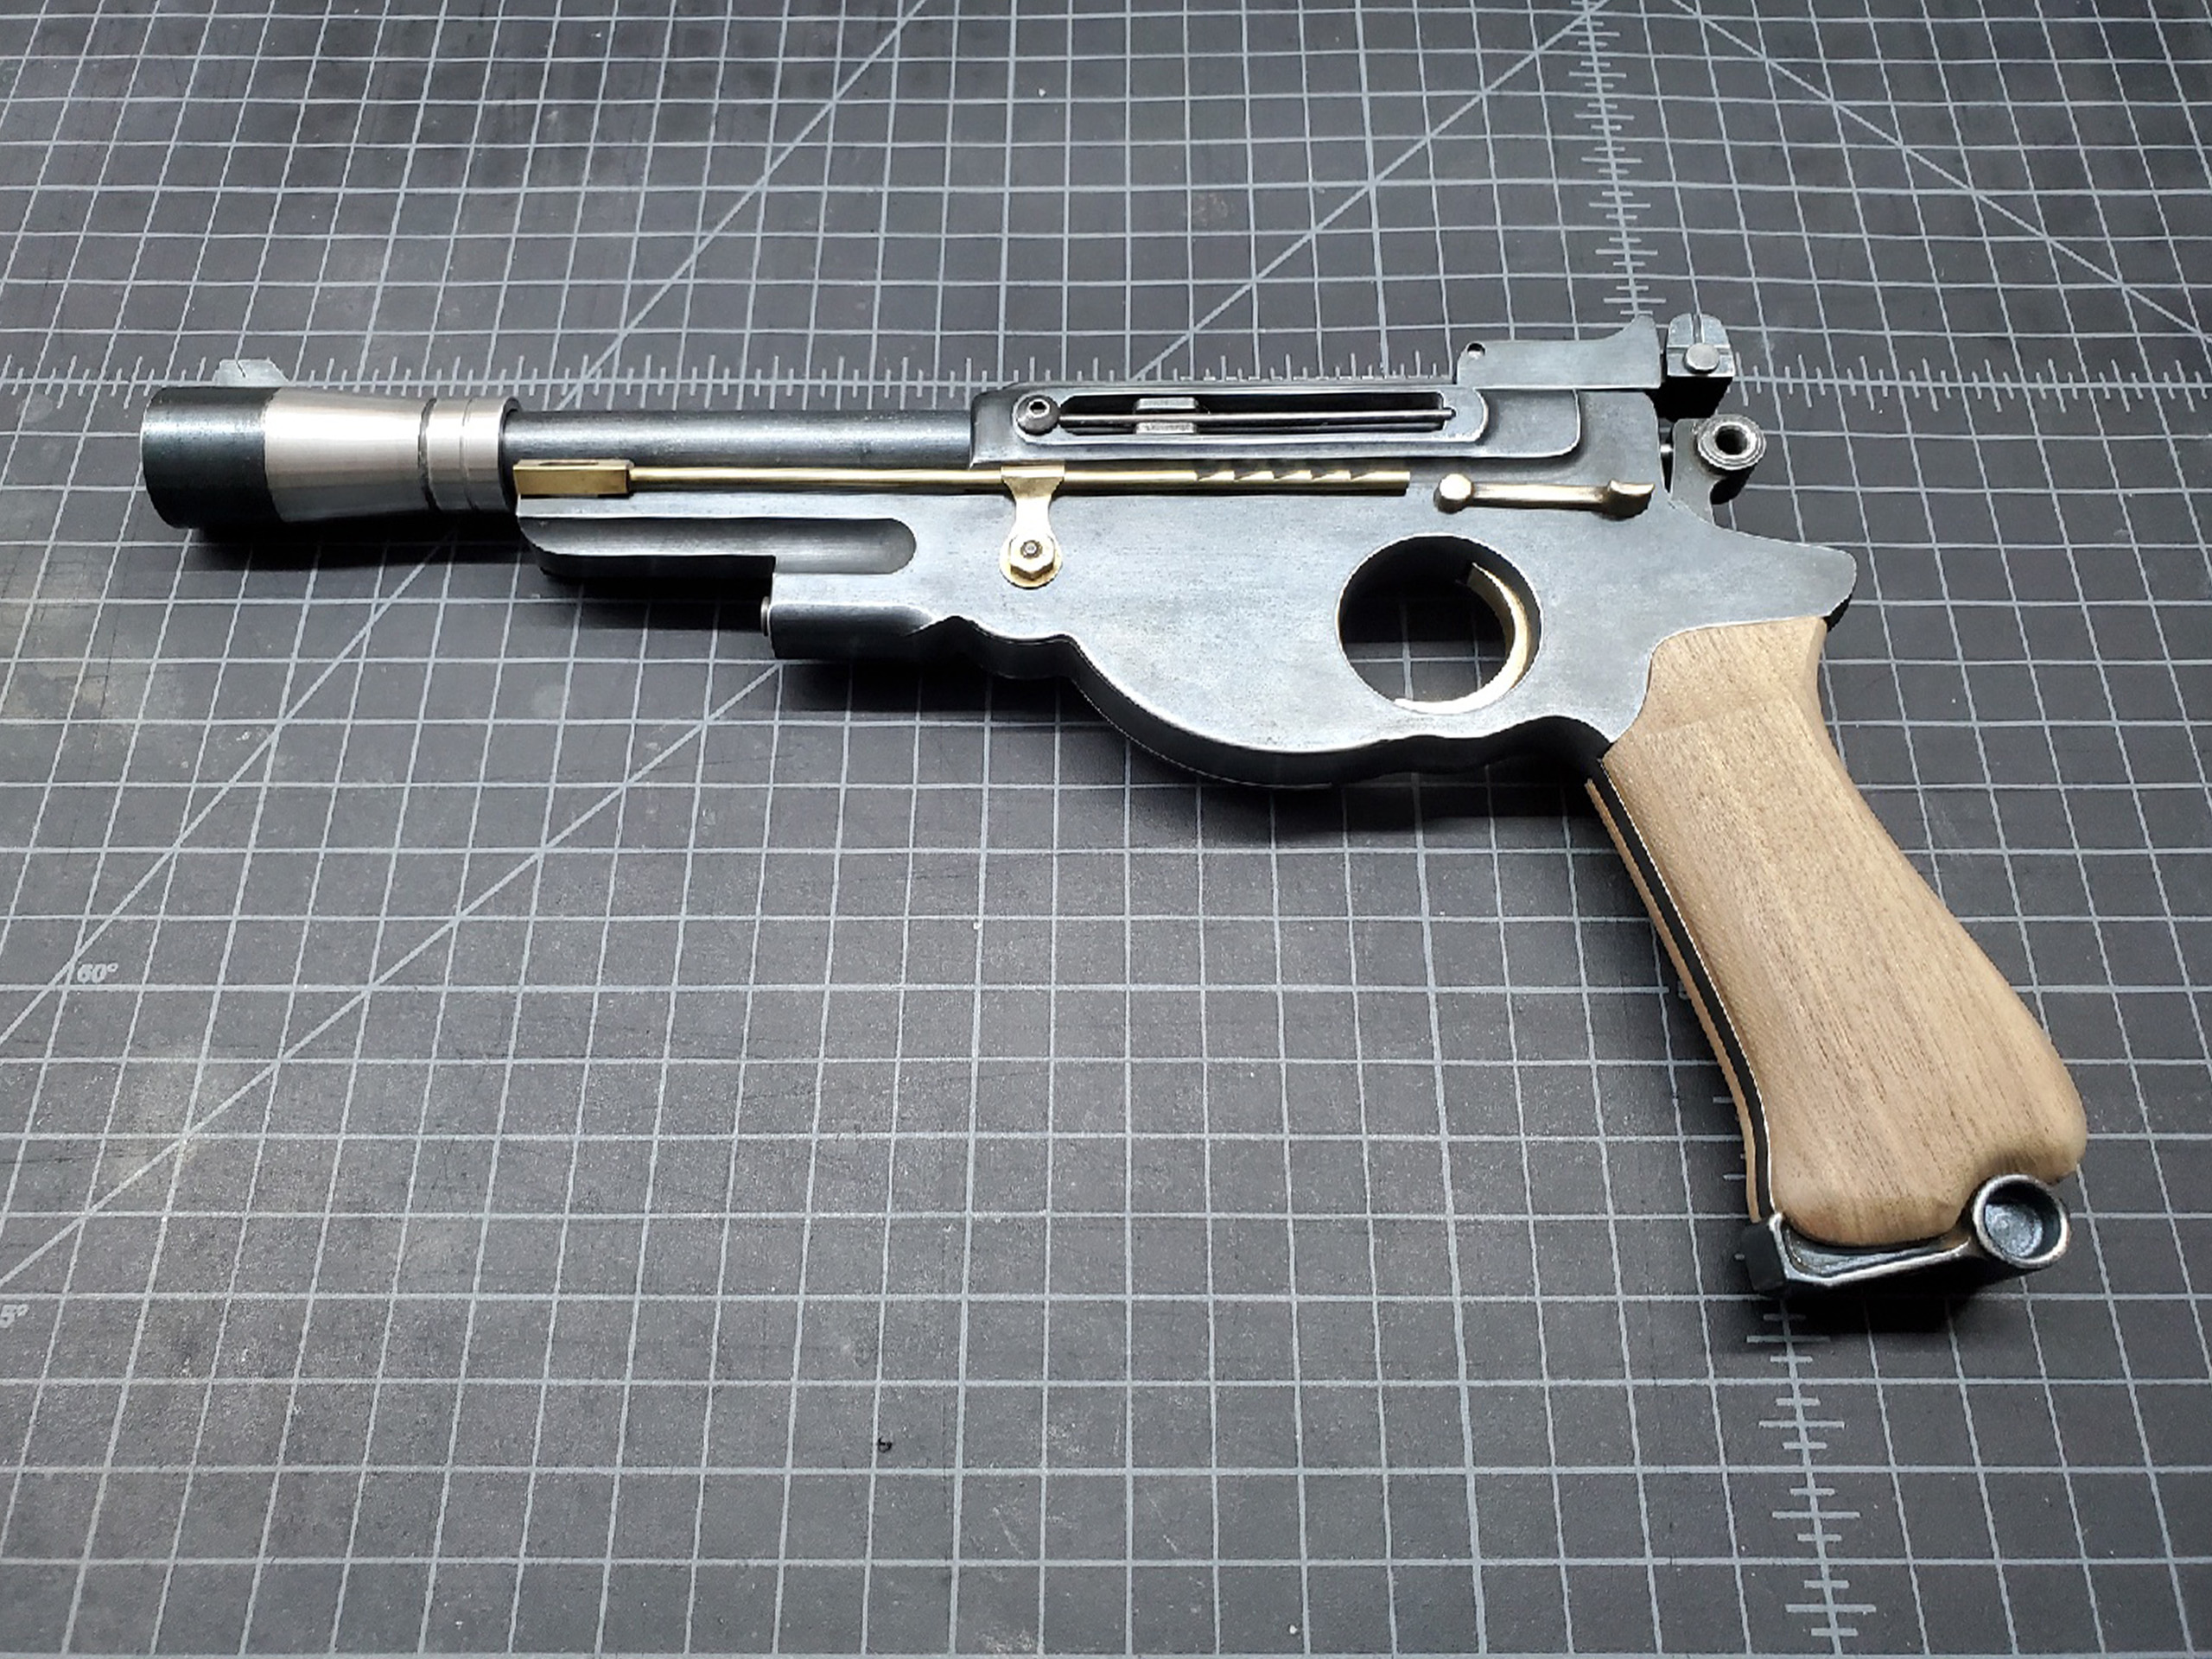
Here is the finished blaster. As you can see, tons of little details that add a bunch of visual interest.
And the other side with the nice brass accents to add some contrast. The grips were finished with Danish Oil and 800 grit sandpaper.
Sorry I didn’t really have any good in-process pictures to show. I’ll be more careful with my photo backups in the future
I hope you enjoyed the build, and as always, thanks for looking!


