
The Mandalorian Helmet Part 1: Printing
This is the start of a multi-part project where I attempt to recreate the helmet from Disney’s The Mandalorian. From the first episode I was instantly caught up in the pop culture hype of show, and really wanted to get my hands on the iconic helmet worn by the main character.
Through this process I will be 3d printing, assembling, sanding, painting, and weathering the helmet. All the parts for this project will be printed on my Robo 3d R1, using PLA filament. I chose to use Rob Pauza’s “Mandalorian Helmet – v2” for my model which can be found over on MyMiniFactory.com. It seemed to be the most screen accurate representation of the helmet, and it has the benefit of already being broken up into 8 pieces to fit on the smaller bed of my printer. If I have something like a Creality CR-10 with its massive bed and build height, I would have been able to print the helmet in one piece. In addition to all that I will by trying out a few new techniques during the finishing process for this project that I will discuss as I get to them.
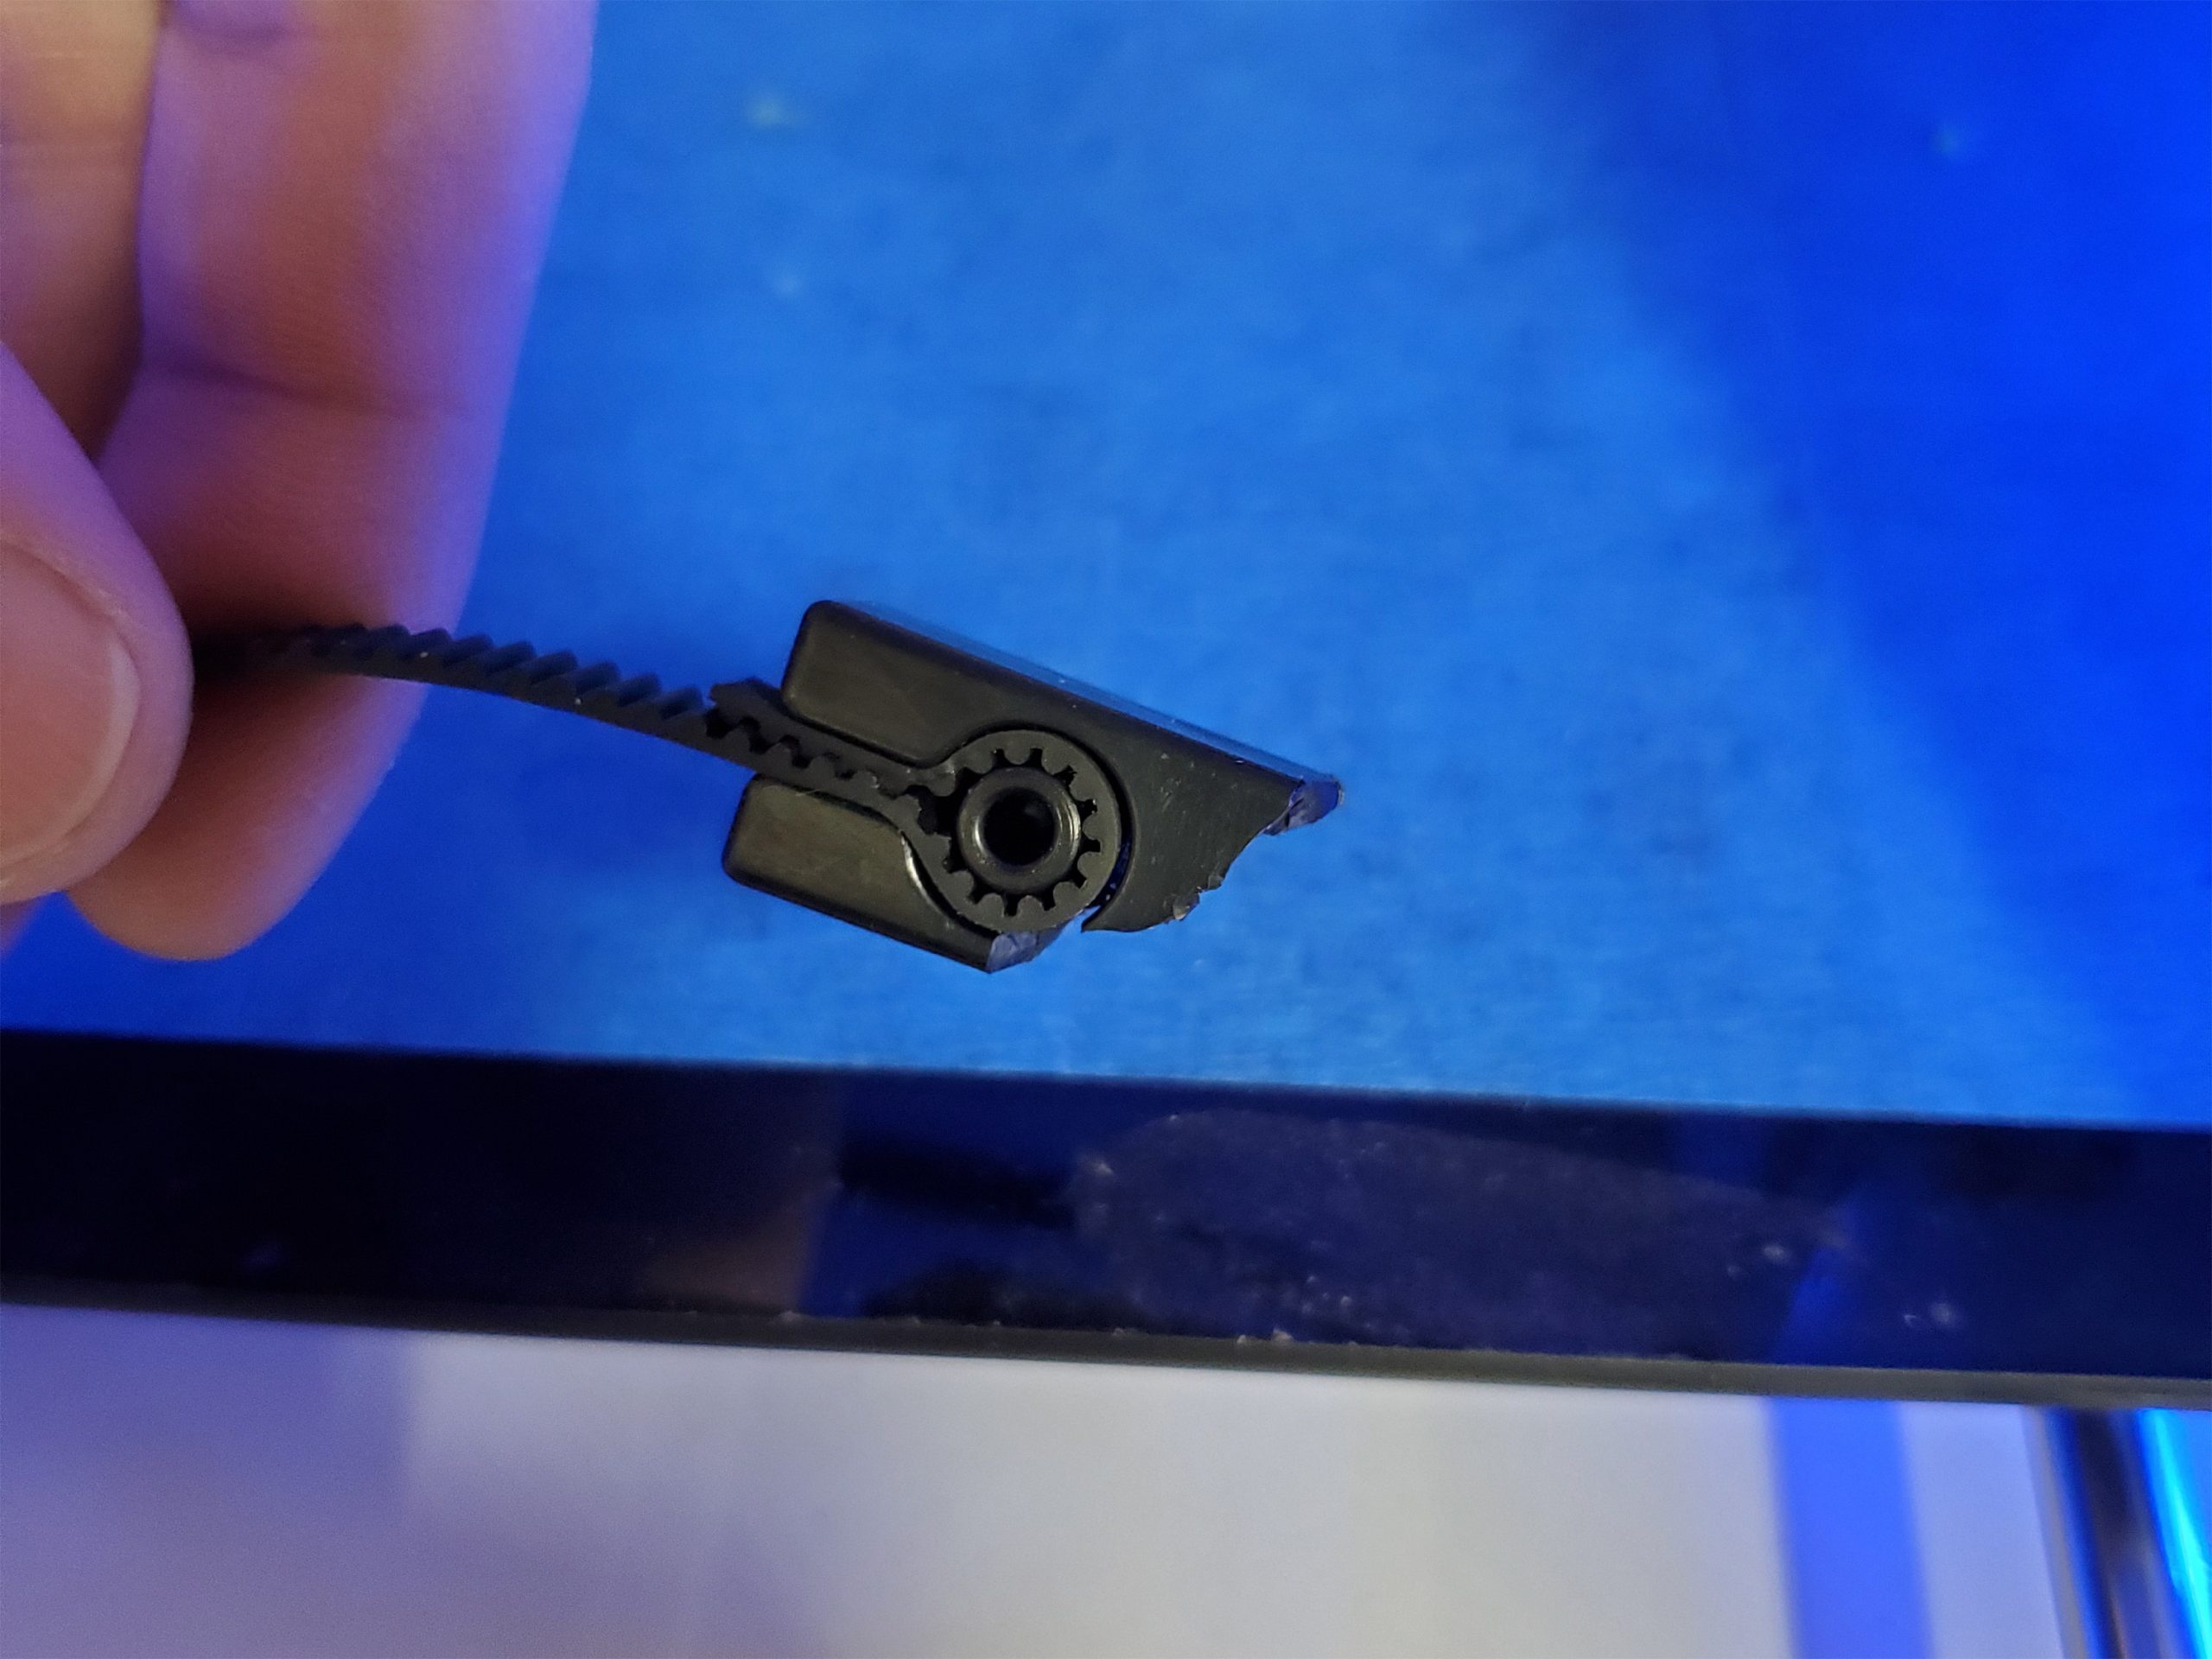
This was an excellent way to start a project! I had not used my printer since earlier in the summer. I have been much more focused on woodworking projects. When I turned my printer on and it went through its little self-leveling routine, I noticed that the print bed remained stationary. I guess at some point while sitting idle, the Y belt holding clip decided it had had enough, and just broke.
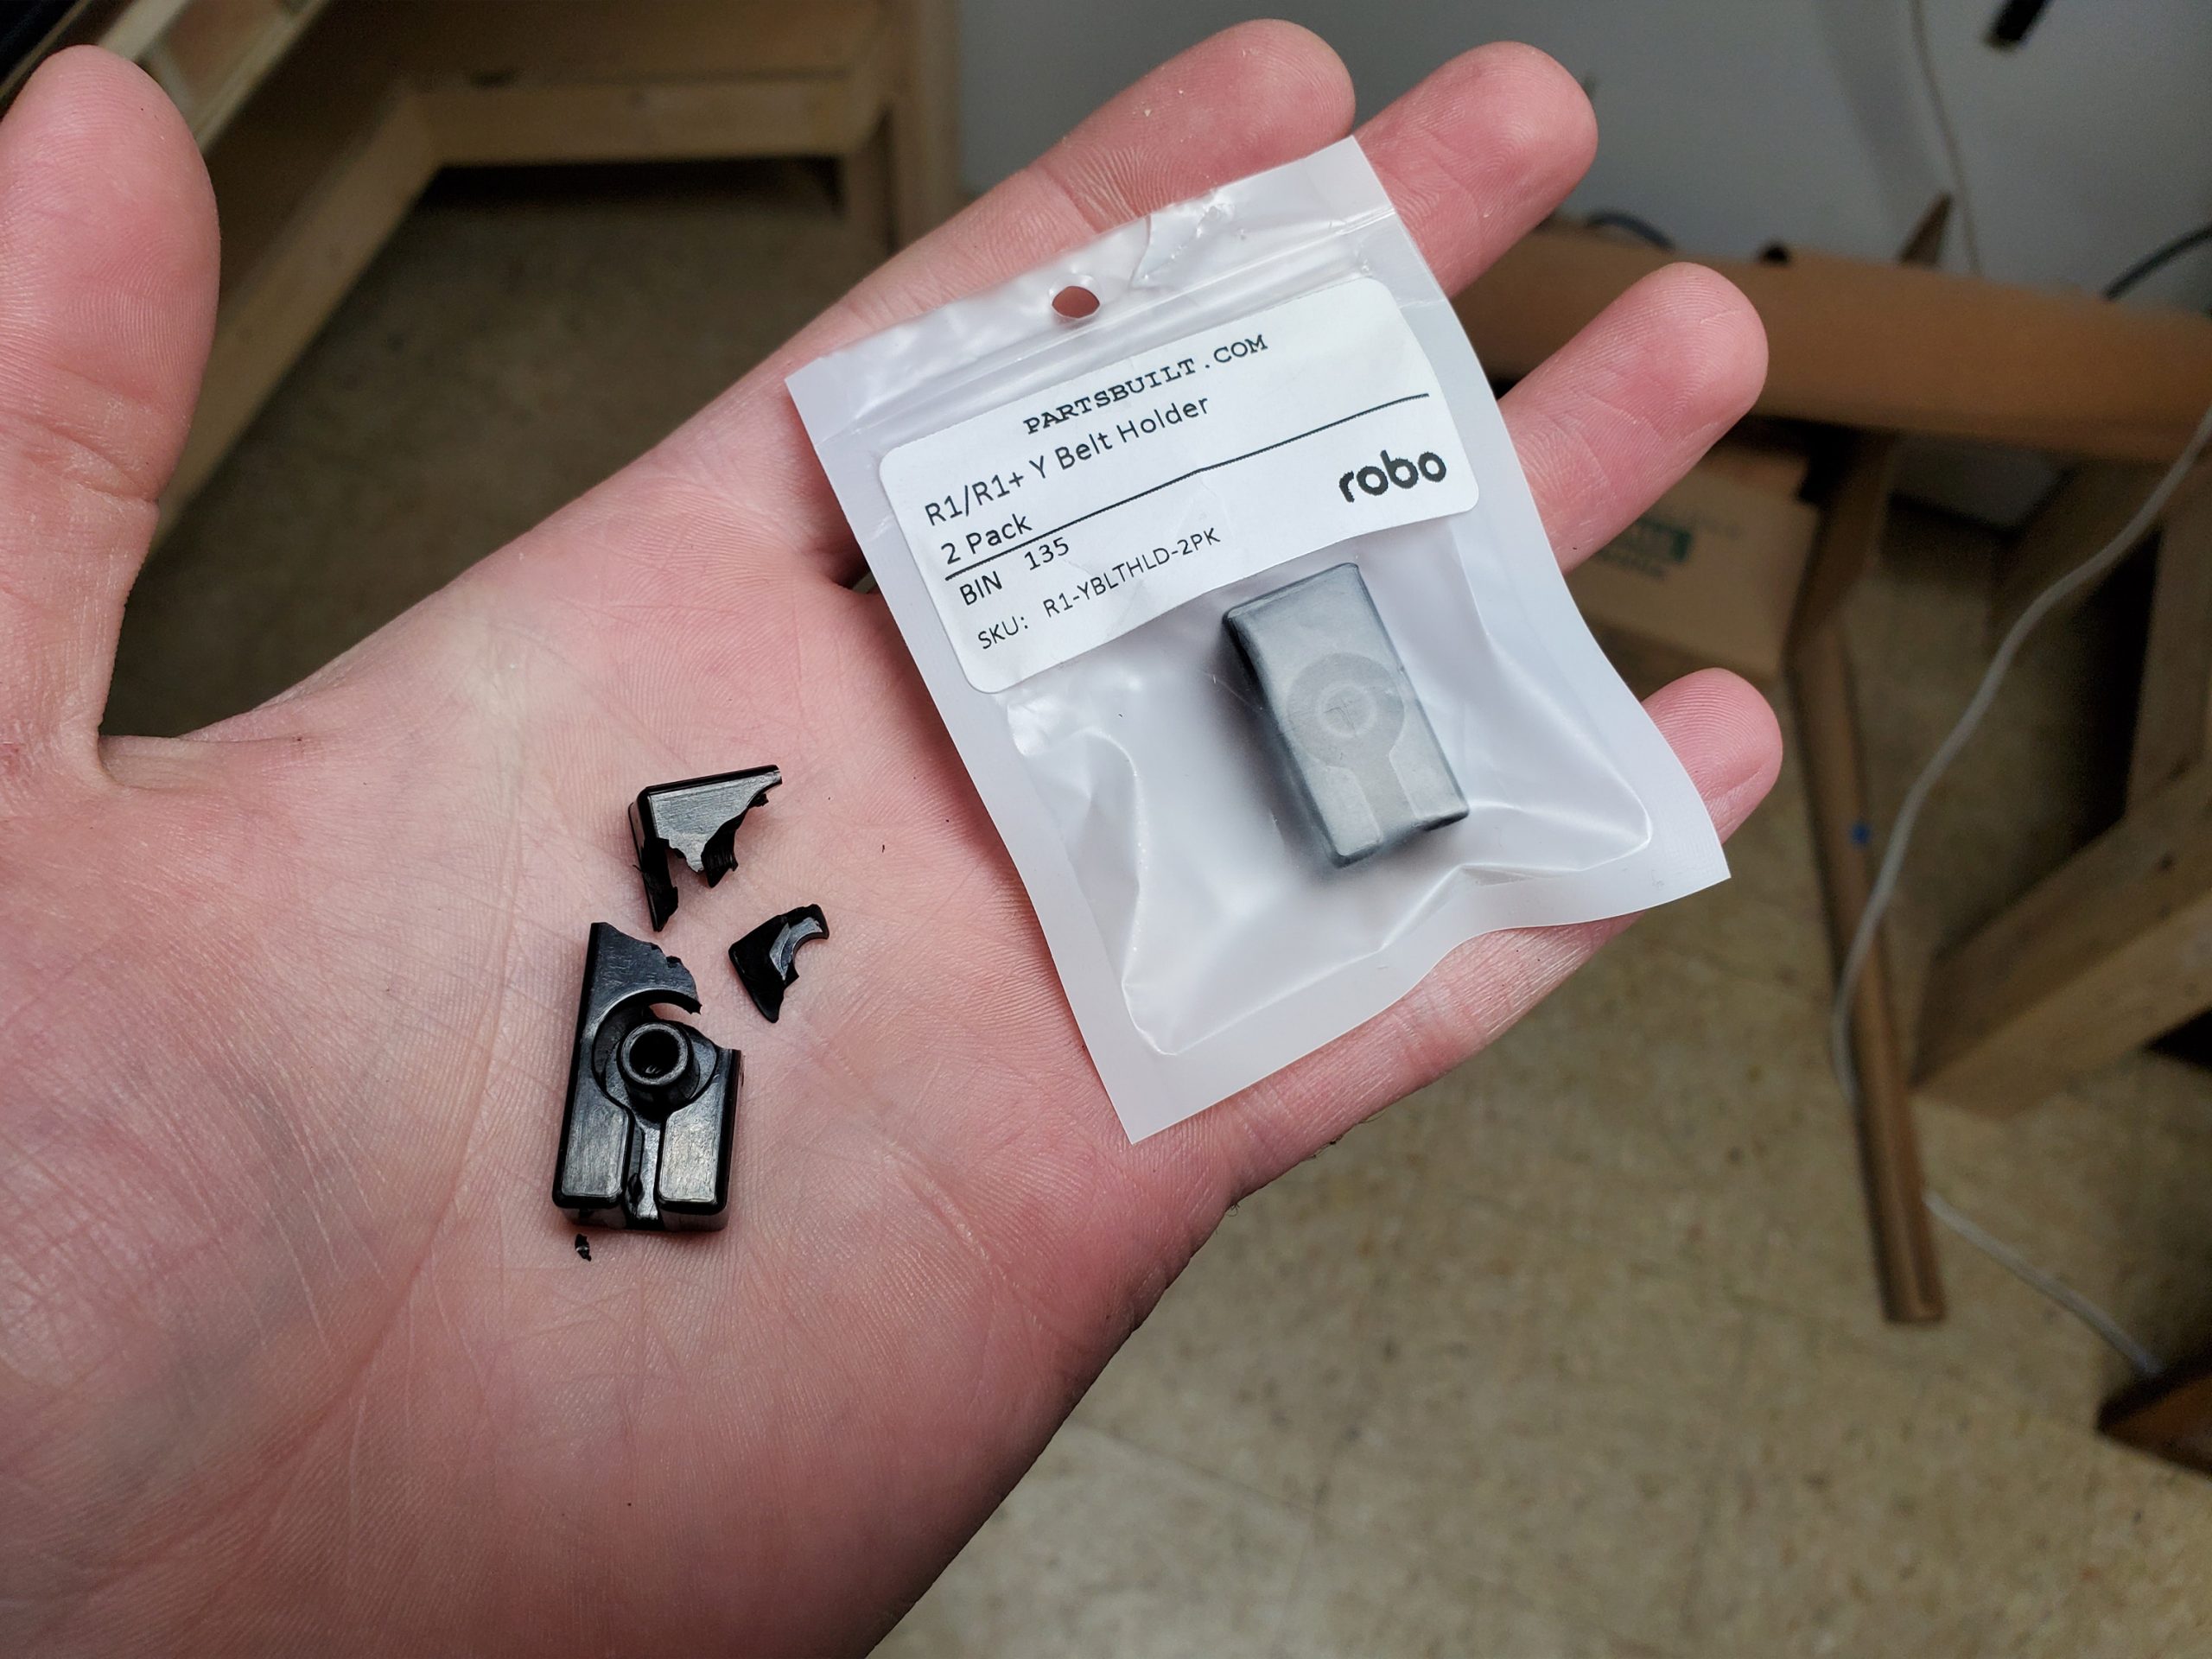
Luckily, I found out this is a common problem with the Robo 3d R1. So much so that if I had a second 3d printer available to me, the model for the clip is available on thingiverse. It was also a cheap fix. I was able to order the part from the kind folks over at partsbuilt.com and they sent it right out to me, and over the Thanksgiving holiday no less.
With the printer fixed, and better than ever, I was able to start my prints. I wanted the helmet to have to weight to it. Not heavy enough to simulate being made out of metal or anything, but heavy enough to feel like it was not made of paper mache. I went with 25% grid for the infill, and I set the layer height for 0.2. I could have gone finer, but the whole helmet is going to be heavily filled and sanded anyway. I don’t think it would have been worth it. I also printed my helmet at 100% scale. Based on the comments of other makers, I was paranoid that the helmet was going to be too small on my head. Some people have elected to print theirs at 105% or even as large as 110%. However, I found the opposite to be true and I feel that it is a little big. If I had to do it all over again, I would choose something closer to 90-95%.
I ended up printing all my pieces with full support material. If you are careful, and good with your slicing software, you can angle all the pieces to print virtually support free. I thought about it, but ultimately decided against it. The angle makes the pieces very narrow and very tall. I know with my printer, printing a narrow panel that tall is just asking for wobble and misaligned layers. Here is all my wasted support material a little over half way through the prints. If you look closely, you can see a failed front top quarter print in there. Each piece takes about 12 hours to print. That part failed because the old Macbook I use to run my printer crashed with about an hour and half to go. It’s all good though, I will use this piece later as a paint test scrap.
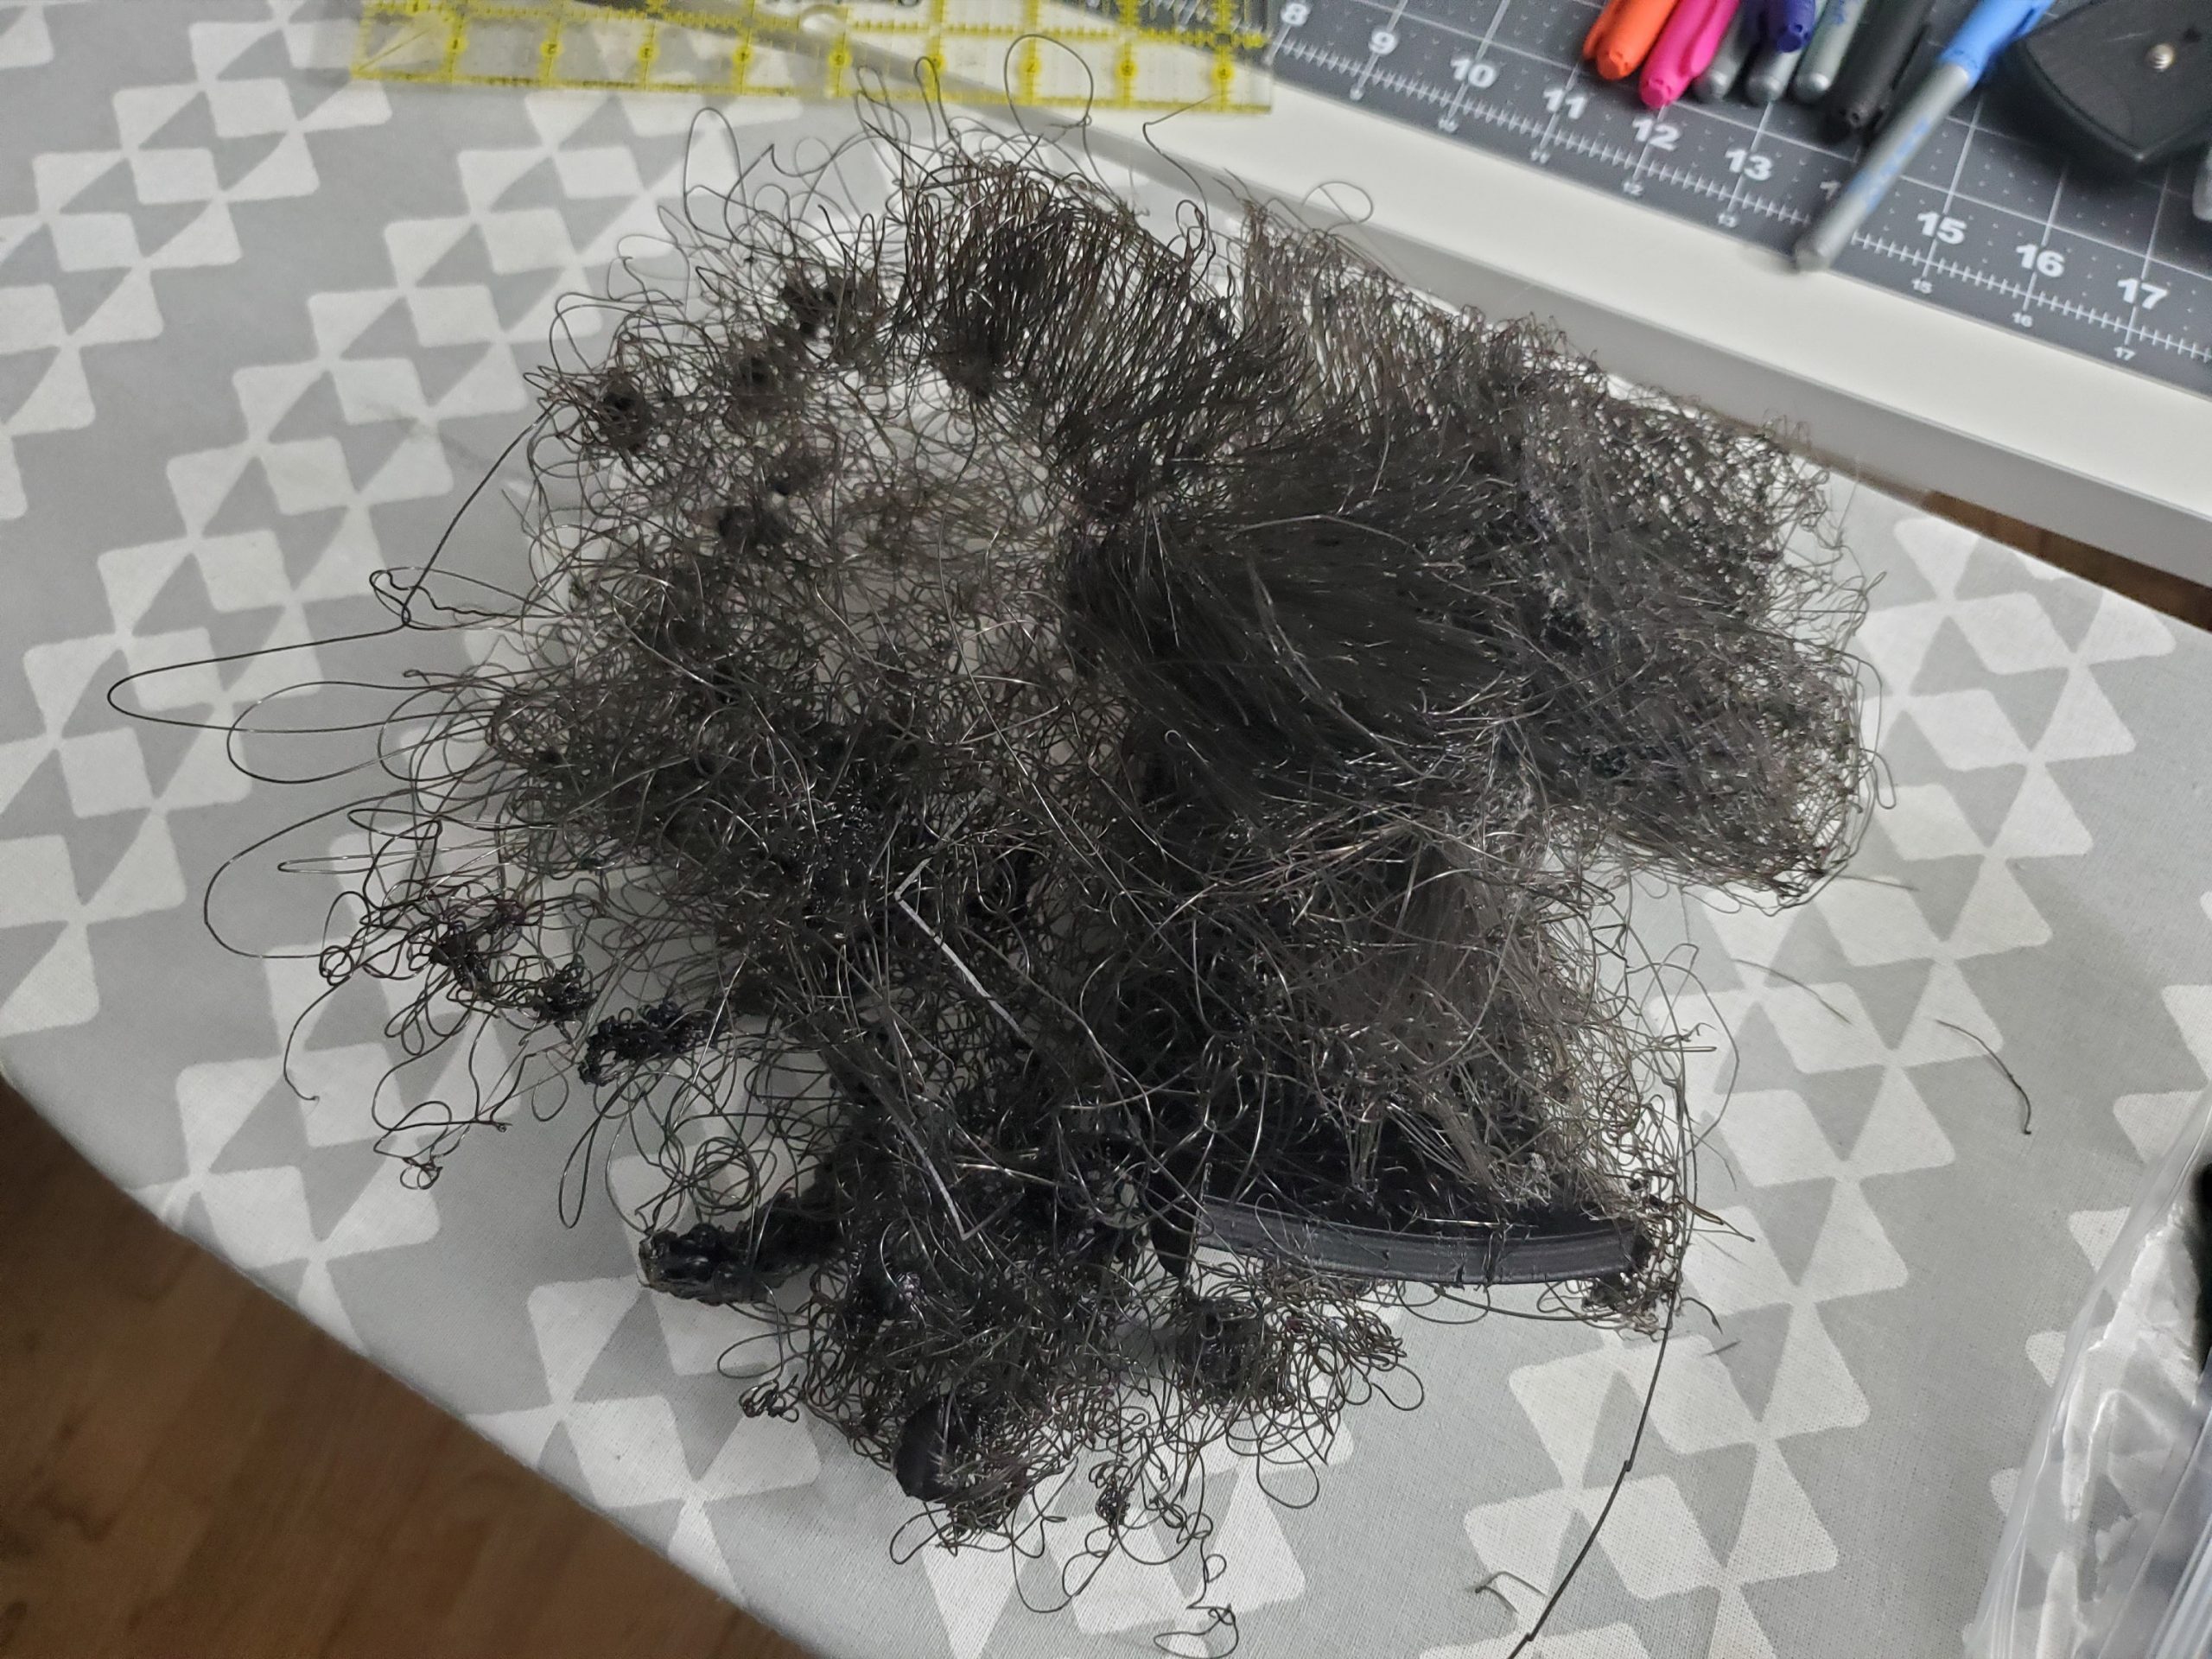
What 3d printing project would be complete without a catastrophic print failure? I started this piece before I left for work one day. It looks like it got about 2 hours in before lifting from the print bed, and then printing another 10 hours of beautiful angel hair pasta. This could easily have been a lot worse. I figured I would share it because it is a pretty impressive failure.
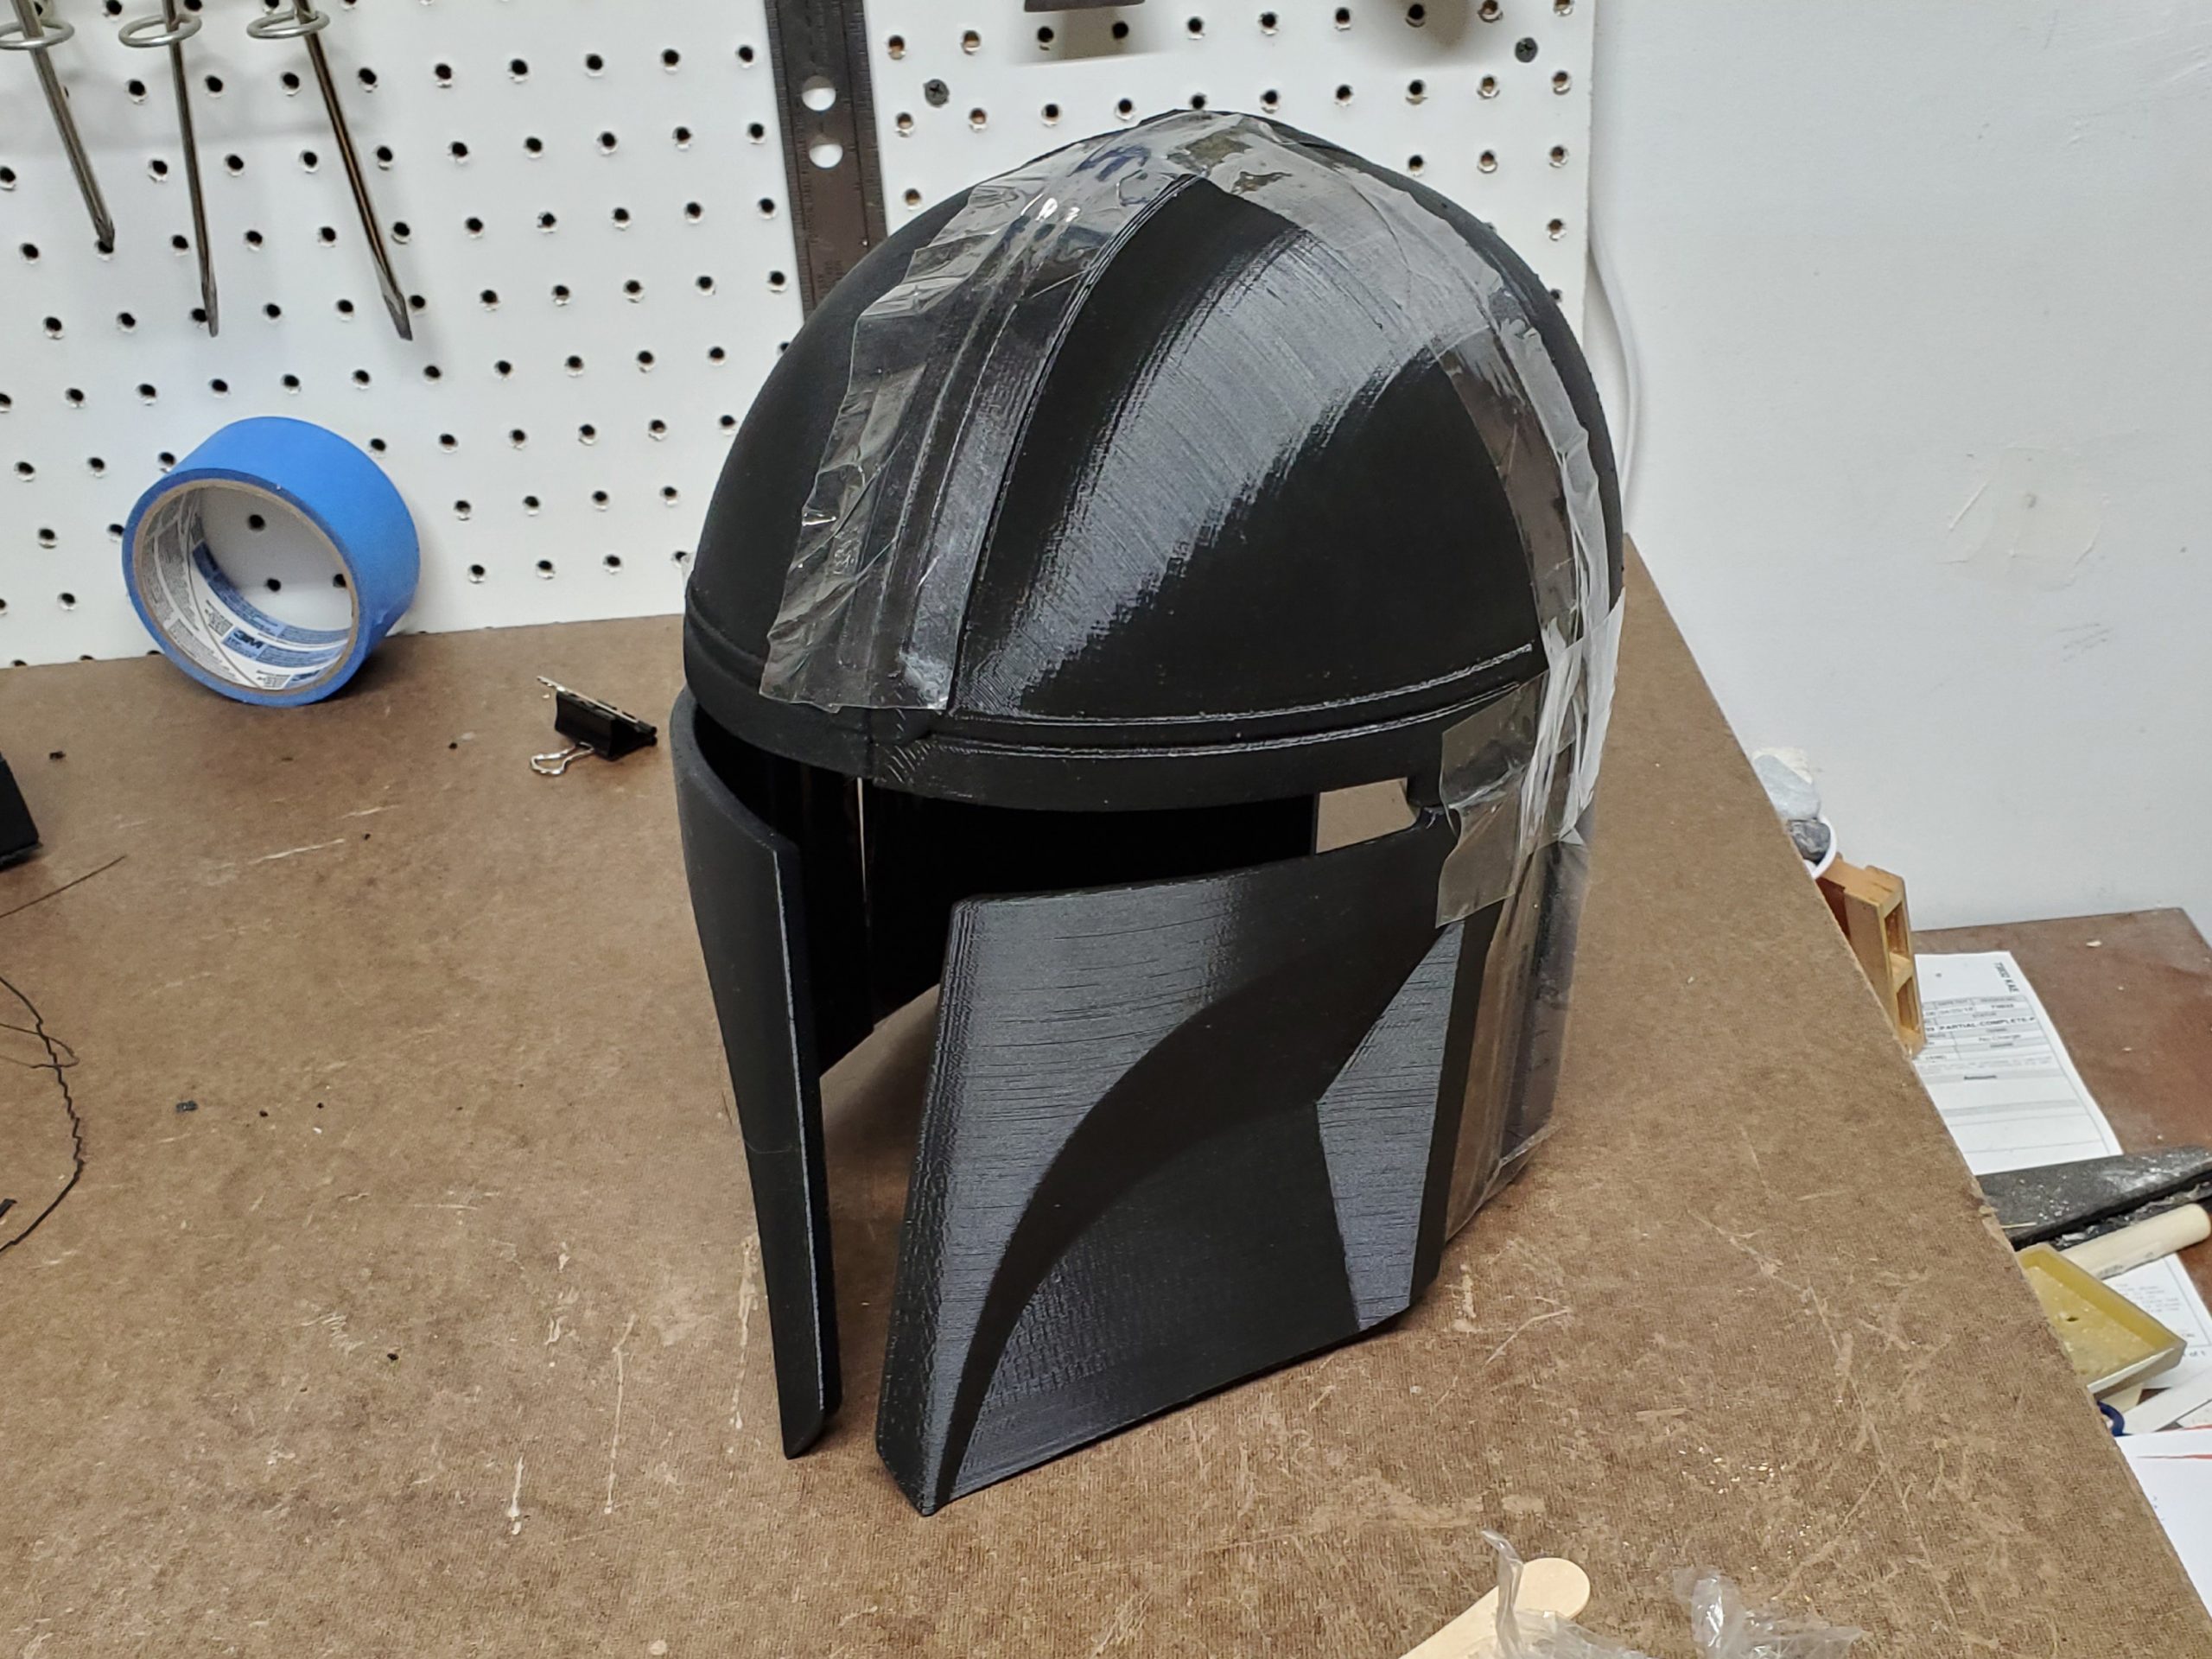
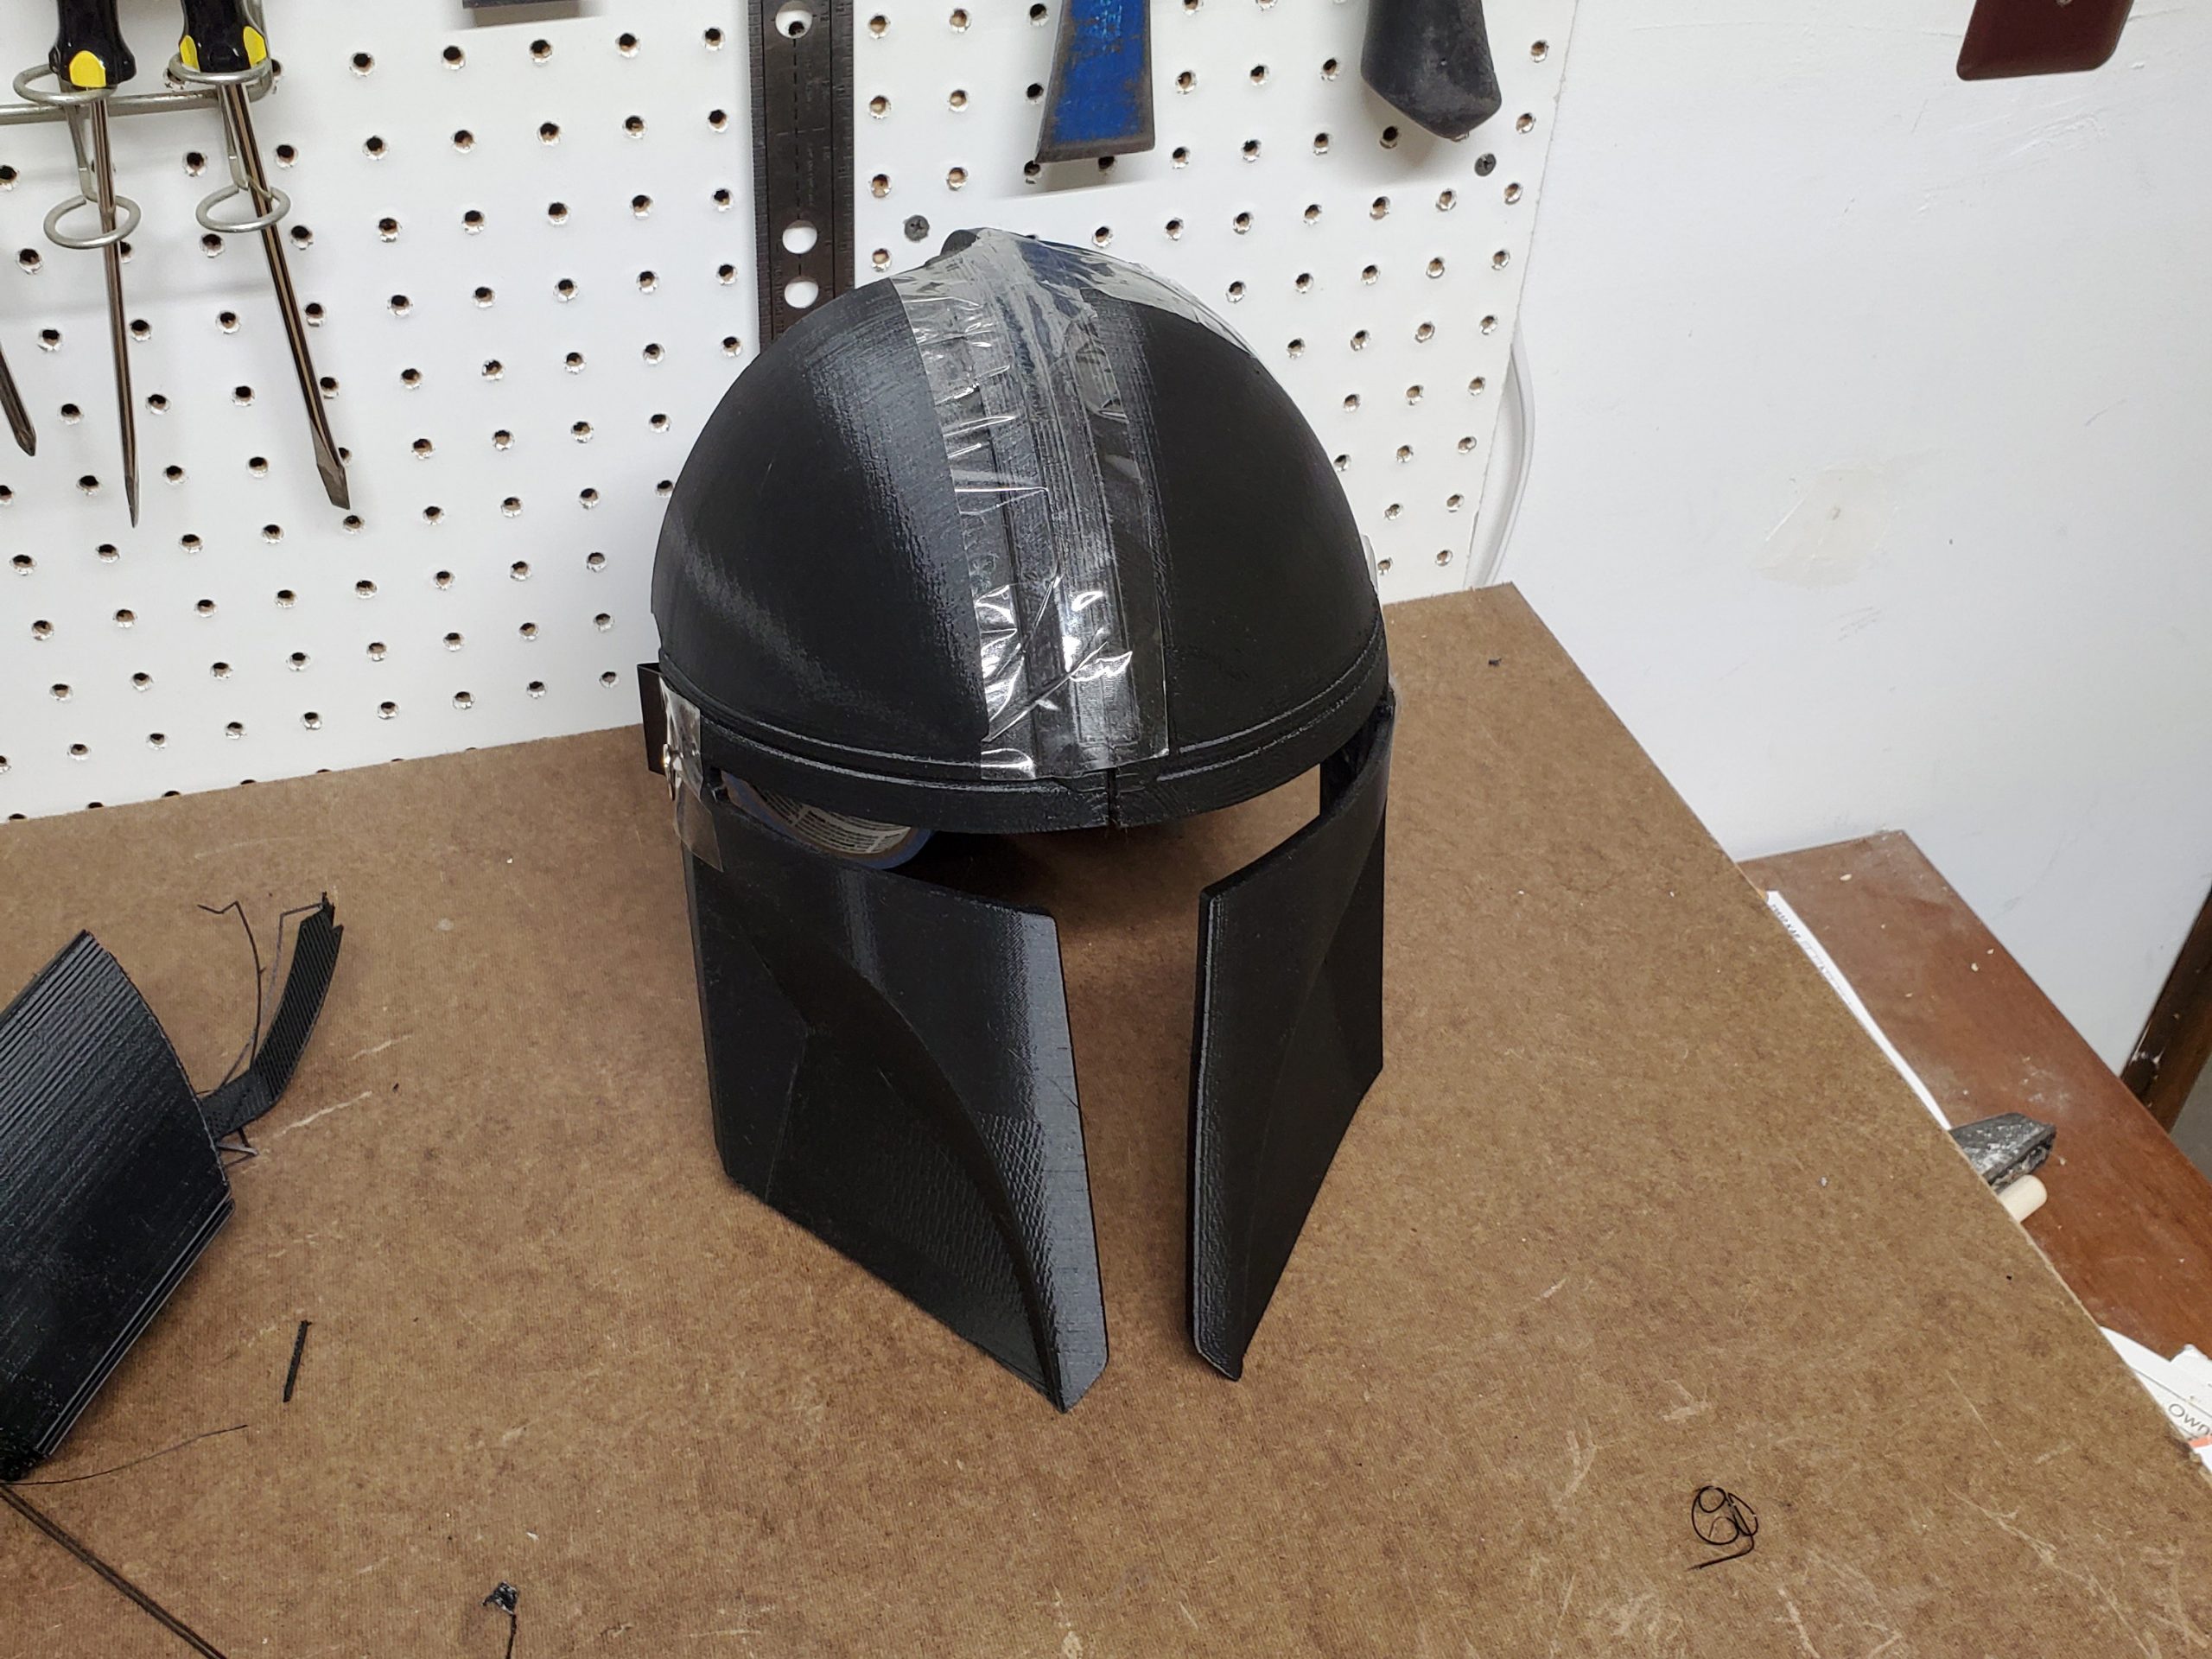
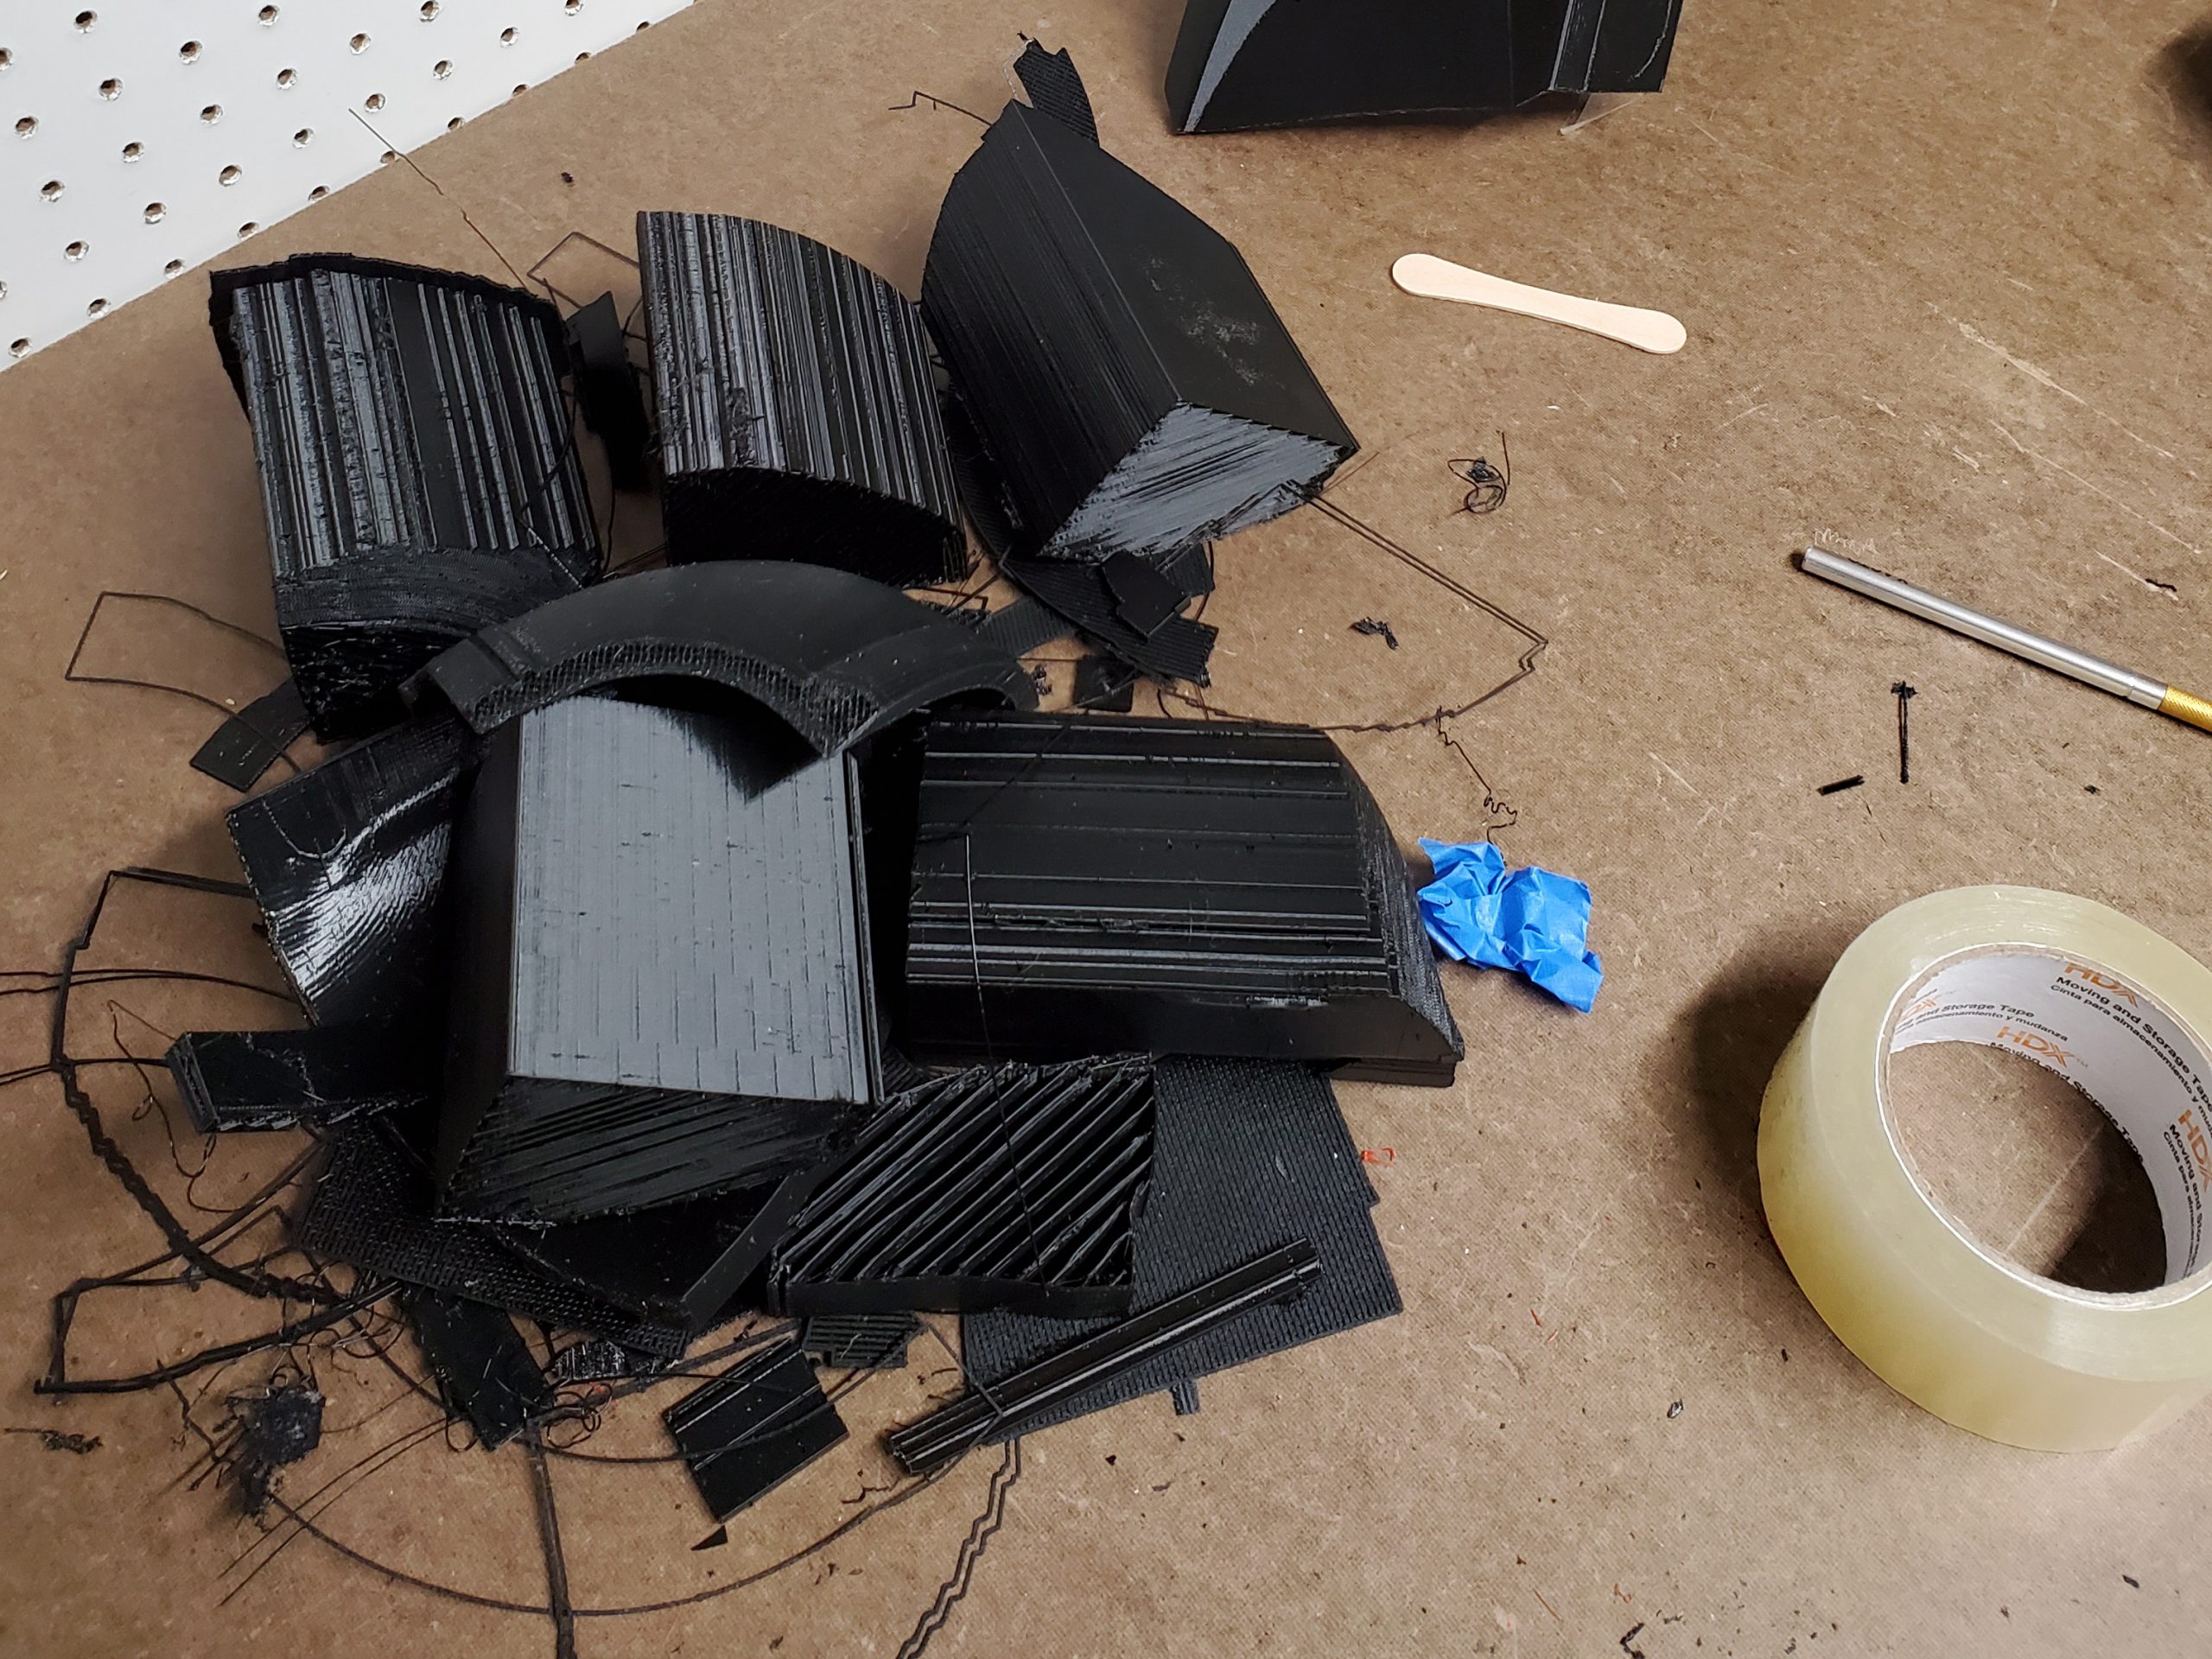
Here is where we are at. These are the 8 main pieces of the helmet ready to go. I still have to print the back and ear details, but those are relatively small and can be done while I am working on the main piece. I taped everything together temporarily with packing tape just to make sure all the angles were square and everything fit together reasonably well… Yes I did put it on my head…
At this point I feel like I have made some good progress, but I know there is a lot more ahead of me. I have no idea how many parts this project is going to span, but as I post additional parts I will update this page with links to the new sections.
Thanks for looking!
Other parts of this project
► The Mandalorian Helmet Part 2: Assembly
► The Mandalorian Helmet Part 3: Priming
► The Mandalorian Helmet Part 4: Painting
► The Mandalorian Helmet Part 5: Final


