
Tomenosuke Blade Runner Blaster Part 3: Final

Here is the last part of my Tomenosuke Blade Runner Blaster build. It is finally time to assemble all the pieces. I must say, this went a lot faster than I thought it would. I had planned on making this my big quarantine project, but it took me like 5 days from start to finish. Not that I am disappointed, but I thought it would have been more.

The first thing I needed to do before assembly was some light weathering work. I took some steel wool and softened the edges of the grip frame that I painted to show signs of wear. This part will be visible through the transparent orange grips and will add a nice touch of realism.

I did not take too many pictures of the assembly process. It was super fun to assemble, like the world’s best model kit, but was ultimately uninteresting in picture form for an audience. This is one of the steps, the cylinder release. I took this picture just to show the scale of some of the tiny pieces I had to assemble.

Here are all the pieces required for the trigger mechanism. On both the real prop, and my reproduction, the second trigger is just a dummy trigger. On a real Steyr target rifle, this is called a “Double Set Trigger”. The rear trigger is used to set the front trigger to be a hair trigger. On the PKD Blaster, this is just “rule of cool”.

Here is the blaster about 50% of the way assembled. The other weathering I had to do along the way was to the screws. They were all black oxide steel screws, and were jet black. They looked really out of place being brand new black screws with everything else being distressed metal. To fix this I used a combination of a metal file, and some sandpaper to scuff the edges of the screws to make the bare metal shine through. I need to go back and renaissance wax them to ensure they don’t rust over time.

The last step of assembly was the polish the grips. They were always transparent but had a slight semi gloss texture to them. I polished them up with some Brasso and a Cap Cod Cloth to give them a glass like surface.
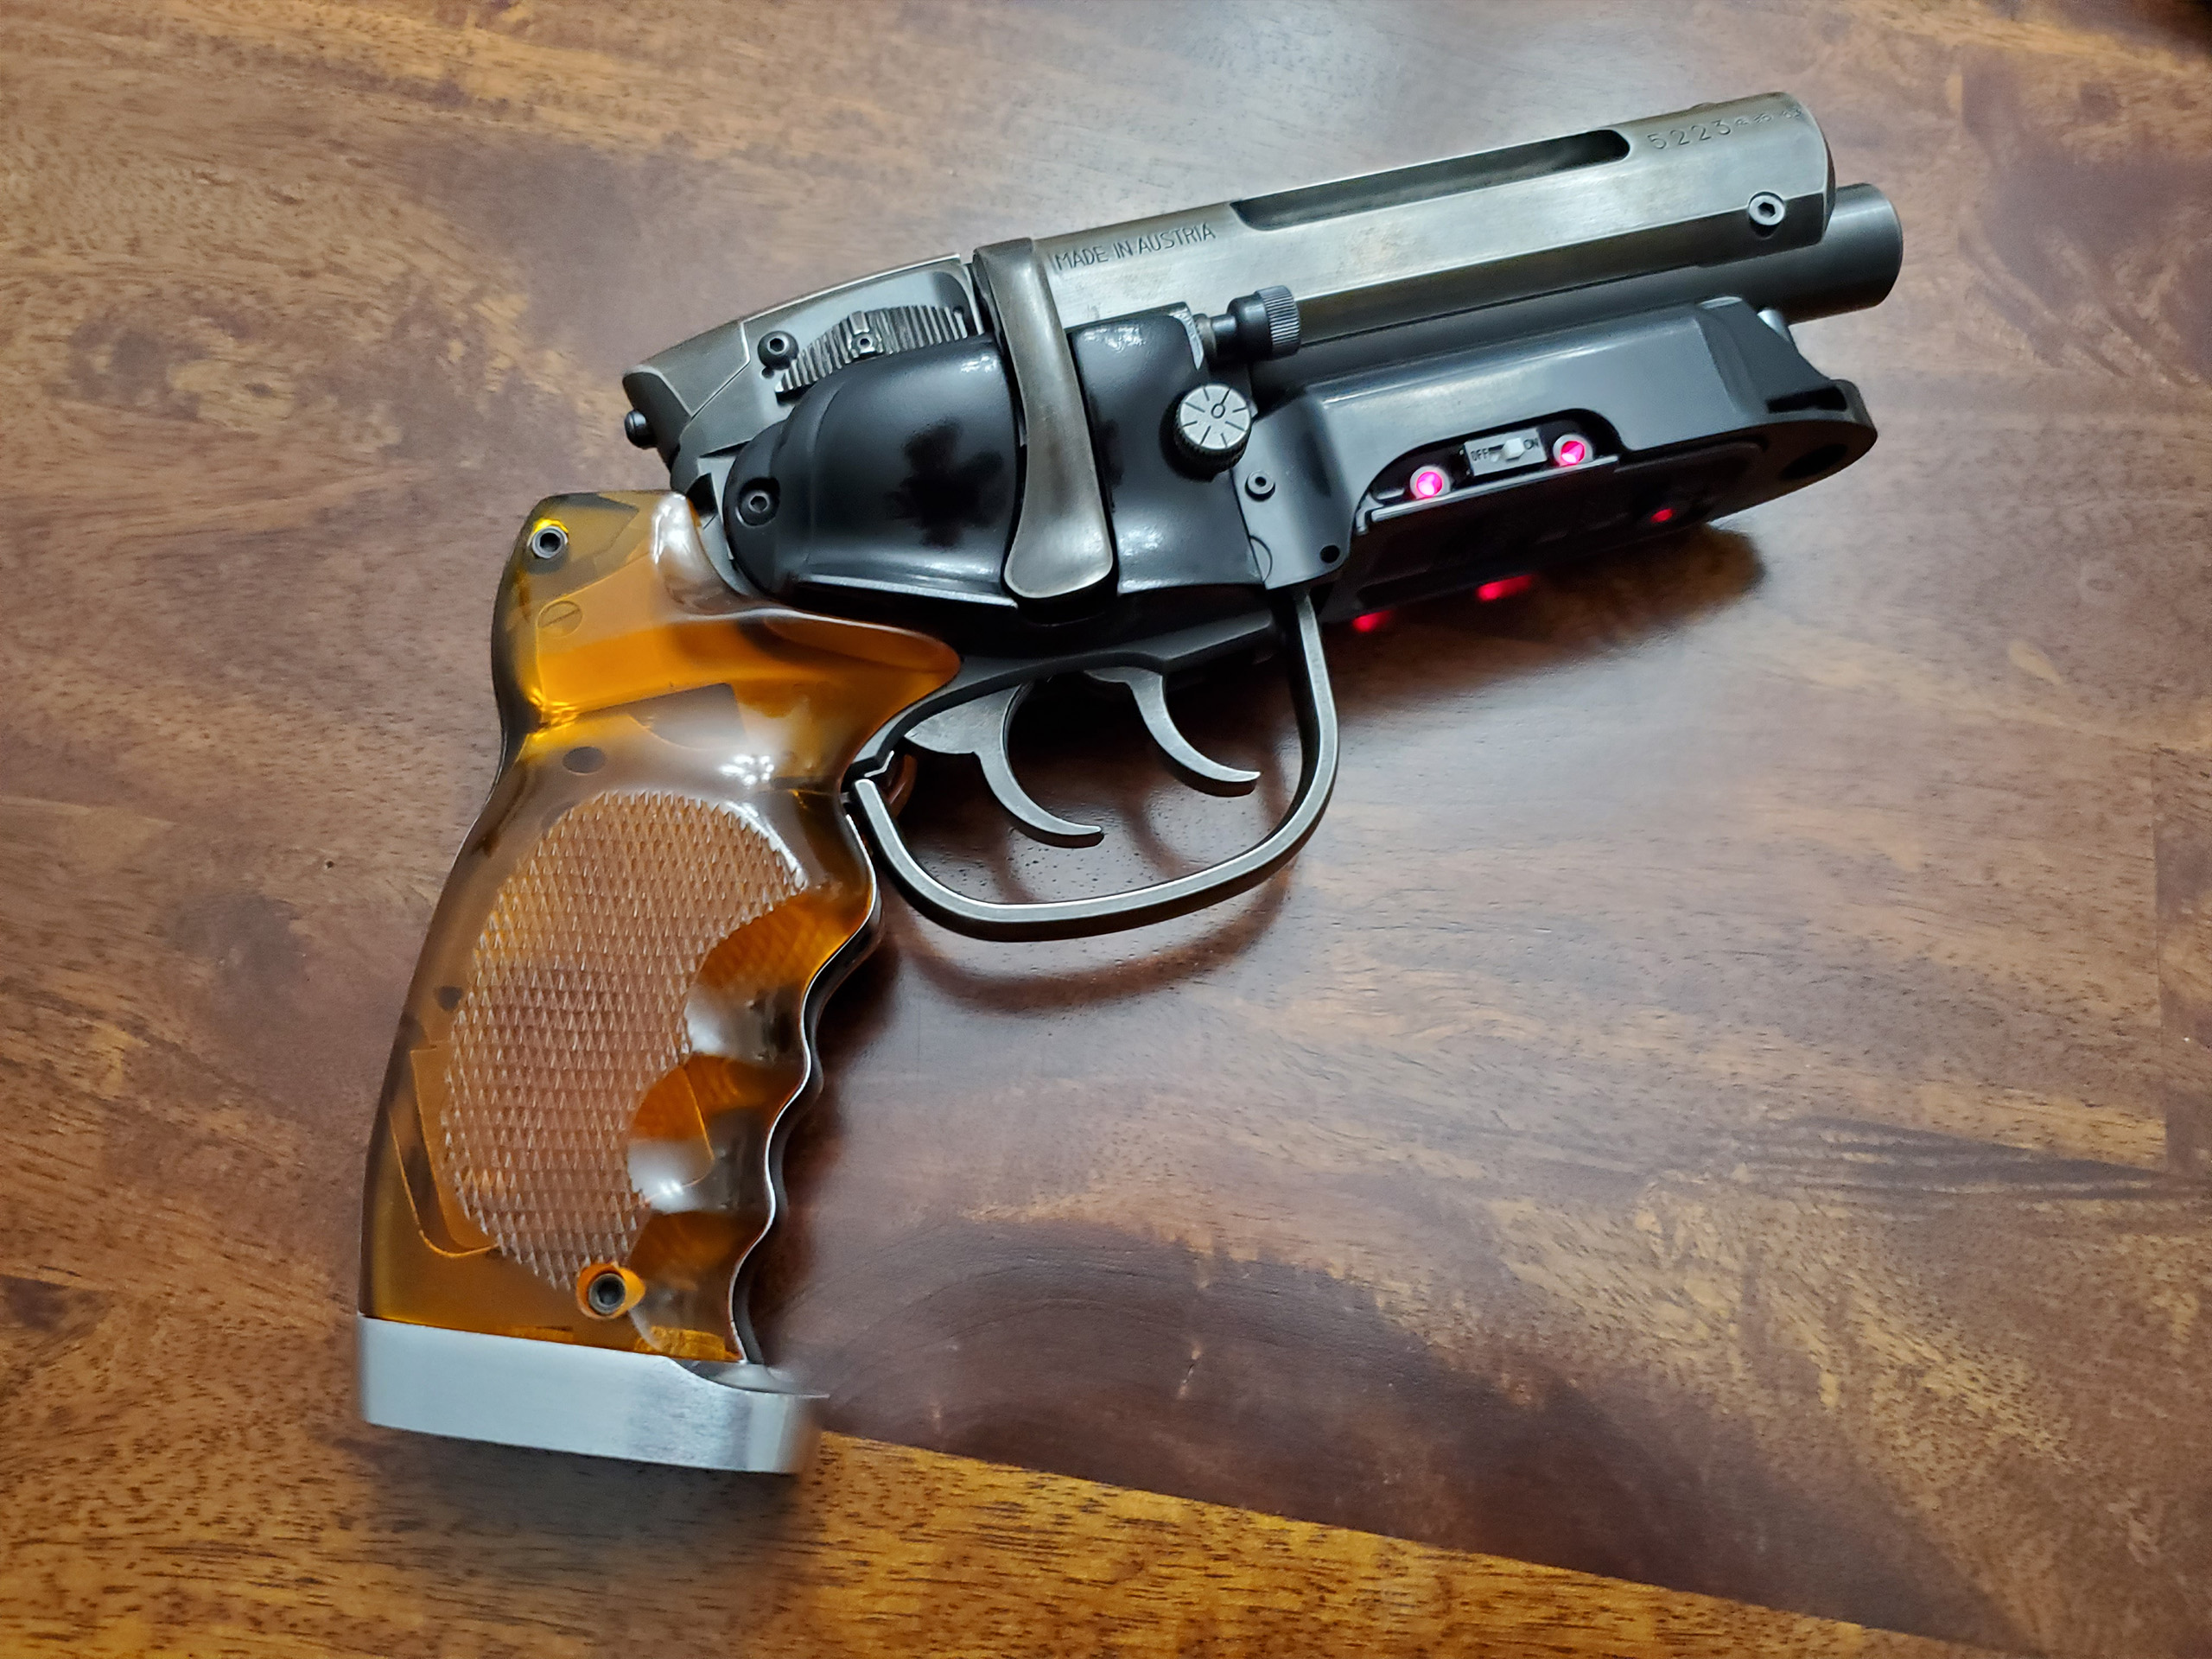

Here is the final assembly. One of these days I need to ask my wife to take some better glamour shots.
I hope you enjoyed the build. I am really pleased to have this finally done!
Thanks for looking!
Other parts of this project
◄ Tomenosuke Blade Runner Blaster Part 1: Cleanup
◄ Tomenosuke Blade Runner Blaster Part 2: Finishing


