
Drawer Style Spice Rack

In an effort to save space in our kitchen and organize the cabinet, I made pull drawer style spice rack out of oak. Above is a picture of the finished rack installed in our kitchen cabinet.
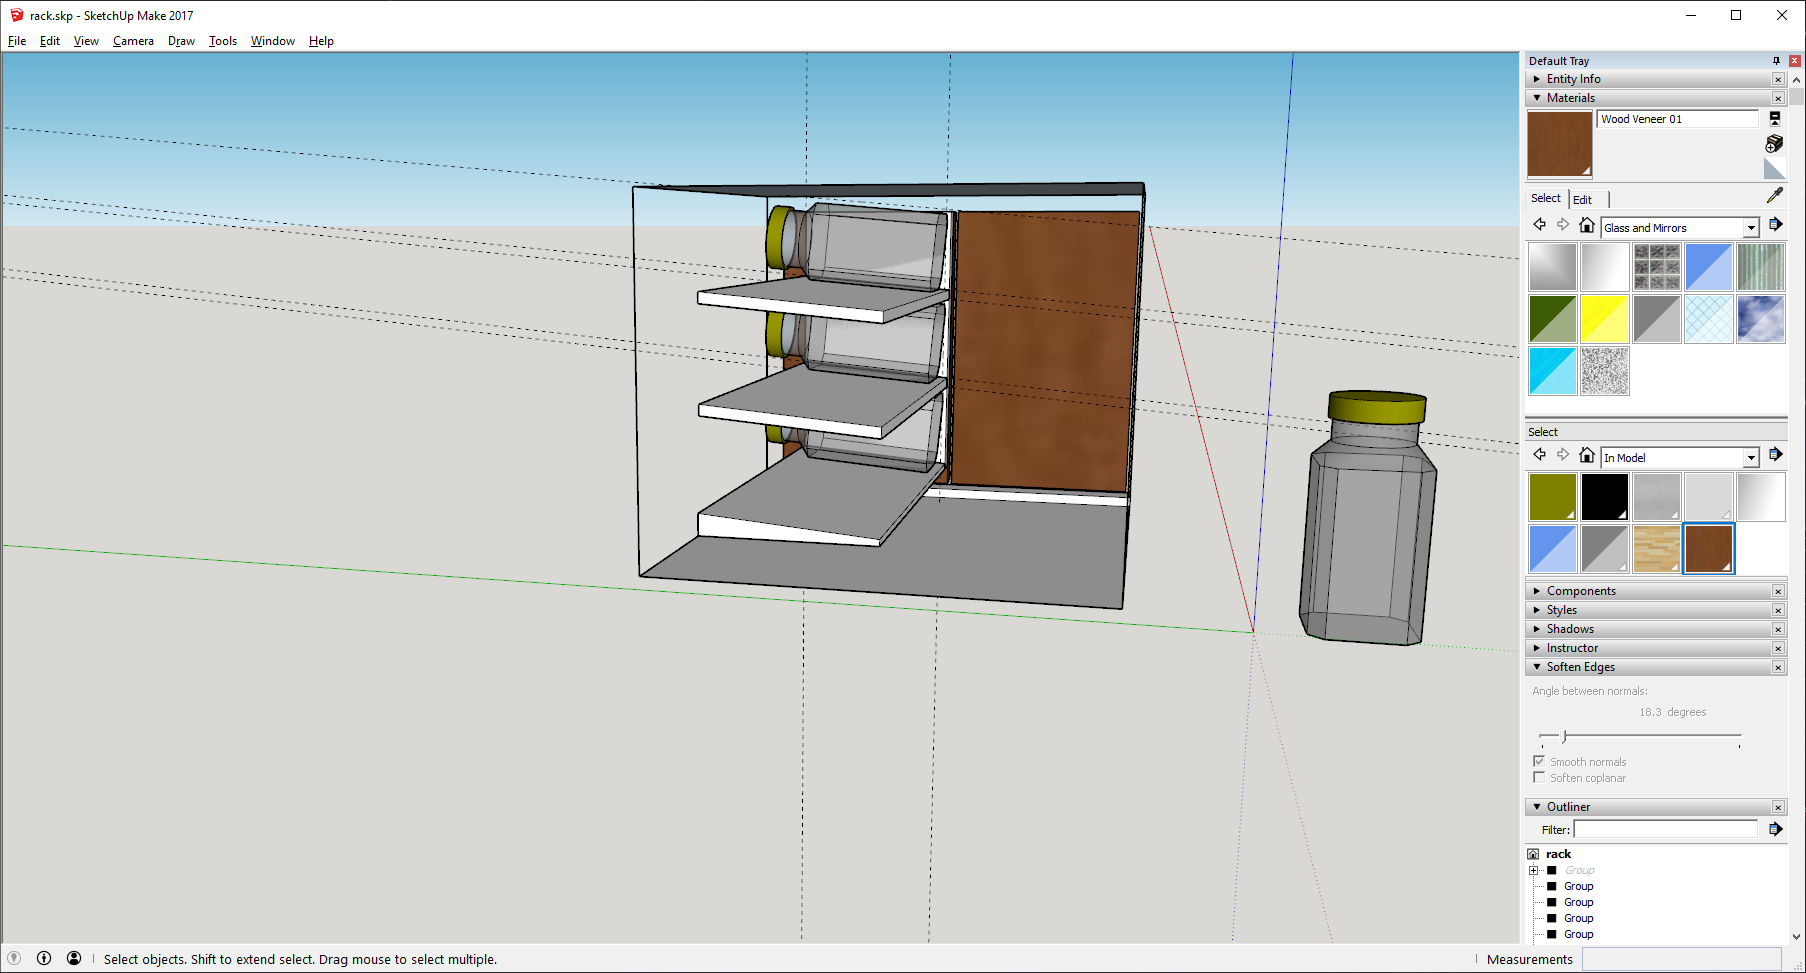
I started out by measuring the internal dimensions of the cabinet so I knew how much space I had to work with. Then I made a rough model of the rack in SketchUp. I started out with a 5° slope on the shelves. However, after adding in the base and draw slide hardware I was left with only about a 1/32″ clearance which I didn’t want to chance. I reduced the pitch to 3° which brought me closer to around 3/16″.

Next, I modeled in all the holes for the hardware. The spice bottles were going to have a 1/8″ steel rod as a backstop. I was also able to plot out all the holes for the hardware that would hold in the shelves.
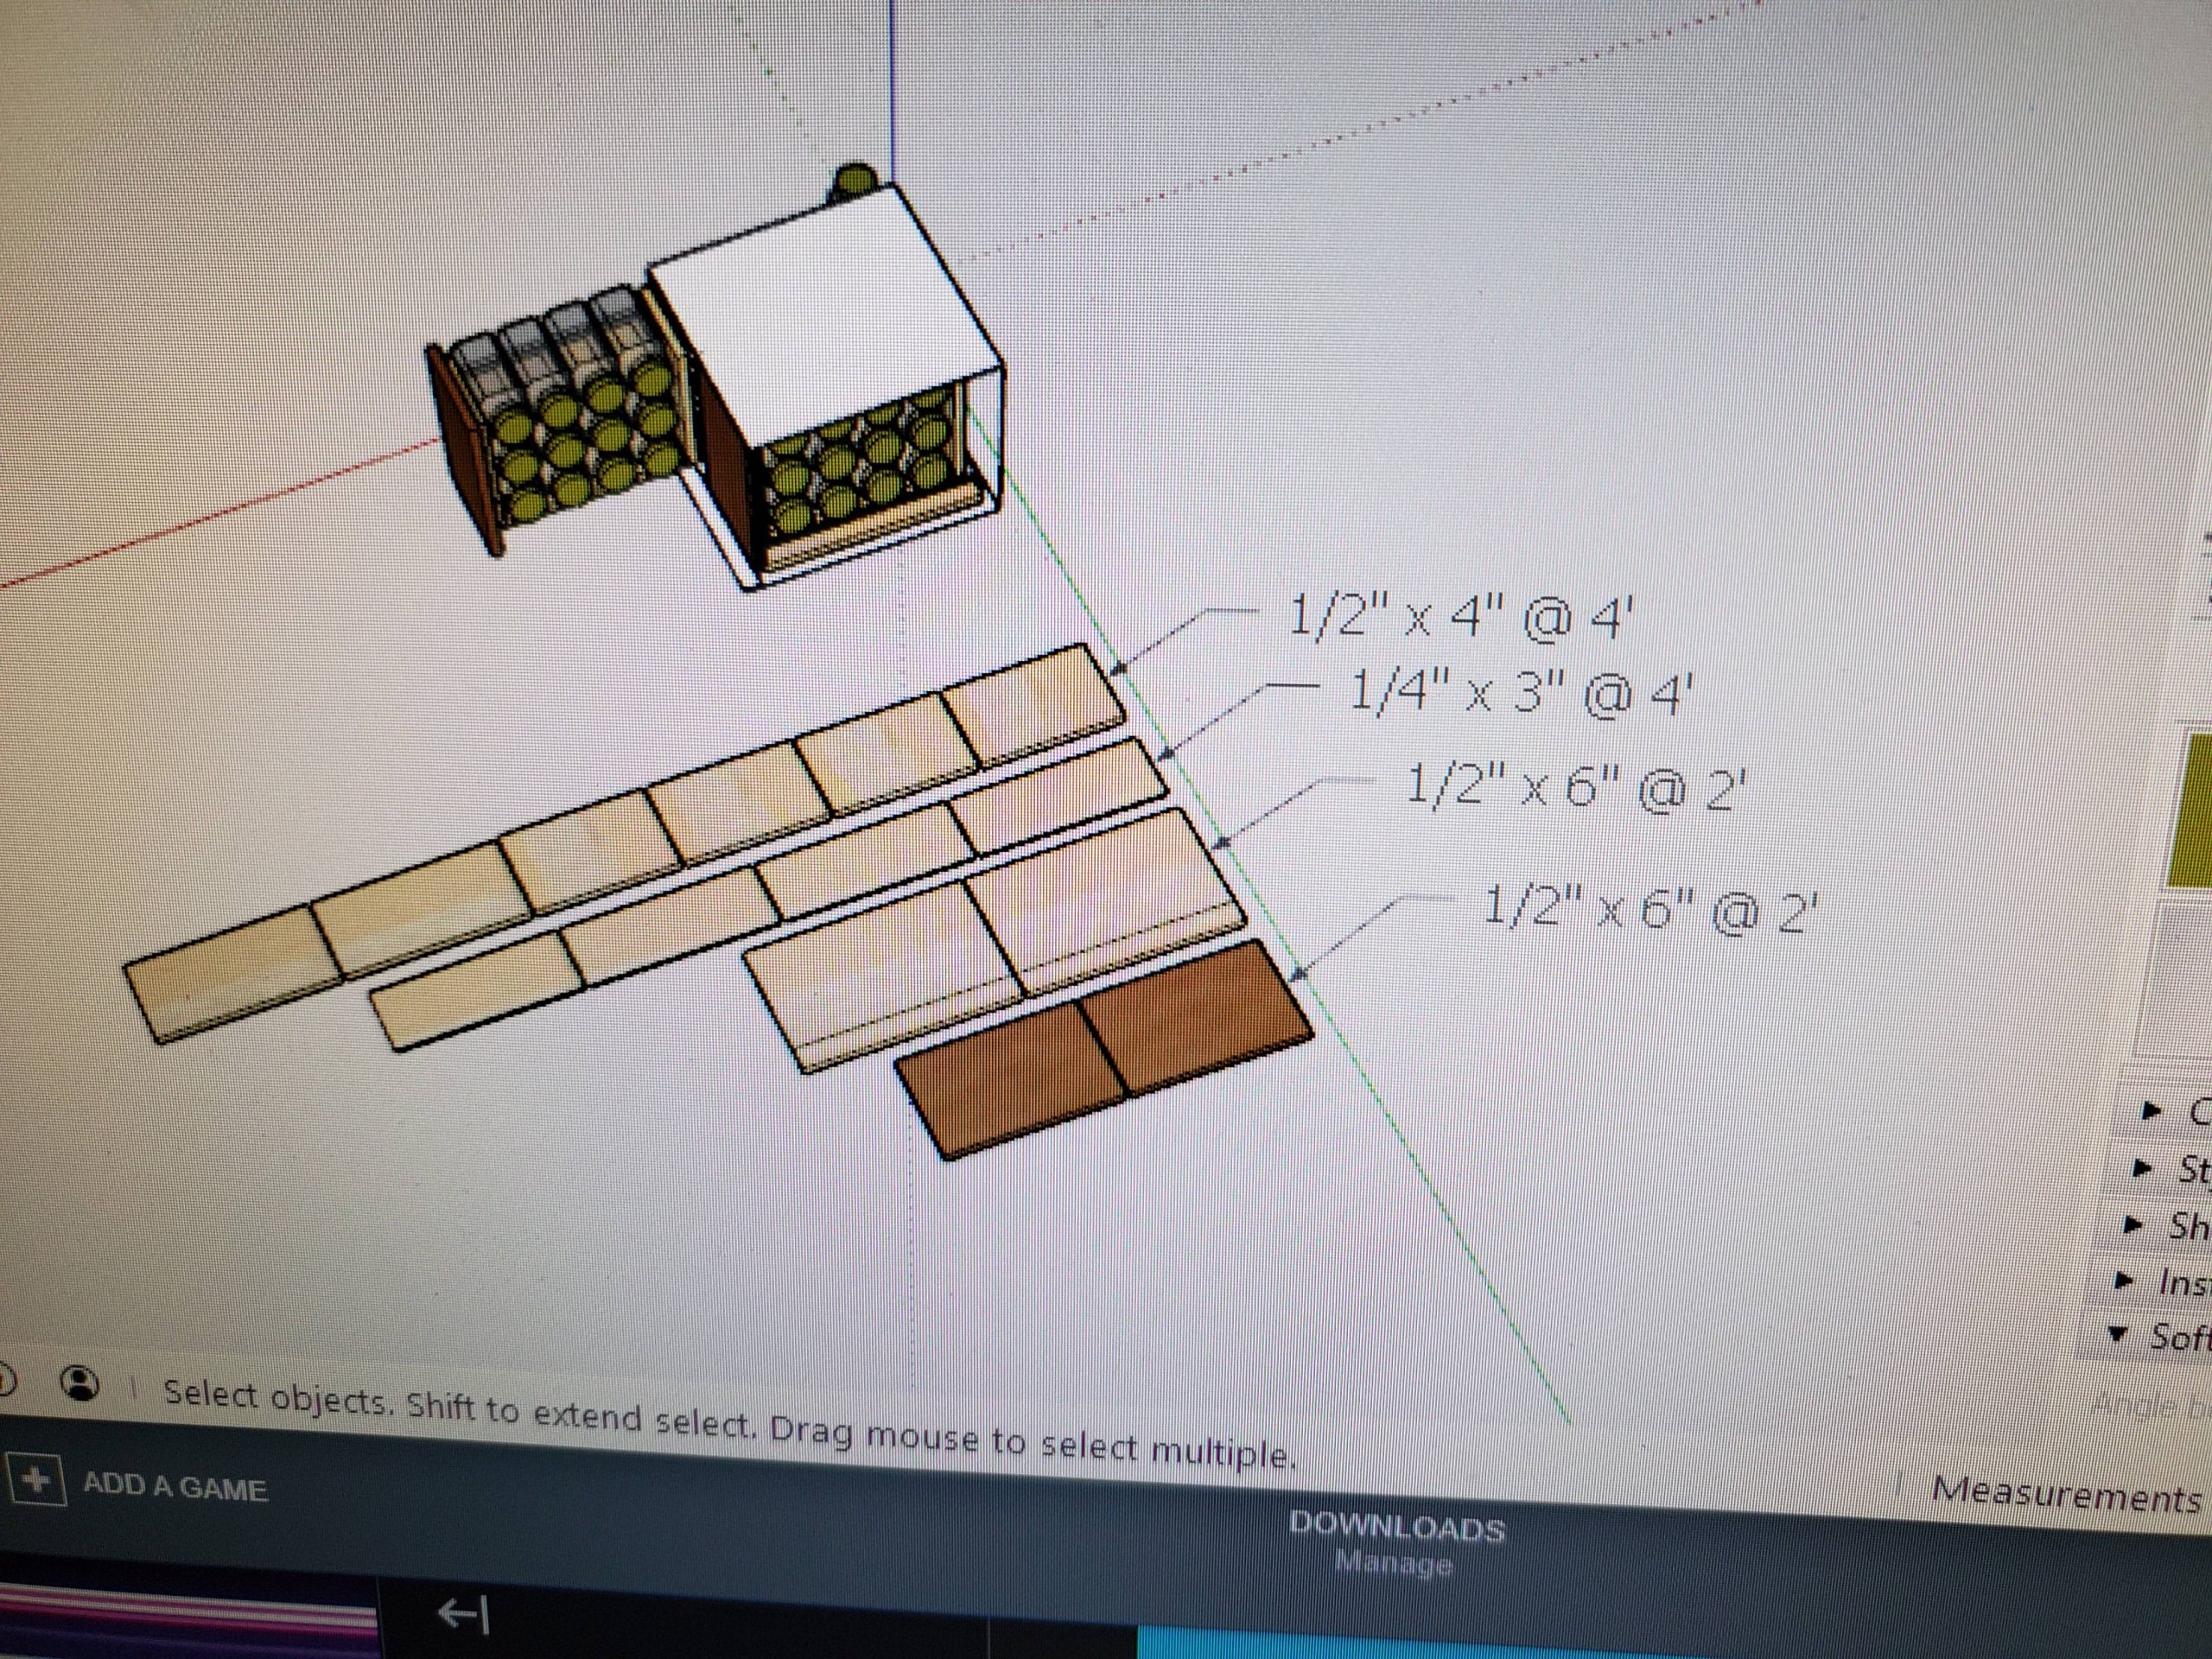
Last, I tore the model apart to make myself a cut list. Then, I snapped a quick picture of the screen, and headed out to purchase all the wood I needed.
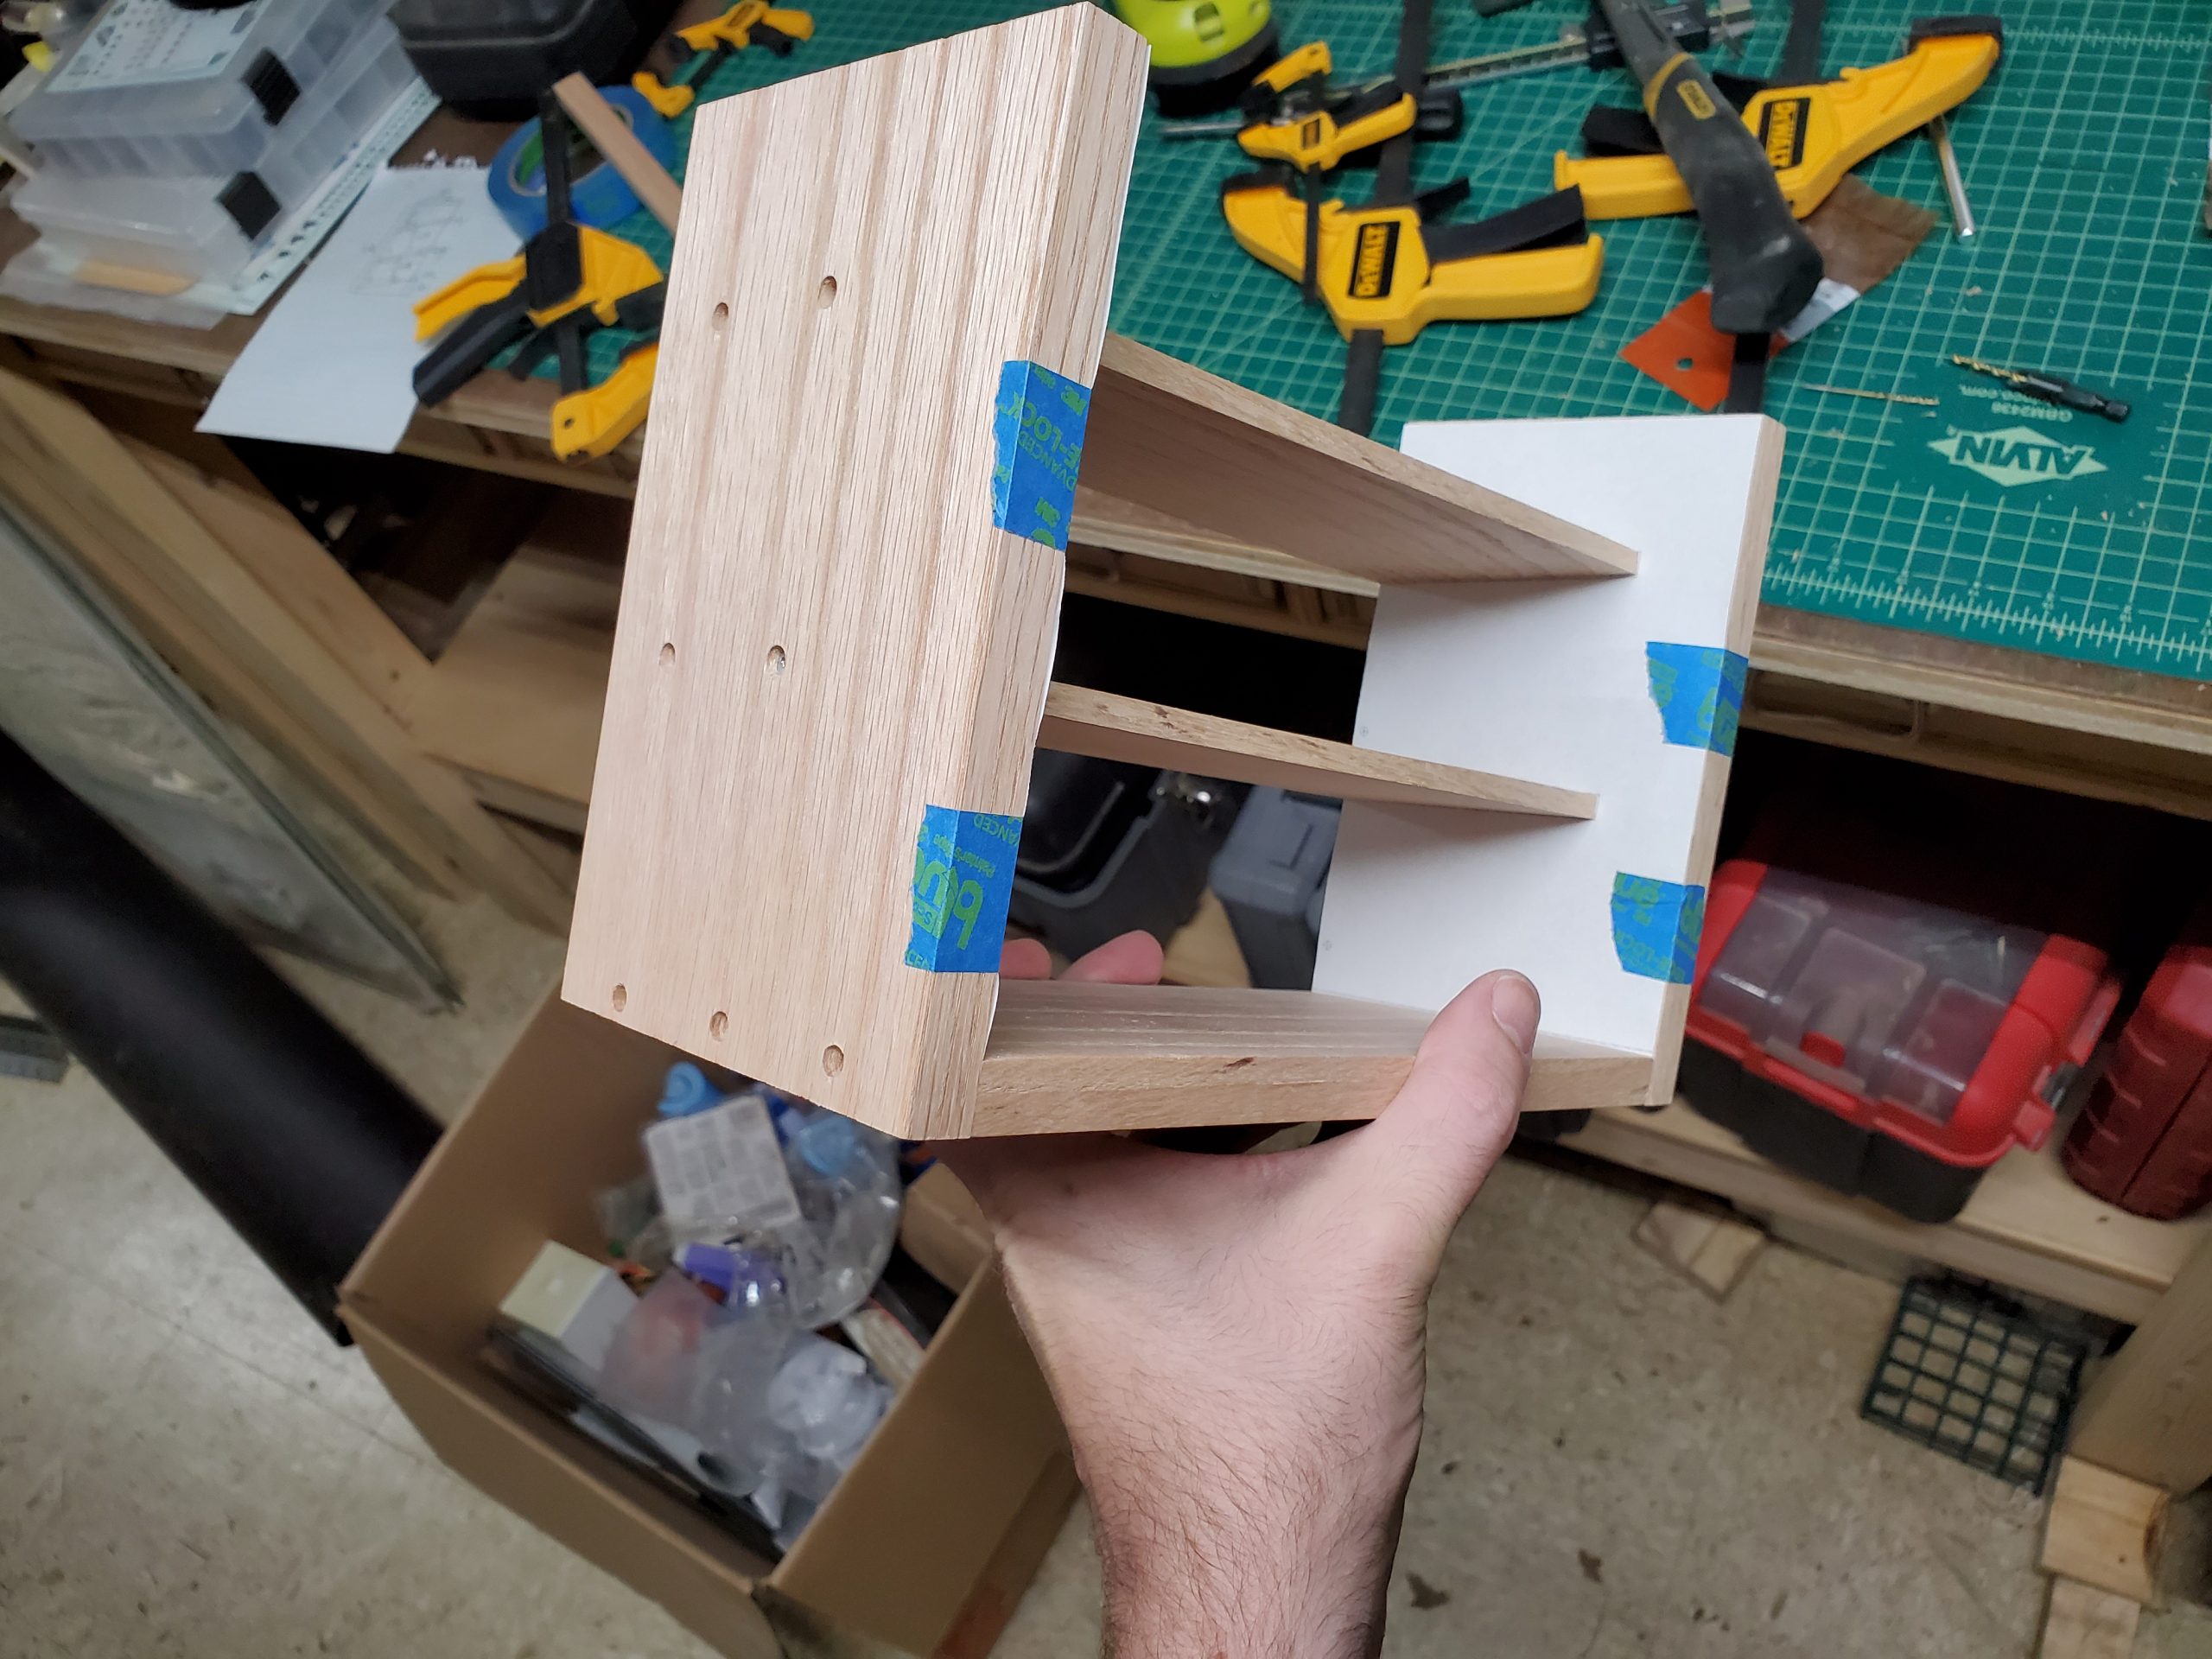
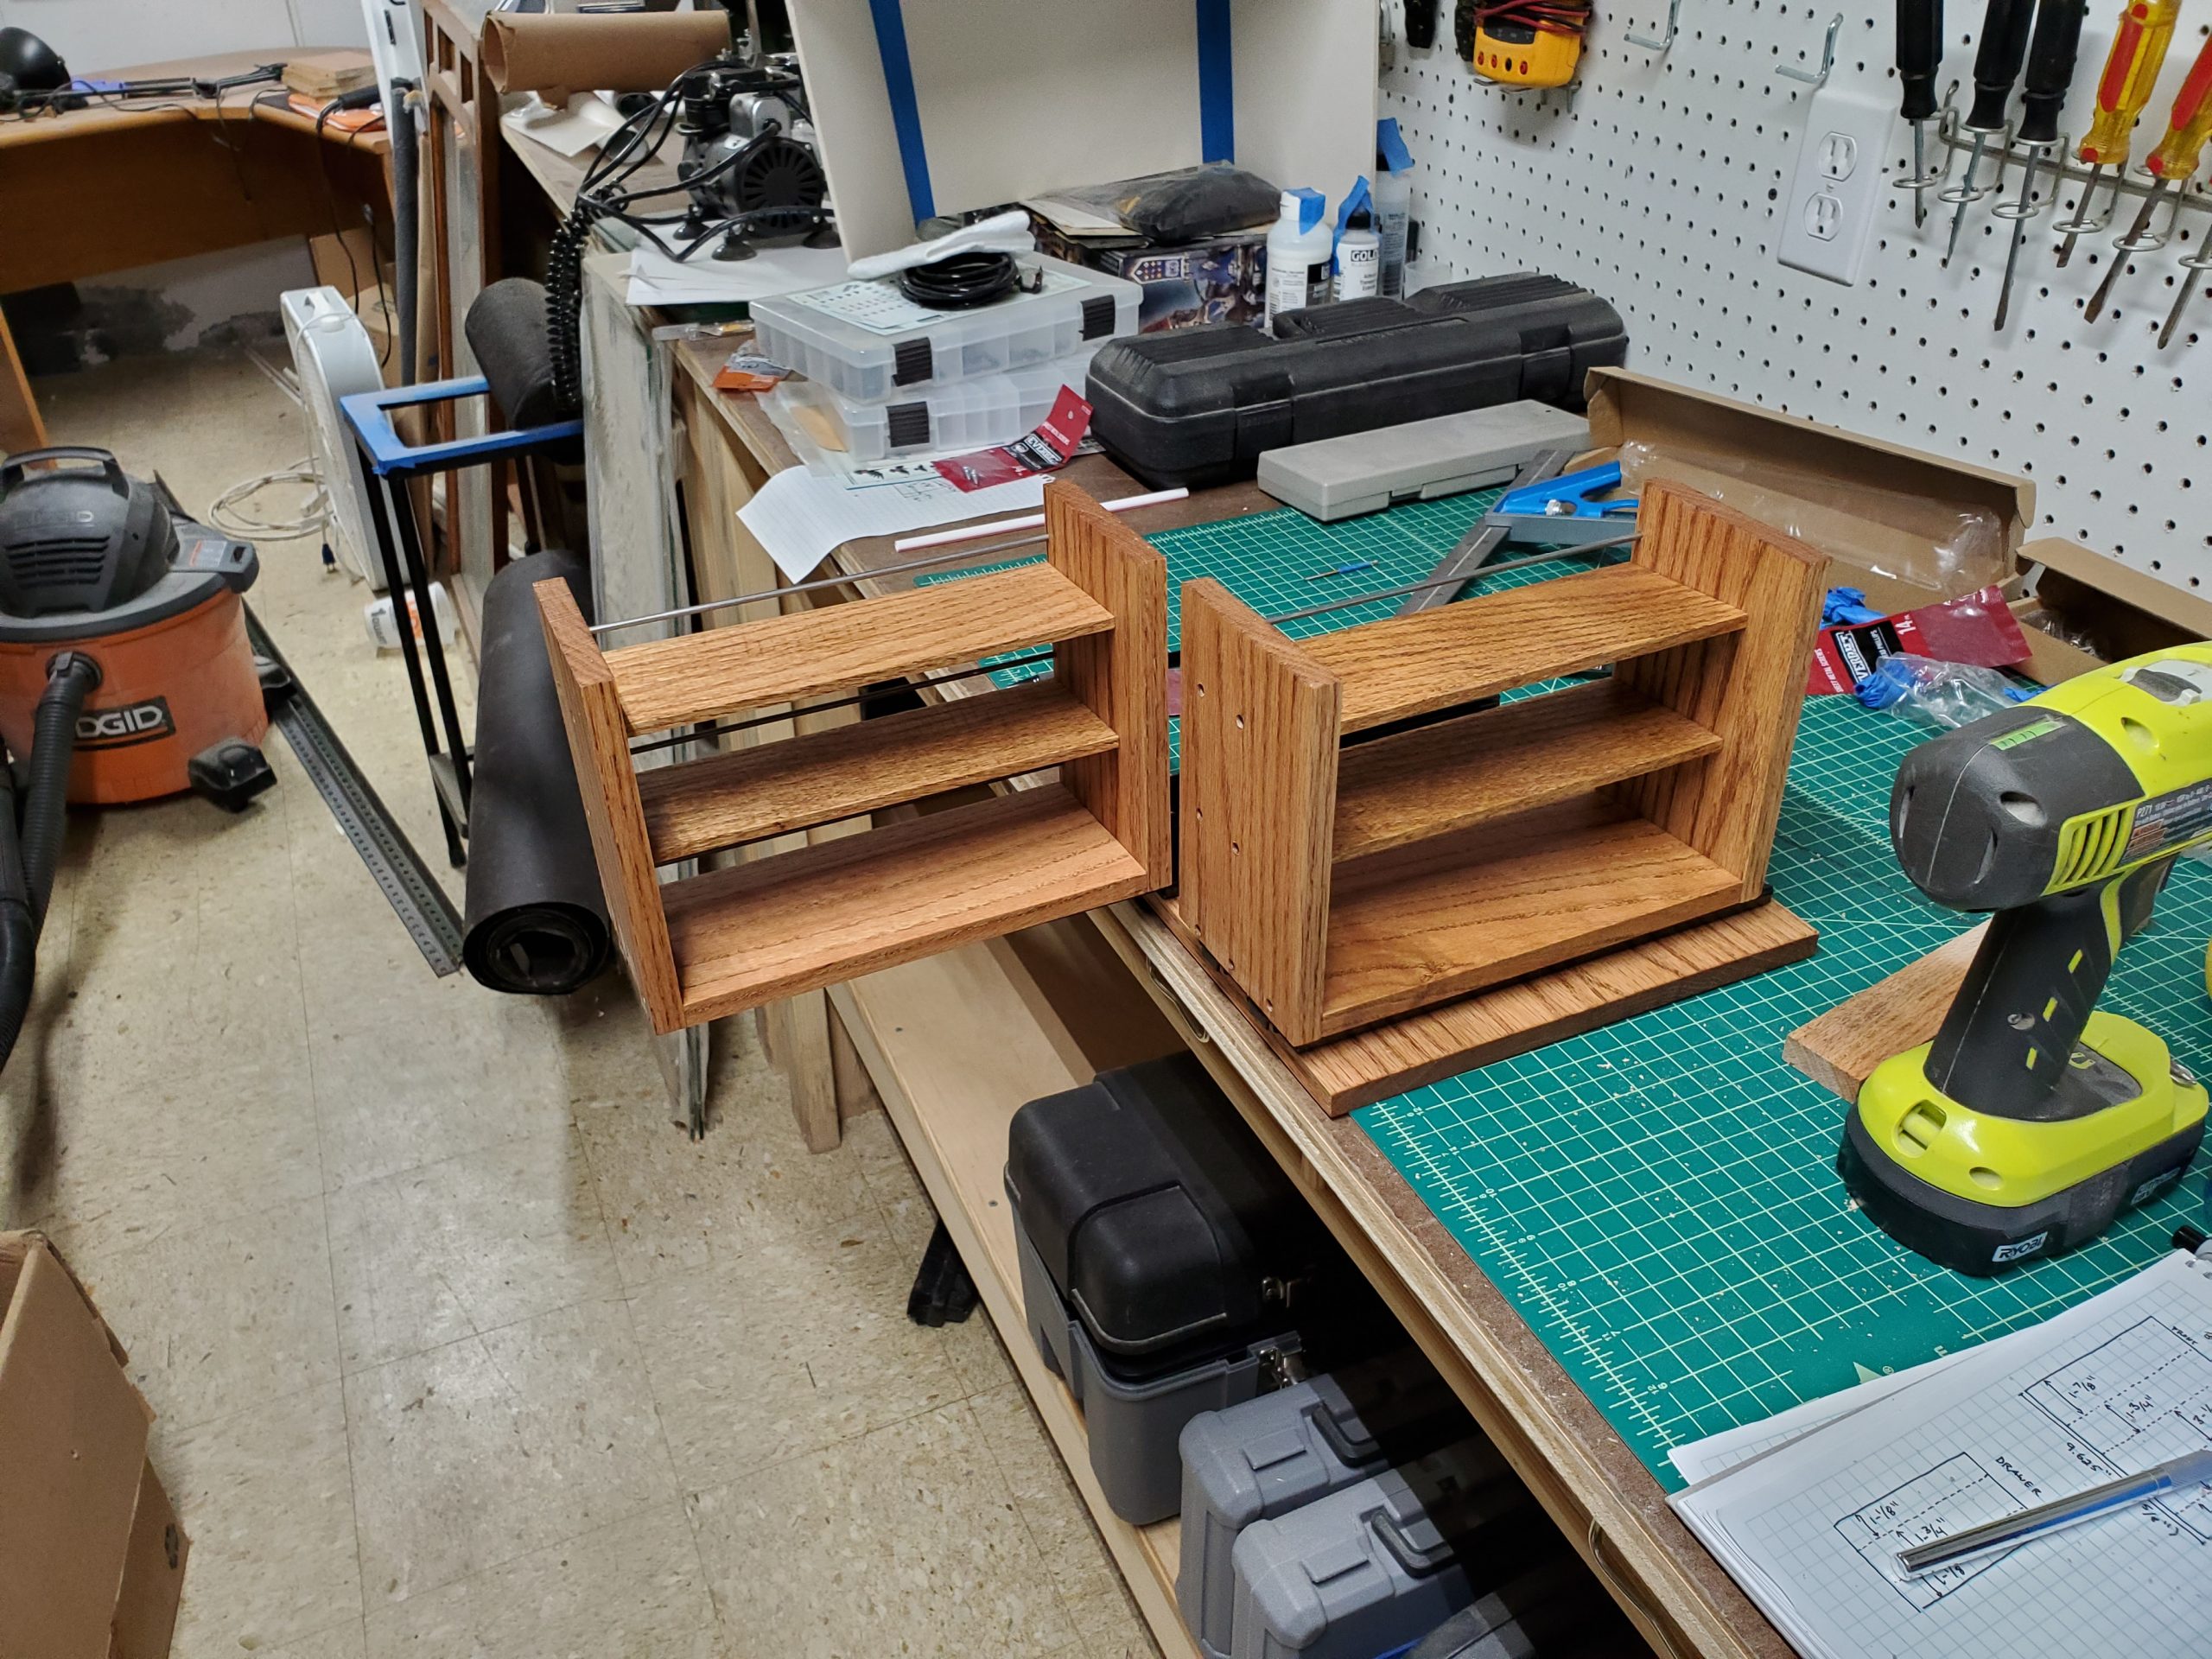
Here is the first rack completed. The white paper that is taped on is a drill template. I used that on the drill press to ensure accurate hole placement. I also used the template to line up the shelves with their 3° pitch.

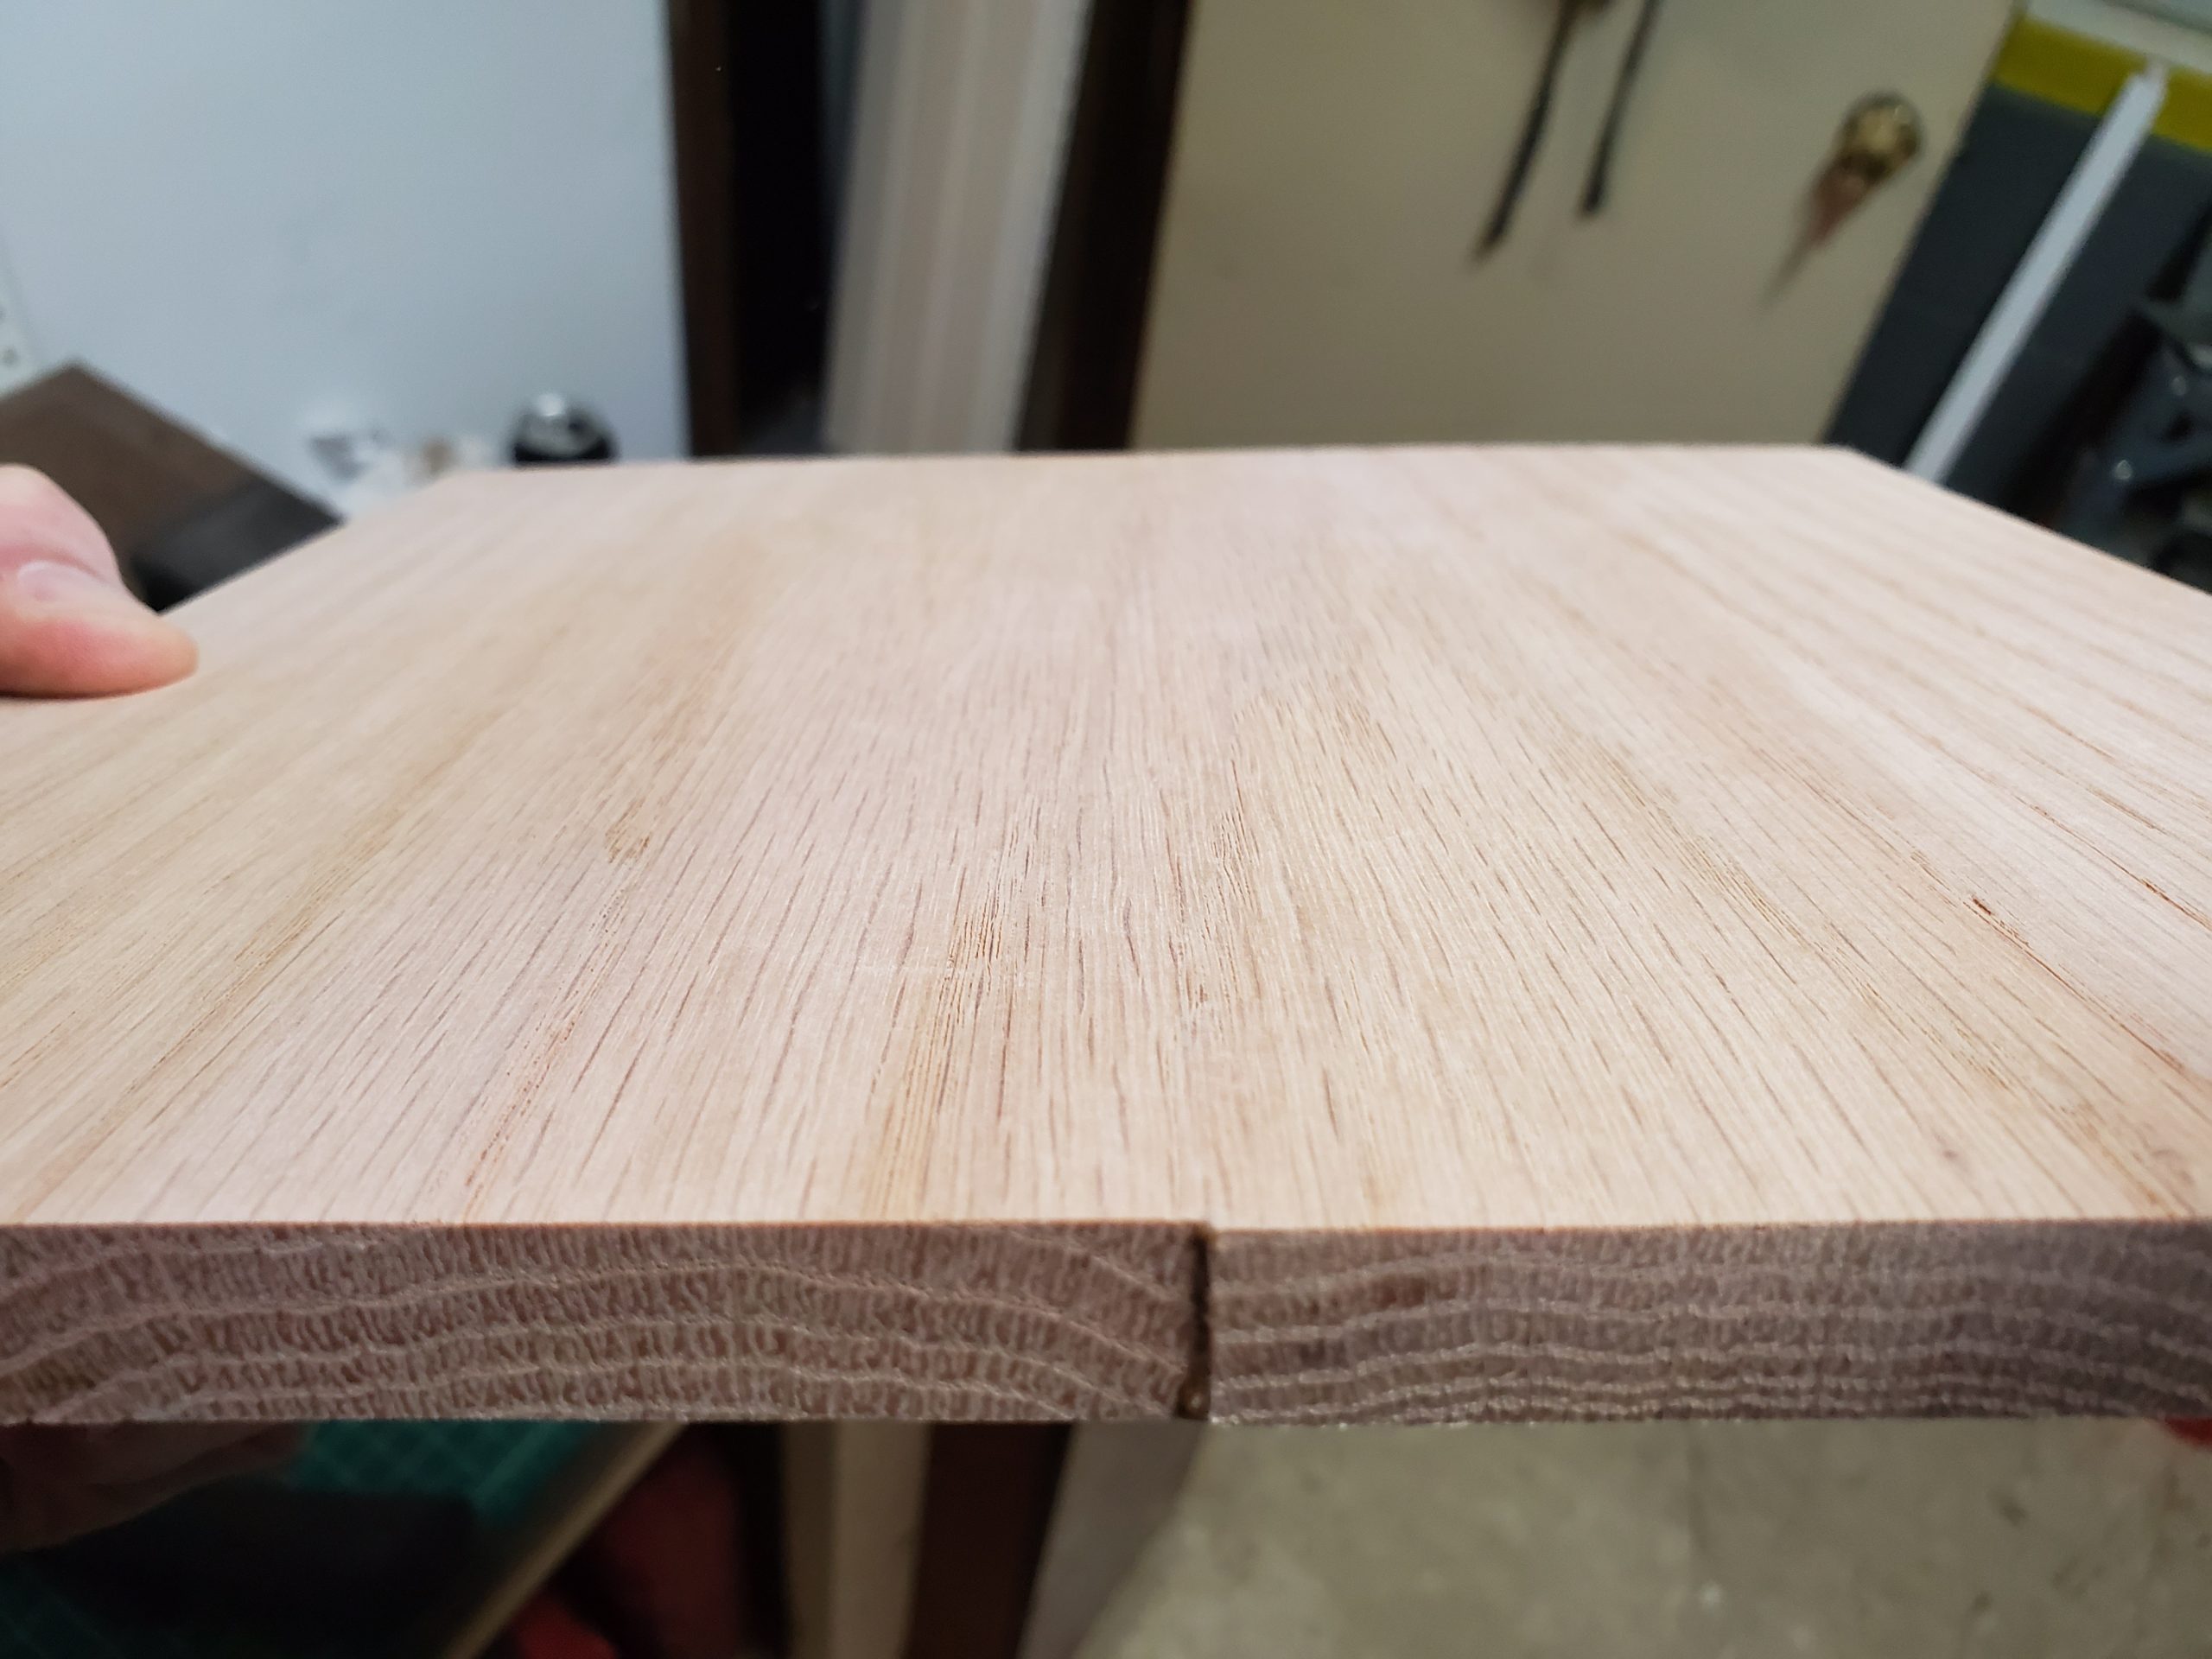
This is just a picture of a glue up I did. I needed a 10″ wide piece for the base but was having a real hard time finding an oak board >10″ x 1/2″. Instead, I just glued together two 5″ board and trimmed the completed glue up to size.
I was really proud of these. It even looks like the grain matches.

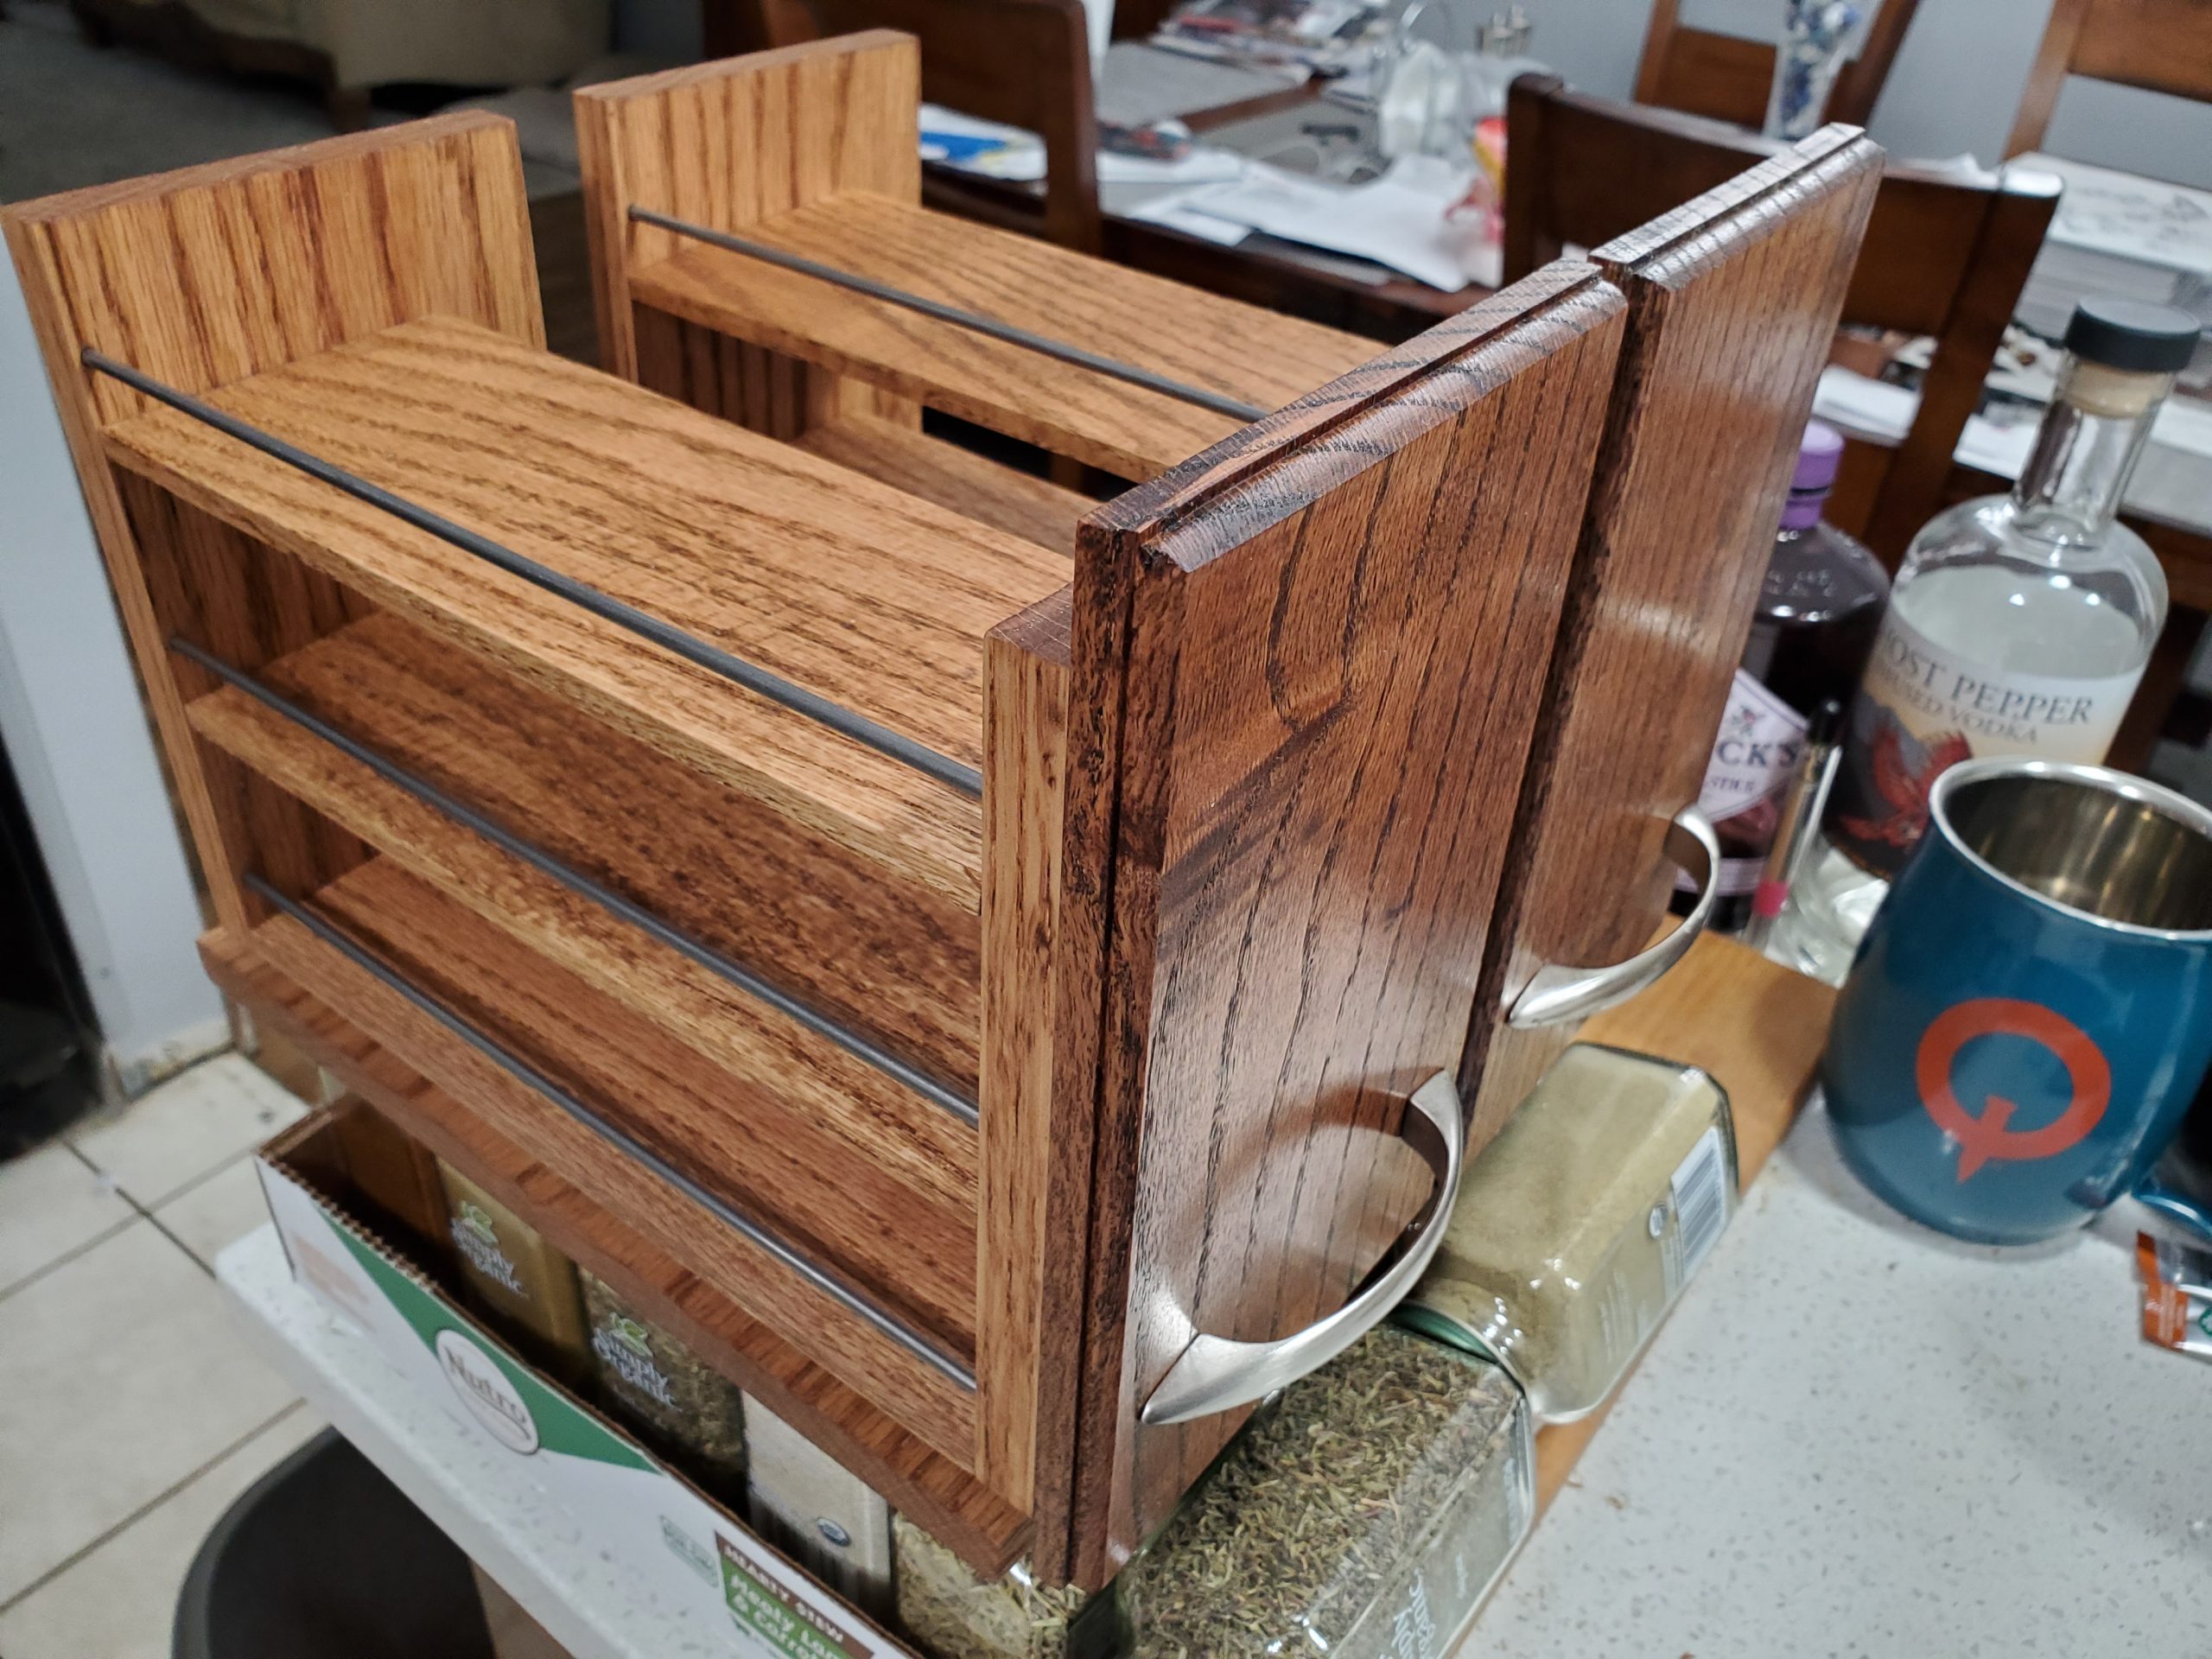
I finished the racks with 5 applications of Medium Walnut Danish Oil. The last application was made with 600 grit wet sand paper. I really like the color the danish oil made the wood. It brought out the natural red of the oak as well as tinting the wood a little warm and brown. It really matches the frames of my kitchen cabinets.
Here, I attached the racks to their drawer pulls and the base I made. I used 10″ full extension drawer pulls. They are designed to be mounted on the side of drawers. However, I used two for each rack for a total of four pulls. And, I used ones that were 250 lb. rated. I did this to ensure that even though I was mounding them with the load on the wrong axis, they should be able to take the stress. They feel rock solid with no axial play.

I went to the store and bought all the spice the rack was designed to hold. 24 in total. Not pictured are two we already had.
I didn’t add any pictures of the steps for making the spice rack drawer faces. I ran the edges over with a router to give them a nice decorative edge. Then I stained them to match the kitchen cabinets. I couldn’t find a single stain that matched perfectly, so I made my own. I used 50/50 Minwax Red Oak and Dark Walnut. This made a real rich red brown which I think match the cabinets perfectly. Then I gave them I nice gloss clear coat. The handles are the same hardware as the ones in the kitchen already. We had extras from when we removed the cabinets over the island when we bought the house.

Here is the empty rack installed in its final home as a test fit.

One drawer out.
Both drawers out.
Thanks for looking!


